

Struggling to remove a stubborn oil filter without a wrench? This guide shows you safe, effective methods using everyday tools like belts, rubber bands, or pliers—perfect for emergencies or DIY oil changes.
Key Takeaways
- Use a belt or strap: Wrap a strong belt around the filter and pull to create leverage and grip.
- Rubber band trick: Layer rubber bands over the filter to improve grip when turning by hand.
- Pliers or channel locks: Carefully clamp the filter body, avoiding damage to the housing or engine.
- Heat can help: Warm the engine slightly to loosen metal expansion and break seal adhesion.
- Safety first: Always wear gloves and eye protection to prevent burns and injury from hot oil.
- Prevent future issues: Install filters by hand and avoid over-tightening to make removal easier next time.
- Know when to stop: If the filter won’t budge, seek professional help to avoid engine damage.
Quick Answers to Common Questions
Can I use a screwdriver to remove an oil filter?
Yes, but only as a last resort. Carefully tap a screwdriver through the side of the filter and use it as a lever. Be cautious—this can damage the filter and should only be done if other methods fail.
Is it safe to reuse an oil filter?
No. Oil filters are designed for single use. Reusing one can lead to poor filtration, engine damage, and oil leaks.
How tight should an oil filter be?
Hand-tight plus a quarter-turn is enough. Over-tightening makes removal difficult and can damage the engine block.
What if the filter breaks during removal?
Use pliers or a screwdriver to carefully remove the remaining pieces. Clean the area thoroughly before installing a new filter.
Can I use duct tape to remove an oil filter?
It’s not recommended. Duct tape lacks the strength and grip needed. Stick to belts, rubber bands, or pliers for better results.
How to Take Off Oil Filter Without Wrench
Changing your car’s oil is one of the most important maintenance tasks you can do at home. But what happens when you’re ready to remove the old oil filter—and you don’t have an oil filter wrench? Don’t panic. You’re not alone, and you’re not stuck.
Whether you’re on the side of the road, in your garage without the right tool, or just forgot your wrench, there are several clever and effective ways to remove an oil filter without one. In this guide, we’ll walk you through practical, step-by-step methods using common household items. You’ll learn how to safely and efficiently remove a stubborn oil filter—no special tools required.
We’ll cover techniques like using a belt, rubber bands, pliers, and even string. Plus, we’ll share safety tips, troubleshooting advice, and how to avoid common mistakes. By the end, you’ll be ready to handle an oil filter change anytime, anywhere.
Why You Might Need to Remove an Oil Filter Without a Wrench
Oil filter wrenches are designed to grip and turn filters, especially when they’re tight or hard to reach. But they’re not always handy. Maybe you’re traveling, working on a friend’s car, or simply don’t own one yet. In those moments, knowing alternative methods can save the day.
Filters can become stuck due to over-tightening, heat expansion, or corrosion. Without the right tool, it’s easy to slip, strip the filter, or even damage the engine block. That’s why it’s crucial to use the right technique—even without a wrench.
The good news? Many of these methods rely on increasing grip and leverage, which are the same principles that make wrenches work. With a little creativity and patience, you can get that filter off safely.
Method 1: The Belt or Strap Technique
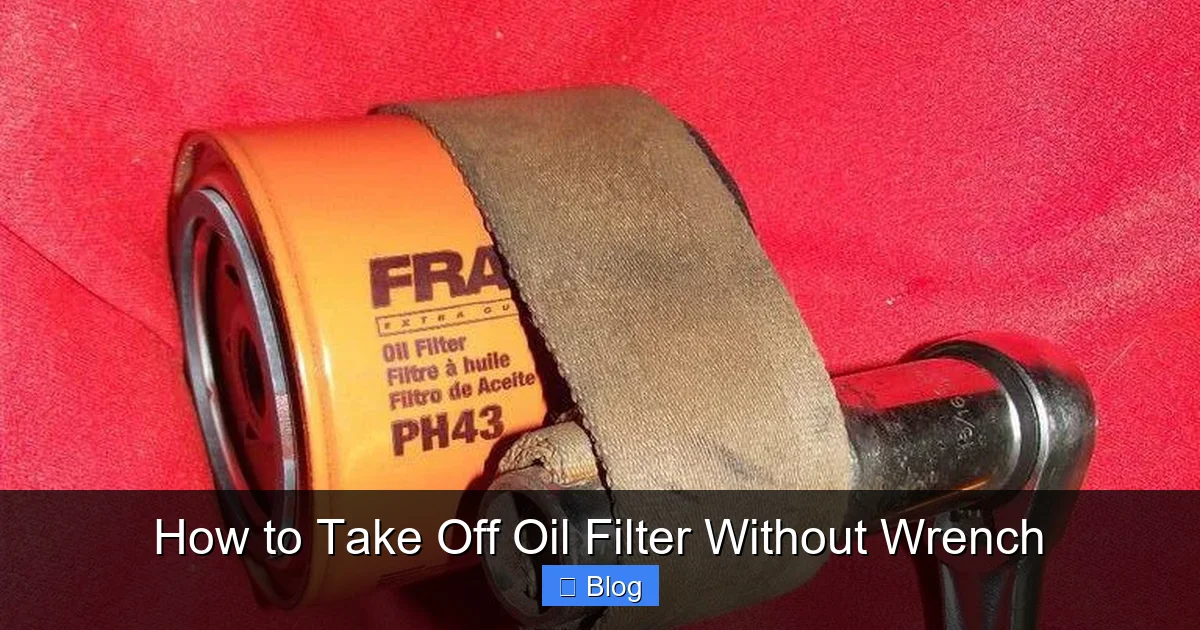
One of the most effective ways to remove an oil filter without a wrench is using a strong belt or strap. This method works like a homemade strap wrench and provides excellent grip.
What You’ll Need
- A sturdy leather or nylon belt (at least 1 inch wide)
- A helper (optional, but helpful)
Step-by-Step Instructions
- Position the belt: Wrap the belt tightly around the oil filter, making sure it covers as much surface area as possible.
- Secure the end: Hold one end of the belt firmly in your hand. If you have a helper, they can hold the other end.
- Apply steady pressure: Pull the belt in the direction that loosens the filter (usually counterclockwise). Use your body weight if needed.
- Twist and turn: If the filter starts to move, continue turning it slowly until it’s completely off.
Pro Tips
- Use a belt with a rough texture for better grip.
- If the belt slips, try wrapping it twice around the filter.
- Wear gloves to protect your hands from sharp edges or hot oil.
This method is especially useful for filters in tight spaces where pliers won’t fit.
Method 2: The Rubber Band Grip Trick
If you’re working in a pinch and only have basic items nearby, the rubber band method is a clever hack. It’s simple, low-risk, and surprisingly effective.
What You’ll Need
- Several large rubber bands (the thicker, the better)
Step-by-Step Instructions
- Clean the filter: Wipe the outside of the filter with a rag to remove oil and debris.
- Apply rubber bands: Wrap multiple rubber bands tightly around the filter, covering the entire gripping area.
- Press and turn: Place your palm firmly on the rubber bands and turn counterclockwise. The rubber increases friction and helps you get a better grip.
- Work gradually: If it doesn’t budge at first, try rocking it back and forth slightly to break the seal.
Pro Tips
- Use as many rubber bands as needed—layer them for maximum grip.
- This method works best on filters that aren’t extremely tight.
- Combine with a rag for extra cushion and control.
This trick is great for beginners or when you want to avoid scratching the filter.
Method 3: Using Pliers or Channel Locks
Pliers are a common tool in most toolkits and can be used to remove an oil filter—if done carefully. The key is to avoid crushing or puncturing the filter canister.
What You’ll Need
- Large slip-joint pliers or channel locks
- A rag or piece of cloth
Step-by-Step Instructions
- Protect the filter: Wrap the filter with a rag to prevent the pliers from denting or piercing it.
- Position the pliers: Open the pliers wide and clamp them onto the filter as close to the base as possible.
- Apply steady pressure: Squeeze the handles and turn counterclockwise. Use slow, even force.
- Adjust as needed: If the pliers slip, reposition them slightly and try again.
Pro Tips
- Use channel locks for better leverage and grip.
- Never use excessive force—this can collapse the filter and make removal harder.
- If the filter is aluminum, be extra gentle to avoid cracking.
This method works well for filters that are accessible and not overly tight.
Method 4: The String or Rope Method
Believe it or not, a strong piece of string or rope can act like a makeshift wrench. This technique uses tension and leverage to turn the filter.
What You’ll Need
- A length of strong string, nylon rope, or paracord (at least 3 feet long)
Step-by-Step Instructions
- Wrap the string: Loop the string around the filter, crossing the ends to form a “handle.”
- Tie a knot: Tie the ends together in a secure knot, leaving a loop to pull on.
- Pull with leverage: Hold the loop and pull in the direction that loosens the filter. Use your body weight if needed.
- Re-wrap if necessary: If the string slips, rewrap it higher or lower on the filter for better grip.
Pro Tips
- Use a thicker rope for more strength and grip.
- Wet the string slightly to reduce friction and prevent breaking.
- This method is ideal for filters in awkward positions.
It’s a simple solution that requires minimal tools and can be surprisingly effective.
Method 5: Heat and Penetrating Oil (For Stubborn Filters)
Sometimes, filters get stuck due to heat expansion or corrosion. In these cases, a little heat and lubrication can make all the difference.
What You’ll Need
- A hair dryer or heat gun
- Penetrating oil (like WD-40 or PB Blaster)
- Safety gloves and goggles
Step-by-Step Instructions
- Let the engine cool slightly: Never apply heat to a scorching-hot engine. Wait until it’s warm but not burning.
- Apply heat: Use a hair dryer or heat gun to warm the filter for 30–60 seconds. This expands the metal and breaks the seal.
- Spray penetrating oil: Apply a small amount of oil around the base of the filter where it meets the engine.
- Wait and try again: Let the oil sit for 5–10 minutes, then attempt to remove the filter using one of the methods above.
Pro Tips
- Never use an open flame—this can ignite oil fumes.
- Use heat sparingly to avoid damaging rubber seals.
- Combine with the belt or pliers method for best results.
This approach is ideal for filters that haven’t been changed in a long time.
Safety Tips and Best Practices
Removing an oil filter without a wrench can be risky if you’re not careful. Follow these safety guidelines to protect yourself and your vehicle.
- Wear protective gear: Always use gloves and safety glasses. Hot oil can cause burns, and debris can fly.
- Work in a well-ventilated area: Oil fumes can be harmful, especially in enclosed spaces.
- Place a drain pan underneath: Even if you’ve drained the oil, some may still spill when removing the filter.
- Don’t force it: If the filter won’t budge after several attempts, stop. Forcing it can damage the engine or cause injury.
- Check for leaks: After installation, start the engine briefly and check for oil leaks around the new filter.
Troubleshooting Common Problems
Even with the right technique, you might run into issues. Here’s how to handle them.
Problem: The filter is crushed or punctured
This usually happens when using pliers too aggressively. To fix it, carefully remove the damaged filter with pliers or a screwdriver. Be sure to clean up any oil spills.
Visual guide about How to Take Off Oil Filter Without Wrench
Image source: filterspoint.com
Visual guide about How to Take Off Oil Filter Without Wrench
Image source: i.pinimg.com
Problem: The filter won’t turn at all
Try combining methods—use heat and penetrating oil, then attempt the belt or string technique. If it still won’t move, consider visiting a mechanic to avoid engine damage.
Problem: Oil leaks after installation
This could mean the old filter’s gasket is stuck on the engine. Always clean the mounting surface before installing a new filter.
How to Prevent Future Issues
The best way to avoid a stuck filter is proper installation. Here’s how:
- Install by hand: Always screw the new filter on by hand until it seats, then give it a quarter-turn more. Never overtighten.
- Use the right filter: Make sure the filter matches your vehicle’s specifications.
- Lubricate the gasket: Apply a thin layer of fresh oil to the rubber gasket before installation. This helps create a better seal and makes removal easier next time.
- Change oil regularly: Old, sludge-filled oil can make filters harder to remove.
Conclusion
You don’t need a fancy wrench to remove an oil filter. With a little creativity and the right technique, you can get the job done using items you probably already have at home. Whether it’s a belt, rubber bands, pliers, or string, each method offers a safe and effective way to tackle a stubborn filter.
Remember: safety comes first. Wear gloves, protect your eyes, and never force a filter that won’t budge. And when in doubt, consult a professional.
By following this guide, you’ll be prepared for your next oil change—no wrench required. Keep these tips handy, and you’ll never be stuck again.

Sagor Jahan is the founder and author of Automopromo.com, dedicated to delivering insightful tips, reviews, and updates in the automotive and promotional industry. With a passion for innovation and clear guidance, Sagor helps readers make informed decisions and stay ahead in the ever-evolving automotive world.

