

Struggling to remove a stuck oil filter without a special tool? This guide shows you safe, practical ways to get the job done using everyday items like a belt, strap wrench, or even a screwdriver and hammer. Perfect for emergencies or quick DIY oil changes.
How to remove oil filter without tool? To remove an oil filter without a tool, first let the engine cool completely. Place a drain pan under the filter. Try loosening it by hand, turning it counterclockwise. If it’s too tight, wrap a rubber glove, belt, or thick cloth around the filter for better grip and twist firmly. As a last option, carefully use a screwdriver to puncture and turn it, but expect oil to spill.
Key Takeaways
- Use a belt or strap wrench: Wrap a strong belt or strap around the filter and twist to create leverage and grip.
- Try the screwdriver and hammer method: Carefully tap a screwdriver through the filter body to create a handle for turning.
- Leverage with pliers or channel locks: Use adjustable pliers to grip the filter’s ridges and twist it off.
- Apply penetrating oil: Spray around the base to loosen rust or debris before attempting removal.
- Protect your hands and eyes: Always wear gloves and safety glasses to avoid burns and cuts.
- Work in the right conditions: Remove the filter when the engine is warm—not hot—to ease removal and reduce mess.
- Know when to stop: If the filter is severely damaged, stop and seek professional help to avoid engine damage.
Quick Answers to Common Questions
Can I use a regular wrench to remove an oil filter?
Yes, if it fits. A large adjustable wrench or pipe wrench can grip the filter, but be careful not to crush it. Use a rag for better grip and protection.
Is it safe to drive with a loose oil filter?
No. A loose filter can leak or fall off, causing oil loss and engine damage. Always tighten the new filter properly after installation.
How tight should an oil filter be?
Hand-tight plus a quarter-turn is ideal. Over-tightening can damage the gasket and make future removal difficult.
What if the oil filter is in a tight space?
Use a strap wrench with a long handle or a flexible oil filter wrench. If space is extremely limited, consider removing nearby components for access.
Can I reuse an old oil filter?
No. Oil filters are designed for single use. Reusing one can lead to clogs, leaks, and engine damage.
How to Remove Oil Filter Without Tool
Changing your car’s oil is a routine maintenance task that most drivers can handle at home. But what happens when you’re ready to remove the oil filter and realize you don’t have the right tool? Don’t panic—there are several effective ways to remove an oil filter without a dedicated wrench. Whether you’re in a pinch or just prefer DIY solutions, this guide will walk you through safe, practical methods using common household items.
In this article, you’ll learn how to remove a stubborn oil filter using tools you likely already have in your garage or kitchen. We’ll cover step-by-step techniques, safety tips, and troubleshooting advice to help you complete your oil change with confidence—even without specialized equipment.
Why You Might Need to Remove an Oil Filter Without a Tool
Sometimes, life throws a wrench in your plans—literally. You might be on a road trip, working late at night, or simply forgot to buy an oil filter wrench. In these situations, knowing alternative removal methods can save you time, money, and stress.
Oil filters are designed to seal tightly to prevent leaks, which means they can become stuck over time—especially if they’ve been over-tightened or exposed to heat and debris. Without the right tool, removal can seem impossible. But with a little creativity and the right technique, you can get that filter off safely and efficiently.
Preparation: Safety First
Before attempting any method, it’s crucial to prepare properly. Safety should always come first.
Let the Engine Cool Slightly
Never remove an oil filter immediately after driving. The oil inside can be extremely hot and may cause severe burns. Wait at least 10–15 minutes after turning off the engine. The ideal time is when the engine is warm but not hot to the touch. This also helps the oil drain more easily.
Visual guide about How to Remove Oil Filter Without Tool
Image source: mechanicwiz.com
Visual guide about How to Remove Oil Filter Without Tool
Image source: montmarte.com
Protect Yourself
Wear heavy-duty gloves to protect your hands from sharp edges, hot surfaces, and oil. Safety glasses are also essential—oil can splash unexpectedly. If you’re working under the car, use jack stands and never rely solely on a jack.
Gather Your Supplies
Even without a filter wrench, you’ll need a few basic items:
- A drain pan to catch oil
- Rags or paper towels
- Penetrating oil (like WD-40 or PB Blaster)
- Adjustable pliers or channel locks
- A strong belt, rope, or strap
- A screwdriver and hammer (optional)
- A clean container for the old filter
Method 1: The Belt or Strap Technique
One of the most effective and low-risk ways to remove an oil filter without a tool is using a belt or strap. This method works especially well for filters with smooth surfaces.
Step 1: Choose a Strong Belt or Strap
Use a leather belt, nylon strap, or even a sturdy rope. Avoid thin or frayed materials that could snap under pressure.
Step 2: Wrap It Around the Filter
Loop the belt around the oil filter, making sure it’s snug. Position it near the base where the filter meets the engine block for maximum grip.
Step 3: Create Leverage
Hold both ends of the belt and pull in opposite directions to twist the filter counterclockwise. Apply steady, even pressure. If it doesn’t budge, try rocking it gently back and forth while pulling.
Tip: Add a Handle
For extra leverage, insert a screwdriver or metal rod through the belt loop to act as a handle. This gives you more torque without slipping.
Method 2: Using Pliers or Channel Locks
If your filter has ridges or a textured surface, pliers can provide a solid grip.
Step 1: Open the Pliers Wide
Adjust your pliers or channel locks to fit around the filter. Make sure the jaws are long enough to wrap around the body.
Step 2: Grip the Filter Firmly
Position the pliers near the base of the filter. Squeeze tightly to get a good hold. If the surface is smooth, wrap a rag around the filter first to prevent slipping.
Step 3: Turn Counterclockwise
Apply steady pressure while turning the pliers counterclockwise. Avoid jerking motions, which can damage the filter or surrounding components.
Tip: Use Two Sets of Pliers
If one set isn’t enough, use a second pair to grip the filter at a different angle. This gives you more control and leverage.
Method 3: The Screwdriver and Hammer Method
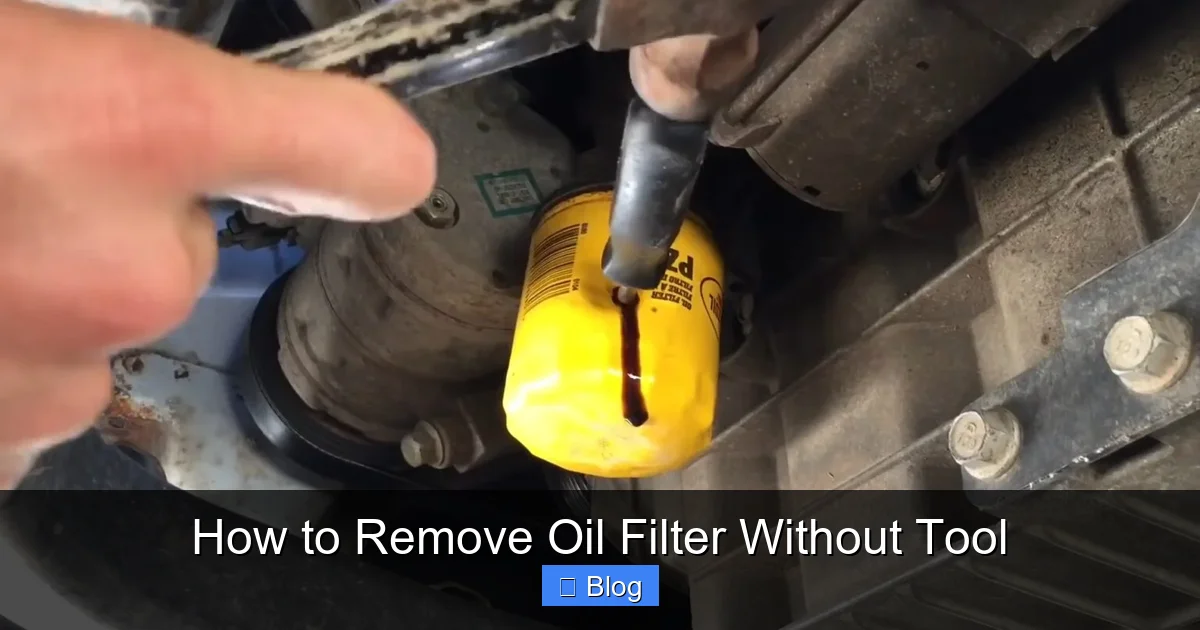
This method is a last resort but can be effective for extremely stuck filters. It involves puncturing the filter to create a turning point.
Step 1: Position the Screwdriver
Choose a long, sturdy screwdriver (preferably flathead). Position it at a 45-degree angle near the top edge of the filter.
Step 2: Tap It In
Using a hammer, gently tap the screwdriver into the filter body until it penetrates about 1–2 inches. Be careful not to damage the engine block or oil passages.
Step 3: Use as a Handle
Once the screwdriver is secure, use it as a lever to turn the filter counterclockwise. Apply steady pressure. The screwdriver acts like a built-in wrench.
Warning: Use Caution
This method can damage the filter and create metal shavings. Only use it if other methods fail, and be prepared for a mess. Clean up any debris immediately.
Method 4: The Rope or Wire Trick
Similar to the belt method, this technique uses tension and friction to turn the filter.
Step 1: Use Thick Rope or Wire
A strong nylon rope or even a coat hanger (straightened and doubled) can work. Avoid thin string or flimsy materials.
Step 2: Wrap and Twist
Wrap the rope tightly around the filter several times. Hold both ends and pull in opposite directions to create a twisting motion.
Step 3: Increase Leverage
For more power, wrap the rope around a long screwdriver or wrench to act as a handle. This gives you greater torque with less effort.
Troubleshooting Common Problems
Even with the right technique, you might run into issues. Here’s how to handle them.
Problem: The Filter Won’t Budge
If the filter is stuck due to rust or over-tightening, apply penetrating oil around the base. Let it sit for 10–15 minutes. Reapply if needed. Then try again with increased leverage.
Problem: The Filter Is Stripped or Damaged
If the filter’s surface is smooth or the ridges are worn, wrap it in a rubber glove or duct tape to improve grip. This adds friction for pliers or belts.
Problem: Oil Is Leaking During Removal
This is normal. Keep your drain pan underneath and have rags ready. Wipe the area clean once the filter is off to prevent contamination.
Problem: The Filter Breaks During Removal
If the filter cracks or splits, stop immediately. Use needle-nose pliers to remove any remaining pieces. Check the engine block for debris before installing a new filter.
Installing the New Oil Filter
Once the old filter is removed, it’s time to install the new one—properly.
Step 1: Clean the Mounting Surface
Wipe the engine’s filter mounting surface with a clean rag. Remove any old gasket material or debris to ensure a proper seal.
Step 2: Lubricate the New Gasket
Apply a thin layer of fresh oil to the rubber gasket on the new filter. This helps prevent leaks and makes future removal easier.
Step 3: Hand-Tighten Only
Screw the new filter on by hand until it’s snug. Then give it an additional quarter-turn. Over-tightening can damage the gasket and make removal difficult next time.
Step 4: Add Oil and Check for Leaks
Refill the engine with the recommended amount and type of oil. Start the engine and let it run for a minute. Check under the car for leaks. Turn off the engine and recheck the oil level.
Final Tips for Success
– Always dispose of used oil and filters at a recycling center or auto parts store.
– Keep a basic oil change kit in your car for emergencies.
– Consider buying an oil filter wrench for future use—it’s a small investment that pays off.
– If you’re unsure or uncomfortable, don’t hesitate to visit a mechanic.
Conclusion
Removing an oil filter without a tool might seem daunting, but with the right approach, it’s entirely doable. Whether you use a belt, pliers, or a screwdriver, these methods can save you from a costly trip to the shop. Remember to prioritize safety, work carefully, and know your limits. With practice, you’ll become confident handling oil changes—even in a pinch. Keep this guide handy, and you’ll never be stuck without a solution again.

Sagor Jahan is the founder and author of Automopromo.com, dedicated to delivering insightful tips, reviews, and updates in the automotive and promotional industry. With a passion for innovation and clear guidance, Sagor helps readers make informed decisions and stay ahead in the ever-evolving automotive world.

