
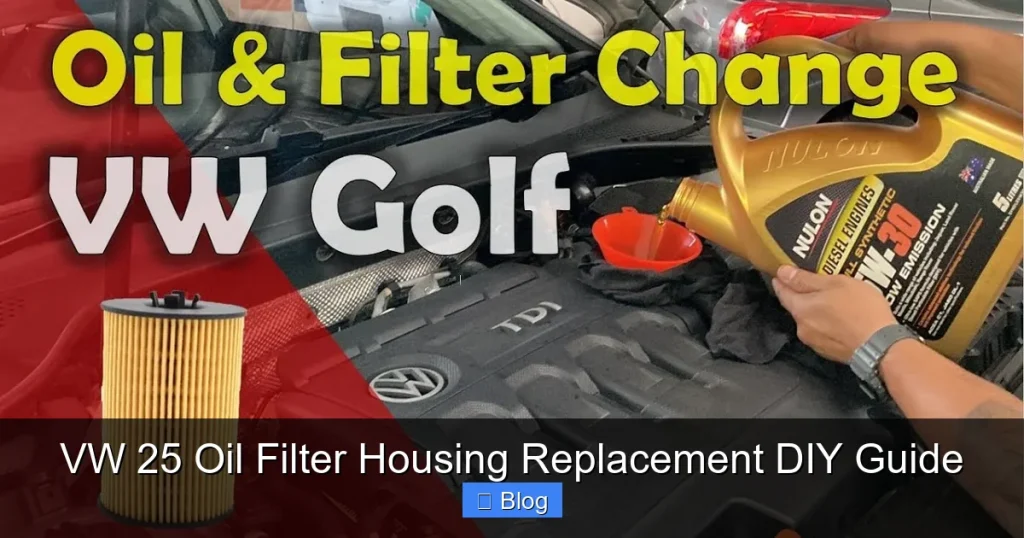
Tackling a VW 2.5 oil filter housing replacement can seem daunting, but this comprehensive DIY guide empowers you to fix it yourself, saving significant repair costs. Learn to diagnose leaks, gather essential tools, and follow our step-by-step instructions for a successful replacement, ensuring your engine stays properly lubricated and leak-free. By understanding the common failure points and taking careful steps, you can confidently complete this repair at home.
VW 25 Oil Filter Housing Replacement DIY Guide
Hey there, fellow VW enthusiast! If you own a Volkswagen with the robust 2.5L 5-cylinder engine, chances are you’ve either dealt with, or will eventually deal with, a pesky oil leak. While these engines are generally known for their reliability and distinctive rumble, there’s one common weak point that tends to rear its head: the oil filter housing. It’s a notorious leaker, often leaving a tell-tale puddle under your car and a burning oil smell when it drips onto hot exhaust components.
Facing an oil leak can be frustrating, and the thought of an expensive repair bill from the dealership can be even more so. But what if I told you that with a bit of patience, the right tools, and this detailed guide, you can tackle the VW 2.5 oil filter housing replacement yourself? You heard that right! This isn’t a job reserved only for seasoned mechanics. Many DIYers have successfully replaced this component, saving a significant amount of money in the process.
This article is designed to be your friendly, step-by-step companion through the entire VW 2.5 oil filter housing replacement process. We’ll cover everything from understanding why it fails and what tools you’ll need, to the detailed instructions for removal and installation, and crucial post-replacement checks. So, grab a cup of coffee, clear your schedule for a weekend, and let’s get your VW back to being leak-free and running perfectly.
Key Takeaways
- Common Failure Point: The plastic VW 2.5 oil filter housing is prone to cracking and gasket failure due to heat cycles, leading to significant oil leaks.
- DIY Saves Money: Performing the VW 2.5 oil filter housing replacement yourself can save you hundreds of dollars in labor costs compared to professional repairs.
- Tools & Parts Are Key: Gather all necessary tools (sockets, torque wrench, drain pan) and quality parts (new housing, gaskets, oil, coolant) before starting to ensure a smooth process.
- Safety First: Always prioritize safety by working on a cool engine, using jack stands, and wearing appropriate personal protective equipment.
- Careful Disassembly & Assembly: Pay close attention to disconnecting hoses and electrical connectors, and ensure proper torque specifications when installing the new housing to prevent future leaks.
- Post-Replacement Checks: Thoroughly bleed the cooling system and meticulously check for leaks after replacement before driving, and monitor fluid levels for the following days.
Quick Answers to Common Questions
Can I drive with a leaking VW 2.5 oil filter housing?
While you might be able to drive short distances with a minor leak, it’s not recommended. A persistent oil leak can lead to dangerously low oil levels, potentially causing severe engine damage over time. It’s best to address it promptly.
How long does a VW 2.5 oil filter housing replacement typically take for a DIYer?
For a DIYer with moderate mechanical experience, expect the VW 2.5 oil filter housing replacement to take anywhere from 3 to 6 hours. This accounts for preparation, disassembly, assembly, and crucial post-replacement checks like bleeding the cooling system.
Do I need to drain all the oil and coolant for this job?
You don’t necessarily need to completely drain all the oil and coolant, but you will lose some of both. It’s often recommended to do a full oil change since the filter is being replaced. For coolant, draining enough so the level is below the housing’s connections will minimize spillage.
What’s the typical cost saving for a DIY VW 2.5 oil filter housing replacement?
Performing a DIY VW 2.5 oil filter housing replacement can save you significantly, often hundreds of dollars. The parts themselves might cost $100-$300, while a shop could charge $500-$1000 or more for parts and labor combined.
Are there upgraded VW 2.5 oil filter housing options available?
Yes, some aftermarket manufacturers offer upgraded VW 2.5 oil filter housings, sometimes made from more durable materials like aluminum, which can be a more robust and long-lasting solution compared to the original plastic design.
📑 Table of Contents
Understanding the VW 2.5 Oil Filter Housing and Why It Fails
The oil filter housing on your VW 2.5 engine is more than just a place to screw in an oil filter. It’s a critical component that integrates the oil filter with the engine’s lubrication and cooling systems. Often, it includes the oil cooler itself, which uses engine coolant to regulate the oil’s temperature. This integrated design, while efficient, introduces multiple points of failure.
Common Failure Points
The primary culprit behind leaks from the VW 2.5 oil filter housing is typically the material it’s made from. Many early housings were plastic, and over time, constant exposure to extreme engine heat cycles, vibrations, and oil pressure causes the plastic to become brittle. This brittleness eventually leads to:
- Cracks: Small hairline cracks can develop in the plastic body itself, allowing oil to seep out.
- Gasket Failure: The gaskets and O-rings that seal the housing to the engine block, and those between the housing and the oil cooler (if separate), can harden, shrink, or simply fail over time, losing their sealing integrity.
- Warping: In some cases, the plastic can warp, compromising the seal even if the gaskets are new.
These issues mean that even if you replace the oil filter regularly, the housing itself can become the source of your problems. A proper VW 2.5 oil filter housing replacement often means replacing the entire housing assembly.
Symptoms of a Failing Housing
How do you know if your oil filter housing is the source of the leak? Look out for these common symptoms:
- Visible Oil Leaks: The most obvious sign is seeing fresh oil puddles or drips under your car, especially after it’s been parked for a while. The leak is often visible near the front of the engine, usually below the intake manifold area.
- Burning Oil Smell: As oil drips onto hot exhaust components or the catalytic converter, it creates a distinct burning oil smell, particularly noticeable when the car is stopped or idling.
- Low Oil Level: Consistently needing to add oil between oil changes, even if you don’t see massive puddles, could indicate a slow leak.
- Oil in Coolant (Rare but Serious): If the internal oil cooler gaskets fail, oil can mix with coolant (and vice versa), leading to a milky substance in your coolant reservoir or on your dipstick. This is a severe issue requiring immediate attention.
If you’re experiencing any of these, it’s highly likely you need a VW 2.5 oil filter housing replacement. Don’t ignore these leaks, as low oil levels can lead to severe engine damage over time.
Tools and Parts You’ll Need for the Replacement
Before you even think about grabbing a wrench, preparation is paramount. Having all the necessary tools and parts at your fingertips will make the VW 2.5 oil filter housing replacement process much smoother and prevent frustrating delays.
Essential Tools
Here’s a list of what you’ll likely need:
- Socket Wrench Set: A good 3/8-inch drive set with various sockets (10mm, 13mm, 17mm are common), extensions (6-inch and 12-inch are handy), and a universal joint will be invaluable. You’ll likely need a 32mm socket for the oil filter cap.
- Torque Wrench: Absolutely crucial for proper installation. Overtightening bolts can crack the new housing, while undertightening can cause leaks.
- Screwdrivers: Flathead and Phillips for various clips and clamps.
- Pliers: Regular pliers, and especially hose clamp pliers, will make dealing with spring-style coolant clamps much easier.
- Drain Pan: For collecting old oil and coolant.
- Funnel: For refilling oil and coolant.
- Shop Rags/Paper Towels: You’ll need plenty for spills and cleaning.
- Jack and Jack Stands: For safely lifting and supporting the front of your car. Never work under a car supported only by a jack!
- Personal Protective Equipment (PPE): Safety glasses and work gloves are a must.
- Pry Tools: Small plastic or metal pry tools can help with stubborn hoses or connectors.
- Shop Vacuum (Optional but Helpful): To clean up any spilled fluids or debris.
Required Parts
Don’t skimp on quality here. Investing in good parts will save you headaches down the road.
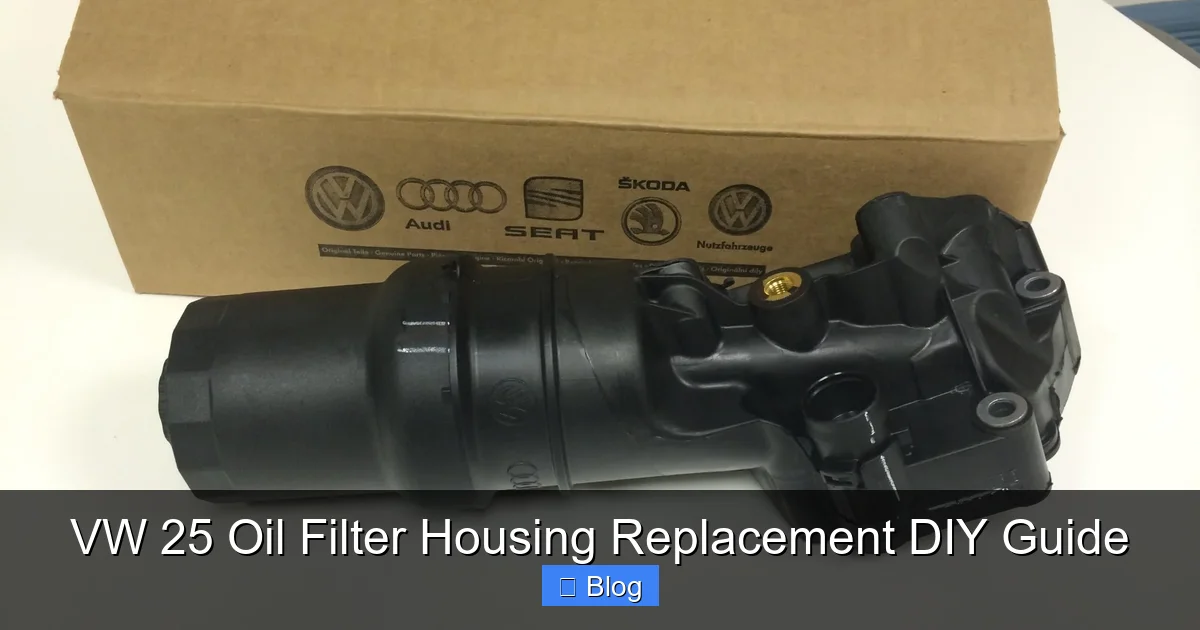
- New VW 2.5 Oil Filter Housing: This is the main component. Research whether OEM (Original Equipment Manufacturer) or a reputable aftermarket brand (like Mahle, Rein, Vaico) is best for your specific year and model. Some aftermarket units feature an improved design or even metal construction, which can be a better long-term solution. Always provide your VIN when ordering to ensure correct fitment.
- New Oil Filter: Since you’ll be removing the old filter, put a fresh one in with the new housing.
- Engine Oil: Check your owner’s manual for the correct type (e.g., 5W-40, 5W-30 synthetic) and capacity. You’ll need about 5.8 to 6.3 quarts (5.5-6 liters) for the 2.5L engine.
- Coolant: You’ll lose some coolant during the process, so have a bottle of VW-approved G12/G13/G12++ coolant (or a suitable universal equivalent) on hand for topping off or refilling.
- Replacement Gaskets/O-rings: Many new housings come with these, but double-check. They are critical for a leak-free seal.
- Coolant Hose Clamps (Optional): If your existing spring clamps are old or corroded, consider replacing them with new worm-drive clamps or fresh spring clamps for a more secure seal.
Safety First! Preparation is Key
Safety is not negotiable. Always prioritize it when working on your car.
Safety Precautions
Before you even think about unbolting anything, make sure your workspace is safe:
Visual guide about VW 25 Oil Filter Housing Replacement DIY Guide
Image source: paulstravelpictures.com
Visual guide about VW 25 Oil Filter Housing Replacement DIY Guide
Image source: m.media-amazon.com
- Cool Engine: Ensure your engine is completely cool. Working with hot engine components or hot fluids can cause serious burns.
- Level Surface: Park your car on a flat, level surface.
- Parking Brake: Engage the parking brake.
- Jack Stands: Use a sturdy jack to lift the front of the car, then immediately place jack stands under secure points to support the vehicle. Never rely solely on the jack. Give the car a slight shake to confirm it’s stable on the stands.
- PPE: Wear safety glasses to protect your eyes from splashes and debris, and gloves to protect your hands from oil, coolant, and sharp edges.
Accessing the Housing and Draining Fluids
Now, let’s get your VW ready for surgery:
- Disconnect the Battery: For safety and to prevent accidental short circuits, disconnect the negative (black) battery terminal.
- Remove Engine Cover: This is usually just a few clips or friction-fit mounts.
- Remove Airbox/Intake Components: To gain clear access to the oil filter housing, you’ll need to remove the air filter housing, mass air flow (MAF) sensor, and potentially the intake tube. This often involves loosening hose clamps and disconnecting electrical connectors. Take photos with your phone as you go – they’re invaluable for reassembly!
- Prepare for Fluid Drains: Place your drain pan under the engine. You don’t necessarily need to fully drain the oil and coolant, but you will lose some of both.
- Partial Oil Drain: You can either drain all the engine oil now (which is a good idea since you’re already doing work that requires removing the filter), or just be prepared for a small amount to spill when you remove the housing. If doing a full drain, remove the drain plug from the oil pan and let it drain completely.
- Partial Coolant Drain: The oil filter housing has coolant lines running to it. To minimize spills, you’ll want to drain some coolant. The easiest way is usually to locate the lower radiator hose clamp, place your drain pan, and carefully loosen it to let some coolant out. Alternatively, if your radiator has a drain cock, use that. You’ll need to drain enough so that the coolant level is below the housing’s connections.
The Step-by-Step Replacement Process
With all your tools and parts ready, and your car safely prepared, it’s time for the main event: the VW 2.5 oil filter housing replacement. Take your time and follow these steps carefully.
Removing the Old Housing
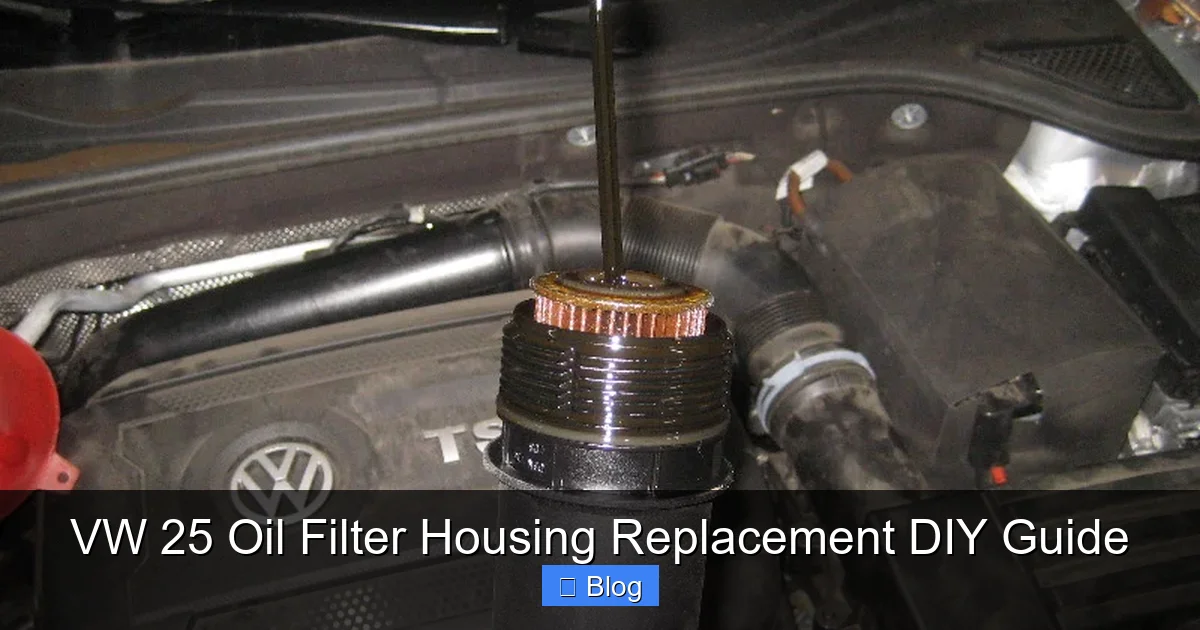
- Remove Oil Filter Cap and Filter: Using your 32mm socket, unscrew the oil filter cap and pull out the old oil filter. Let any residual oil drain into the pan.
- Disconnect Electrical Connectors: There might be one or two electrical connectors (e.g., for oil pressure or temperature sensors) plugged into the housing. Carefully unplug them.
- Disconnect Coolant Hoses: Identify the coolant hoses connected to the oil filter housing. Using your hose clamp pliers, slide the clamps away from the connection points. Be prepared for some coolant to spill! Gently twist and pull the hoses off the housing. If they are stubborn, a small pry tool or flathead screwdriver can help separate them, but be careful not to damage the hoses.
- Remove Mounting Bolts: Locate all the bolts securing the oil filter housing to the engine block. There are typically 3-4 bolts. Use your appropriate socket and extensions to remove them. Keep track of which bolt came from where, as they might be different lengths.
- Carefully Pry Off the Old Housing: Once all bolts and hoses are disconnected, the housing might still be stuck due to the old gasket. Gently use a plastic pry tool or a flathead screwdriver to carefully pry the housing away from the engine block. Be mindful of any remaining fluid spills.
- Clean the Mounting Surface: With the old housing removed, thoroughly clean the mating surface on the engine block. Scrape off any old gasket material using a plastic scraper or razor blade (be very careful not to scratch the aluminum engine block). Ensure the surface is perfectly clean and free of debris for a good seal with the new housing.
Installing the New Housing
- Install New Gaskets/O-rings: If your new housing didn’t come with gaskets installed, or if you’re using separate ones, ensure they are properly seated in their grooves on the new housing. A tiny bit of fresh engine oil can help lubricate O-rings for easier installation and better sealing.
- Position the New Housing: Carefully align the new VW 2.5 oil filter housing with the bolt holes on the engine block. Ensure it sits flush against the cleaned surface.
- Install Mounting Bolts: Insert the mounting bolts and hand-tighten them first to ensure proper threading. Then, using your torque wrench, tighten them to the manufacturer’s specified torque. *This step is critical!* Overtightening can crack the new plastic housing, leading to another leak, while undertightening will result in a leak. Consult a repair manual for your specific model’s torque specs (usually in the range of 10-15 Nm or 7-11 ft-lbs for these smaller bolts). Tighten in a star pattern if there are more than two bolts.
- Reconnect Coolant Hoses: Push the coolant hoses firmly back onto their connections on the new housing. Slide the clamps back into their original positions to secure the hoses.
- Reconnect Electrical Connectors: Plug any electrical connectors back into the new housing until you hear or feel a click.
- Install New Oil Filter and Cap: Insert the new oil filter into the housing, ensuring it’s correctly oriented. Screw the oil filter cap back on until it’s snug, but don’t overtighten it. Many caps have a torque spec printed on them (often 25 Nm).
Post-Replacement Checks and First Start-Up
You’re almost there! The VW 2.5 oil filter housing replacement isn’t complete until you’ve verified everything is sealed and working correctly.
Double-Checking and Refilling Fluids
- Inspect All Connections: Before lowering the car, do a thorough visual inspection. Double-check that all bolts are tightened to spec, all hoses are connected and clamps are secure, and all electrical connectors are properly plugged in.
- Refill Engine Oil: Pour the correct amount and type of fresh engine oil into the engine through the oil fill cap. Check the dipstick to ensure the level is between the min and max marks.
- Top Up/Refill Coolant: Add coolant to the expansion tank until it reaches the MAX line.
Bleeding the Cooling System
This step is critical for VWs and ensures there are no air pockets in your cooling system. Air pockets can lead to overheating.
- Start the Engine: Start the car with the expansion tank cap off. Turn your heater on full hot and fan on low. This opens the heater core valve, allowing coolant to circulate through that part of the system.
- Burp the System: Let the engine run at idle. Watch the coolant level in the expansion tank. It will likely drop as the thermostat opens and coolant circulates. Continue to top up the coolant to the MAX line. You might see air bubbles escaping. Gently squeeze the radiator hoses to help trapped air escape.
- Monitor Temperature: Keep an eye on your engine temperature gauge. It should rise steadily to its normal operating temperature.
- Cap On: Once the engine is at operating temperature, no more large air bubbles are appearing, and the coolant level is stable, put the expansion tank cap back on.
Leak Checks and Test Drive
- Initial Leak Check: With the engine running, carefully inspect the area around the new VW 2.5 oil filter housing for any signs of oil or coolant leaks. Look closely with a flashlight.
- Lower the Car: Once you’re confident there are no immediate leaks, carefully lower your car off the jack stands.
- Test Drive: Take your car for a short, gentle drive (5-10 minutes). Pay attention to any warning lights, unusual noises, or smells.
- Post-Drive Inspection: After the test drive, park the car and re-inspect the housing area for leaks. Also, check your engine oil and coolant levels again on a cool engine and top off if necessary. The coolant level will often drop slightly after the first drive as more air pockets work their way out.
Congratulations! You’ve just completed a full VW 2.5 oil filter housing replacement. Take pride in knowing you tackled a significant repair, saved money, and gained valuable experience. Keep an eye on your fluid levels for the next few days, just to be sure. Enjoy your leak-free VW!
Frequently Asked Questions
What are the signs that my VW 2.5 oil filter housing is failing?
The most common signs of a failing VW 2.5 oil filter housing include visible oil leaks under your vehicle, a burning oil smell (especially when the engine is hot and stopped), and consistently low engine oil levels requiring frequent top-offs. In rare, more severe cases, you might notice oil mixing with your engine’s coolant.
Is the VW 2.5 oil filter housing replacement a difficult DIY job?
While the VW 2.5 oil filter housing replacement isn’t the simplest repair, it’s definitely achievable for a confident DIYer with the right tools and patience. The main challenges are accessing the housing, dealing with fluid spills, and properly torquing bolts, but our step-by-step guide breaks it down into manageable tasks.
What type of coolant and oil should I use for my VW 2.5 after replacement?
Always refer to your car’s owner’s manual for the precise specifications, but typically, VW 2.5 engines require synthetic engine oil (e.g., 5W-40 or 5W-30 meeting VW 502 00/505 00 standards) and VW-approved G12, G12++, or G13 coolant. Using the correct fluids is crucial for engine longevity and performance.
How important is using a torque wrench during the installation?
Using a torque wrench is extremely important during the VW 2.5 oil filter housing replacement. The housing, often made of plastic, can crack if bolts are overtightened, leading to immediate leaks. Conversely, undertightening can also cause leaks. Proper torque ensures a secure, even seal without damaging components.
Can I just replace the gaskets on the VW 2.5 oil filter housing instead of the whole unit?
While it’s possible to replace just the gaskets, it’s generally not recommended for the VW 2.5 oil filter housing. The plastic housing itself is prone to cracking and warping over time due to heat cycles, meaning a new gasket might not seal correctly against an already compromised housing. Replacing the entire assembly is usually the more reliable long-term solution.
What should I do if I notice a leak after completing the VW 2.5 oil filter housing replacement?
If you notice a leak after the VW 2.5 oil filter housing replacement, first re-check all connections, especially hose clamps and electrical connectors. Then, verify that all mounting bolts are torqued to specification and inspect the new housing for any unforeseen damage or incorrect gasket seating. It’s crucial to identify the source of the new leak to prevent further issues.

Sagor Jahan is the founder and author of Automopromo.com, dedicated to delivering insightful tips, reviews, and updates in the automotive and promotional industry. With a passion for innovation and clear guidance, Sagor helps readers make informed decisions and stay ahead in the ever-evolving automotive world.

