
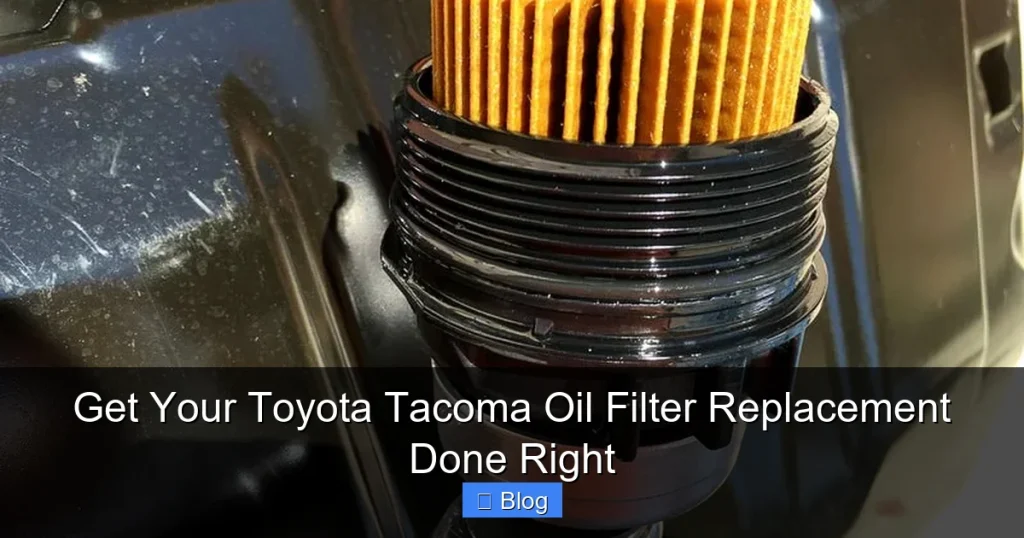
Ensuring your Toyota Tacoma’s longevity and peak performance starts with regular oil filter replacement. This comprehensive guide empowers you to tackle the task yourself, providing a detailed, step-by-step walkthrough from gathering tools to proper disposal. Mastering this essential maintenance not only saves money but also gives you confidence in your truck’s health and readiness for any adventure.
Your Toyota Tacoma is more than just a truck; it’s a trusty companion for work, adventure, and everything in between. It hauls your gear, navigates tough trails, and gets you to your destination reliably. To keep your Tacoma performing its best, consistent maintenance is non-negotiable. One of the most vital tasks on that maintenance checklist is the oil change, and specifically, the Toyota Tacoma oil filter replacement.
Many truck owners shy away from DIY maintenance, thinking it’s too complicated or requires specialized skills. But when it comes to replacing your Toyota Tacoma oil filter, it’s a perfectly manageable job for the average enthusiast. Not only will you save money by doing it yourself, but you’ll also gain a deeper understanding of your vehicle. More importantly, you’ll have the satisfaction of knowing the job was done right, with quality parts you trust. This comprehensive guide will walk you through every step, ensuring you can perform your Toyota Tacoma oil filter replacement with confidence.
So, roll up your sleeves, grab your tools, and let’s get ready to give your Tacoma the care it deserves. We’ll cover everything from why this task is crucial to a detailed, step-by-step breakdown of the process. Get ready to empower yourself and keep your Toyota Tacoma running smoothly for years to come with a proper oil filter replacement.
Key Takeaways
- Regular Maintenance is Key: Timely Toyota Tacoma oil filter replacement is crucial for engine health, preventing premature wear, and maintaining fuel efficiency.
- Know Your Filter Type: Modern Tacomas (3rd Gen) typically use a cartridge-style oil filter, while older models might have spin-on filters. Identifying yours is the first step.
- Safety First Always: Prioritize safety by using proper jack stands, wheel chocks, and personal protective equipment before starting any work under your truck.
- Gather the Right Tools: Specific tools like a filter wrench, torque wrench, drain pan, and the correct oil and filter are essential for a smooth and successful replacement.
- Follow a Step-by-Step Process: Draining the old oil, carefully removing and replacing the filter, and proper refilling are critical steps that prevent errors and leaks.
- Don’t Forget the Gaskets: Always replace the O-rings and gaskets that come with the new oil filter kit to ensure a tight, leak-free seal.
- Proper Disposal is Important: Dispose of used oil and filters responsibly at designated recycling centers to protect the environment.
Quick Answers to Common Questions
What type of oil does a 3rd Gen Toyota Tacoma (3.5L V6) use?
A 3rd Generation Toyota Tacoma with the 3.5L V6 engine typically requires 0W-20 full synthetic engine oil.
How often should I change my Tacoma’s oil filter?
Generally, the oil filter should be replaced every time you change your engine oil. For modern Tacomas using synthetic oil, this is often every 10,000 miles or 12 months, though severe driving conditions might warrant more frequent changes (e.g., every 5,000 miles).
Do I need a special tool to remove the oil filter on a 3rd Gen Tacoma?
Yes, for the cartridge-style oil filter housing found on 3rd Gen Tacomas, you will need a specific oil filter cap wrench (often 64mm with 14 flutes) to remove the housing.
What happens if I don’t replace the O-rings with a new cartridge filter?
If you don’t replace the old O-rings (main housing O-ring and the smaller drain valve O-ring) with the new ones provided in the filter kit, you will almost certainly experience oil leaks from the filter housing.
How much oil does a Toyota Tacoma usually take with a filter change?
A 3rd Generation Toyota Tacoma with the 3.5L V6 engine typically requires about 6.1-6.2 quarts (approx. 5.8-5.9 liters) of engine oil when the filter is also replaced.
📑 Table of Contents
- Why Your Tacoma Deserves a Fresh Oil Filter
- Knowing Your Tacoma’s Oil Filter: Cartridge vs. Spin-On
- Gear Up! Essential Tools and Supplies for the Job
- Your Step-by-Step Guide to a Flawless Tacoma Oil Filter Replacement
- Common Pitfalls and Pro Tips for Tacoma Owners
- When to Schedule Your Next Tacoma Oil Filter Replacement
- Conclusion
Why Your Tacoma Deserves a Fresh Oil Filter
Think of your engine oil as the lifeblood of your Toyota Tacoma. It lubricates moving parts, reduces friction, dissipates heat, and helps clean the engine. As oil circulates, it picks up contaminants. These include metal shavings, dirt, carbon deposits, and unburnt fuel particles. This is where your oil filter comes in. It acts as your engine’s kidney, trapping these harmful particles before they can cause damage.
A clean oil filter is essential for a healthy engine. It allows oil to flow freely, ensuring proper lubrication to all critical components. When your Toyota Tacoma oil filter becomes clogged, it can’t perform its job effectively. Dirty oil then circulates throughout the engine. This contaminated oil can lead to increased friction and wear on engine parts. Over time, this accelerates engine degradation. It can even lead to costly repairs down the road. Regular Toyota Tacoma oil filter replacement is a simple, cost-effective way to prevent these issues.
The Risks of Neglecting Your Oil Filter
- Increased Engine Wear: Contaminants in the oil act like sandpaper, grinding down crucial engine components.
- Reduced Fuel Economy: A struggling engine due to poor lubrication will work harder, consuming more fuel.
- Lower Engine Performance: Dirty oil can impede engine efficiency, leading to a noticeable drop in power and responsiveness.
- Premature Engine Failure: In severe cases, a completely clogged filter can starve the engine of oil, leading to catastrophic failure.
- Overheating: Oil helps cool the engine. Dirty oil loses its ability to dissipate heat efficiently, potentially causing overheating.
Understanding these risks highlights the importance of timely Toyota Tacoma oil filter replacement. It’s not just about changing the oil; it’s about changing the filter too. Always replace the filter every time you change your oil. This ensures your Tacoma gets the clean, effective lubrication it needs to conquer any road.
Knowing Your Tacoma’s Oil Filter: Cartridge vs. Spin-On
Before you dive into the replacement process, it’s vital to know which type of oil filter your Toyota Tacoma uses. Tacomas, especially newer generations, feature different oil filter designs. Knowing this helps you buy the correct part. It also ensures you have the right tools for the job.
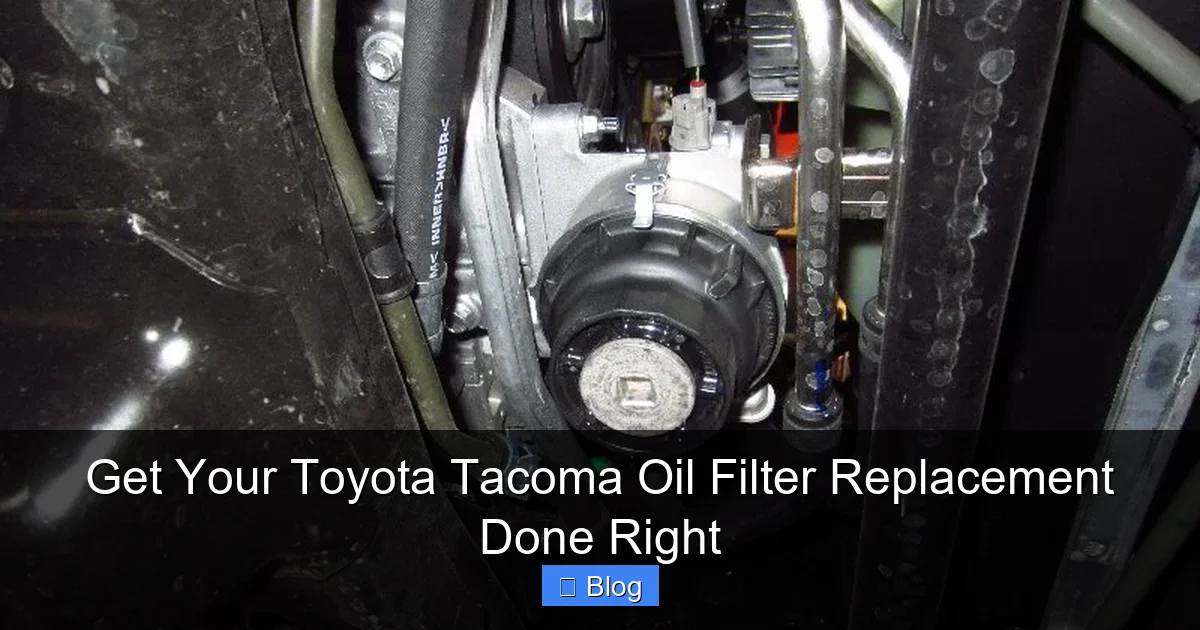
Visual guide about Get Your Toyota Tacoma Oil Filter Replacement Done Right
Image source: paulstravelpictures.com
Cartridge-Style Oil Filters (Common in 3rd Gen Tacomas)
Many modern Toyota vehicles, including 3rd generation Tacomas (2016-present) with the V6 3.5L 2GR-FKS engine, use a cartridge-style oil filter. This design differs significantly from traditional spin-on filters. The filter element itself is a replaceable paper cartridge. It sits inside a reusable housing, usually made of plastic or aluminum. This housing screws onto the engine block. The advantage here is less waste, as only the filter element is discarded. However, this design requires a specific oil filter housing wrench to remove the cap.
Spin-On Oil Filters (Common in Older Tacomas)
Older Toyota Tacoma models, such as 2nd generation Tacomas (2005-2015) with the 4.0L V6 1GR-FE engine, often utilize a spin-on oil filter. This is the more traditional type of filter. It’s a self-contained metal canister. You simply unscrew the old canister and spin on a new one. While simpler in concept, it still requires a filter wrench for removal. Sometimes, these can be quite tight.
How to Identify Your Filter Type
The easiest way to determine your Tacoma’s oil filter type is to check your owner’s manual. It will specify the exact part number and style. You can also look under your truck. The cartridge filter housing is typically a plastic or metal cap. It’s usually located towards the front of the engine, under the skid plate. A spin-on filter looks like a small metal can. If you’re still unsure, provide your Tacoma’s year, make, and model (and engine size) to your local parts store. They can quickly tell you which filter you need for your Toyota Tacoma oil filter replacement.
Gear Up! Essential Tools and Supplies for the Job
Having the right tools and supplies makes your Toyota Tacoma oil filter replacement project smooth and hassle-free. Don’t start until you have everything ready. This prevents frustrating delays and ensures a proper job.
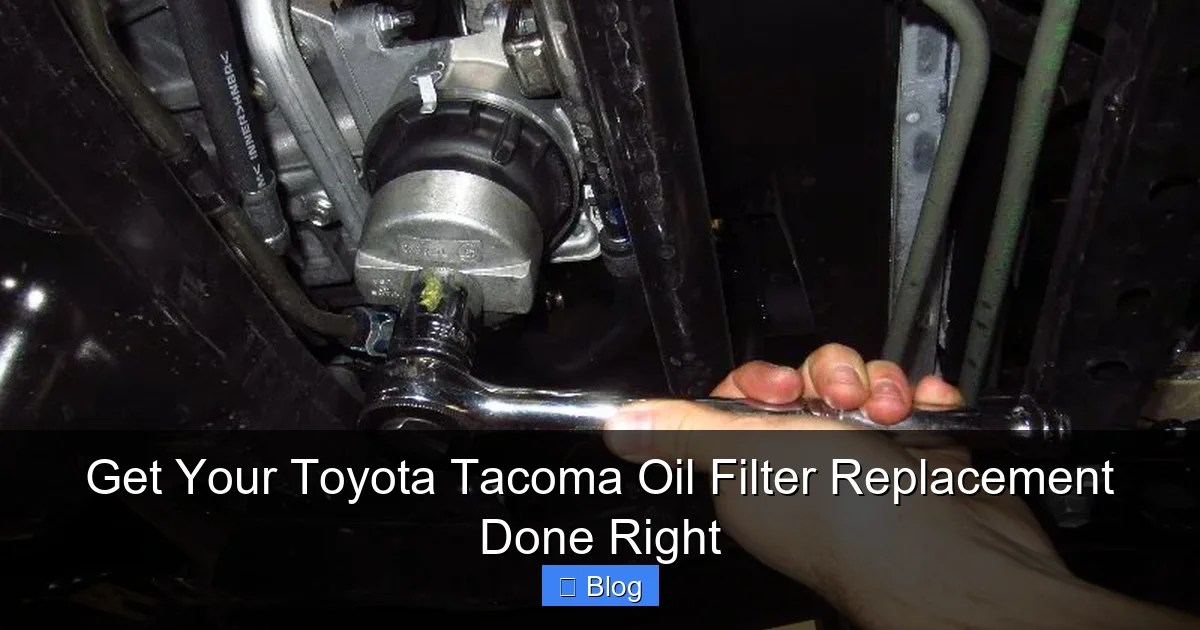
Visual guide about Get Your Toyota Tacoma Oil Filter Replacement Done Right
Image source: paulstravelpictures.com
Must-Have Tools:
- Socket Wrench Set: You’ll need various sizes, particularly for the drain plug (often 14mm or 17mm) and potentially for the oil filter housing.
- Oil Filter Wrench: This is crucial. For cartridge filters, you’ll need a specific cap wrench that fits your filter housing (e.g., 64mm with 14 flutes for 3rd Gen V6 Tacomas). For spin-on filters, a band-style or claw-style wrench will work.
- Torque Wrench: Essential for tightening the drain plug and filter housing to the manufacturer’s specified torque. This prevents over-tightening (which can damage threads) or under-tightening (which can cause leaks).
- Drain Pan: A large capacity pan is needed to collect the old engine oil. Make sure it can hold at least 6-7 quarts.
- Funnel: For mess-free refilling of new oil into the engine.
- Jack and Jack Stands: Absolutely critical for safety. You’ll need to lift the front of your Tacoma to access the drain plug and filter. NEVER rely solely on a jack. Always use sturdy jack stands.
- Wheel Chocks: To prevent the truck from rolling while lifted.
- Gloves: Protect your hands from hot oil and grime.
- Shop Rags or Paper Towels: For cleaning up spills.
- Safety Glasses: Protect your eyes from splashes.
Essential Supplies:
- New Toyota Tacoma Oil Filter: Purchase the correct filter for your specific year and engine. For cartridge filters, ensure it comes with all necessary O-rings and gaskets (main O-ring for the housing, and a smaller O-ring for the drain valve).
- Engine Oil: Refer to your owner’s manual for the correct oil type (e.g., 0W-20 synthetic for 3rd Gen Tacomas) and capacity. Always use high-quality oil that meets Toyota’s specifications. Tacomas typically require 6.1-6.2 quarts (approx. 5.8-5.9 liters) with a filter change. It’s a good idea to buy a bit more than the exact capacity, just in case.
- Crush Washer / Gasket for Drain Plug: Many drain plugs use a crush washer that should be replaced with every oil change to ensure a leak-free seal. These usually come with the new oil filter kit or can be purchased separately.
Having everything laid out and ready before you start will make the Toyota Tacoma oil filter replacement process much more efficient and enjoyable. Double-check your owner’s manual for specific torque specifications and oil capacities for your model.
Your Step-by-Step Guide to a Flawless Tacoma Oil Filter Replacement
Now that you’re prepped with knowledge and tools, let’s get down to the actual Toyota Tacoma oil filter replacement. Follow these steps carefully for a successful and leak-free job.
Safety First: Lifting and Securing Your Tacoma
This is the most critical step. Never work under a vehicle supported only by a jack.
- Park on a Level Surface: Ensure your Tacoma is on flat, stable ground.
- Engage Parking Brake: Set the parking brake firmly.
- Chock Rear Wheels: Place wheel chocks behind the rear wheels to prevent any movement.
- Lift the Front: Use your floor jack to lift the front of the Tacoma. Place the jack under a sturdy frame point, such as the front cross member.
- Place Jack Stands: Position jack stands under the frame rails, near the front wheels. Ensure they are securely seated.
- Lower onto Jack Stands: Slowly lower the jack until the Tacoma rests securely on the jack stands. Give it a gentle shake to confirm stability. Remove the floor jack from under the vehicle, or leave it just barely touching a lift point as an extra precaution (but not bearing weight).
It’s often helpful to warm up the engine for a few minutes before draining the oil. Warm oil flows more easily, allowing for a more complete drain. Just be careful, as the oil will be hot!
Draining the Old Oil
- Locate the Drain Plug: The oil pan drain plug is typically found at the bottom of the oil pan, which is under the engine.
- Position Drain Pan: Place your oil drain pan directly under the drain plug. Ensure it’s large enough to hold all the old oil.
- Remove Drain Plug: Using your socket wrench, carefully loosen and remove the drain plug. Be ready for the oil to flow out immediately. Let the oil drain completely. This can take 10-15 minutes.
- Replace Crush Washer: Once the oil flow slows to a trickle, clean around the drain hole. Replace the old crush washer on the drain plug with a new one.
- Reinstall Drain Plug: Thread the drain plug back into the oil pan by hand first to avoid cross-threading. Then, use your torque wrench to tighten it to the manufacturer’s specifications (check your owner’s manual, typically around 27-30 ft-lbs for many Tacomas). Do not overtighten!
Removing the Old Filter Element (Cartridge Filter Specifics)
For cartridge filters (e.g., 3rd Gen Tacoma V6):
- Locate Filter Housing: The cartridge filter housing is usually located at the front, lower part of the engine, often covered by a small access panel or directly visible behind the skid plate.
- Install Drain Tool: Most cartridge housings have a small drain nipple or cap at the bottom. Screw in the special plastic drain tool (often supplied with the new filter) into this nipple. This allows the oil from inside the housing to drain into your pan, minimizing mess.
- Remove Filter Housing Cap: Once the oil drains from the housing, use your specific oil filter cap wrench and socket wrench to carefully loosen and remove the filter housing cap. It will unscrew counter-clockwise.
- Remove Old Filter: Pull the old filter cartridge straight out from the housing.
- Remove Old O-rings: Carefully remove the large O-ring from the filter housing cap and the smaller O-ring from the drain valve nipple using a pick tool or small screwdriver.
For spin-on filters (e.g., 2nd Gen Tacoma V6):
- Locate Spin-On Filter: It’s usually on the side or bottom of the engine.
- Position Drain Pan: Place your drain pan under the filter, as oil will spill.
- Remove Filter: Use your spin-on oil filter wrench to loosen the old filter. Once loose, unscrew it by hand. Be prepared for oil to dribble out.
Prepping the New Filter
This step is crucial for preventing leaks and ensuring proper function of your Toyota Tacoma oil filter replacement.
- Install New O-rings (Cartridge Filters): Lubricate the new large O-ring with fresh engine oil. Install it onto the filter housing cap in the same groove as the old one. Lubricate and install the smaller O-ring onto the drain valve nipple.
- Install New Filter Cartridge: Push the new filter cartridge firmly onto the center post of the filter housing cap. It should click into place.
- Lubricate Gasket (Spin-On Filters): For spin-on filters, apply a thin film of fresh oil to the rubber gasket of the new filter. This helps ensure a good seal and prevents it from sticking.
Installing the New Filter and Drain Plug
- Install New Filter:
- Cartridge: Carefully thread the filter housing cap (with the new filter and O-rings) back into the engine block. Hand-tighten until snug.
- Spin-On: Thread the new spin-on filter onto the engine by hand.
- Torque to Spec: Use your torque wrench to tighten the filter housing cap or spin-on filter to the manufacturer’s specified torque (e.g., 18 ft-lbs or 25 Nm for the cartridge housing, and typically hand-tight plus 3/4 turn for spin-on filters, but always confirm your specific model’s requirements). Do not overtighten! Overtightening can damage the plastic housing or crush the O-rings, leading to leaks.
- Clean Up: Wipe away any spilled oil from the filter area and the drain plug.
Refilling with Fresh Oil
- Lower Tacoma: Carefully use your jack to lift the Tacoma slightly, remove the jack stands, and then lower the vehicle completely to the ground. This ensures an accurate oil level reading.
- Open Oil Cap: Locate and remove the oil filler cap on top of your engine.
- Insert Funnel: Place your funnel into the oil filler opening.
- Add New Oil: Slowly pour the correct amount and type of new engine oil into the engine. Refer to your owner’s manual for the exact capacity. A 3rd Gen Tacoma V6 usually takes about 6.1-6.2 quarts (approx. 5.8-5.9 liters) with a filter change.
- Check Oil Level: After pouring, wait a few minutes for the oil to settle. Remove the dipstick, wipe it clean, reinsert it fully, and then pull it out again. Check the oil level. It should be between the “low” and “full” marks. Add more oil in small increments if needed, rechecking each time.
- Replace Oil Cap: Reinstall the oil filler cap securely.
Final Checks and Cleanup
- Start Engine: Start your Tacoma’s engine. Check for any warning lights on the dashboard (especially the oil pressure light). Let it run for a minute or two.
- Check for Leaks: While the engine is running, look under the truck for any oil leaks around the drain plug or the new filter housing. If you see any, shut off the engine immediately and investigate. Tighten slightly if needed, but be careful not to overtighten.
- Recheck Oil Level: Turn off the engine and wait 5-10 minutes for the oil to settle again. Recheck the dipstick one last time to ensure the oil level is correct. Adjust if necessary.
- Reset Maintenance Light: Your Tacoma might have a maintenance required light. Consult your owner’s manual for instructions on how to reset it. For many Toyota models, this involves turning the ignition to ON (engine off), holding down the trip meter reset button, and then turning the ignition off and on again.
- Dispose of Old Oil and Filter: Pour the old oil from your drain pan into empty oil containers (the ones the new oil came in work great). Take the old oil and filter to an auto parts store or local recycling center that accepts used motor oil. Never pour oil down drains or dispose of it in regular trash. This is part of responsible Toyota Tacoma oil filter replacement.
Common Pitfalls and Pro Tips for Tacoma Owners
Even a straightforward task like Toyota Tacoma oil filter replacement can go wrong if you’re not careful. Here are some common mistakes to avoid and pro tips to ensure a perfect job every time.
Mistakes to Avoid:
- Not Using Jack Stands: As emphasized, safety is paramount. Never work under a vehicle without proper support.
- Overtightening: This is a very common mistake. Overtightening the drain plug can strip the threads on your oil pan, leading to expensive repairs. Overtightening the filter housing can crack it or damage the O-rings, causing leaks. Always use a torque wrench.
- Forgetting O-rings/Gaskets: For cartridge filters, forgetting to replace the old O-rings with the new ones will almost guarantee a leak. For spin-on filters, forgetting to oil the gasket or using a damaged gasket can also cause leaks.
- Using the Wrong Oil Type or Filter: Always consult your owner’s manual for the correct oil viscosity (e.g., 0W-20) and specifications. Likewise, ensure you have the exact correct oil filter for your specific Tacoma model and engine.
- Cross-threading: Always start threading the drain plug and filter housing by hand. If it doesn’t turn easily, you’re likely cross-threading. Stop, back it out, and try again.
- Not Cleaning Up Spills: Oil spills are not only messy but can also be a fire hazard. Clean up immediately.
Pro Tips for a Smoother Replacement:
- Consider a Fumoto Valve: For an even cleaner oil change experience, consider installing a Fumoto or similar quick-drain valve on your oil pan. This replaces your drain plug and allows you to drain oil with a simple lever, without needing tools or worrying about crush washers.
- Use a Filter Wrench Extender: Sometimes, the oil filter or housing is in an awkward spot. A universal joint or an extension for your wrench can make access much easier.
- Check for Leaks Later: Even after your initial check, drive your Tacoma for a day or two and then recheck under the vehicle and your driveway for any signs of fresh oil leaks.
- Keep Records: Note down the date and mileage of your Toyota Tacoma oil filter replacement. This helps you track your maintenance schedule.
- Buy a Quality Filter: Don’t skimp on the oil filter. OEM (Original Equipment Manufacturer) Toyota filters are always a safe bet, or reputable aftermarket brands. A good filter is an inexpensive way to protect your engine.
When to Schedule Your Next Tacoma Oil Filter Replacement
Knowing the right interval for your Toyota Tacoma oil filter replacement is just as important as knowing how to do it. Adhering to the recommended schedule ensures continuous engine protection and optimal performance.
Consult Your Owner’s Manual
The absolute best source for your specific Tacoma’s oil and filter replacement interval is your owner’s manual. Toyota provides detailed service schedules based on normal and severe driving conditions. Typically, for modern Tacomas using synthetic oil, the recommended interval for an oil and filter change is every 10,000 miles or 12 months, whichever comes first. However, always verify this for your specific model year and engine.
Consider Your Driving Conditions
While the owner’s manual provides a general guideline, certain driving conditions can warrant more frequent oil and filter changes. Consider a “severe service” schedule if you often:
- Tow Heavy Loads: Pulling trailers or hauling heavy cargo puts extra stress on your engine and oil.
- Drive in Dusty Conditions: Dirt roads or construction zones can introduce more contaminants into your engine.
- Drive in Extreme Temperatures: Very hot or very cold climates can degrade oil faster.
- Make Frequent Short Trips: If most of your driving involves short distances where the engine doesn’t fully warm up, moisture and contaminants can build up more quickly.
- Off-Road Regularly: Off-roading subjects your truck to harsh conditions, dust, and varying engine loads.
If any of these apply to you, consider performing your Toyota Tacoma oil filter replacement every 5,000 miles or 6 months. It’s a small price to pay for extended engine life.
Monitoring Your Oil
While relying on mileage and time is standard, you can also keep an eye on your oil’s condition. Regularly check your dipstick for proper level and color. New oil is typically golden amber. Over time, it will darken. Very dark, gritty, or milky oil indicates it’s time for a change, regardless of mileage. However, never rely solely on visual inspection. Stick to your manual’s recommendations or the severe service schedule if applicable.
Conclusion
You’ve done it! Successfully completing your Toyota Tacoma oil filter replacement is a rewarding experience. You’ve not only saved money but also gained valuable insight into your truck’s maintenance needs. More importantly, you’ve taken a crucial step in ensuring your Tacoma’s engine remains healthy, efficient, and ready for whatever lies ahead.
Remember, regular maintenance is the cornerstone of vehicle longevity. By prioritizing tasks like the Toyota Tacoma oil filter replacement, you’re investing in your truck’s future. Keep this guide handy for your next oil change, and continue to empower yourself with the knowledge to care for your trusted Toyota Tacoma. Happy trails, and enjoy the peace of mind that comes with a well-maintained machine!
Frequently Asked Questions
How important is it to use a torque wrench for my Tacoma’s oil filter replacement?
Using a torque wrench is highly important for your Tacoma’s oil filter replacement. It ensures that both the drain plug and the oil filter housing are tightened to the manufacturer’s exact specifications. This prevents costly issues like stripped threads from overtightening or leaks from undertightening, ensuring a secure and leak-free seal.
Can I reuse the old crush washer on my Tacoma’s drain plug?
While some people might reuse an old crush washer, it is strongly recommended to replace it every time you perform a Toyota Tacoma oil filter replacement. The crush washer is designed to compress and create a tight seal, and reusing an old one significantly increases the risk of oil leaks from the drain plug.
What’s the difference between a cartridge and a spin-on oil filter?
A spin-on oil filter is a self-contained metal canister that screws directly onto the engine block, whereas a cartridge filter is a replaceable paper element that sits inside a reusable housing. Many newer Tacomas use cartridge filters, which are often considered more environmentally friendly as only the element is discarded, while older models commonly use spin-on filters.
What should I do if I find an oil leak after my oil filter replacement?
If you discover an oil leak after your Toyota Tacoma oil filter replacement, first turn off the engine and carefully recheck the drain plug and the oil filter housing. Ensure they are tightened to the correct torque specifications and that all O-rings and gaskets were properly installed and seated. A common cause for leaks is improperly installed O-rings or an overtightened/undertightened component.
Is it okay to use conventional oil in my Toyota Tacoma instead of synthetic?
Always refer to your Toyota Tacoma’s owner’s manual for the recommended oil type and viscosity. Most modern Tacomas, especially 3rd Gen models, are designed to use full synthetic oil (e.g., 0W-20). Using conventional oil when synthetic is specified can compromise engine performance, lead to premature wear, and may even void your warranty.
How do I dispose of my old oil and oil filter responsibly?
After your Toyota Tacoma oil filter replacement, drain the old oil into a sealable container (like the jugs the new oil came in). Take both the used oil and the old oil filter to an authorized recycling center or an auto parts store that accepts used motor oil and filters. Never pour used oil down drains, onto the ground, or into regular trash, as it is a hazardous waste.

Sagor Jahan is the founder and author of Automopromo.com, dedicated to delivering insightful tips, reviews, and updates in the automotive and promotional industry. With a passion for innovation and clear guidance, Sagor helps readers make informed decisions and stay ahead in the ever-evolving automotive world.

