
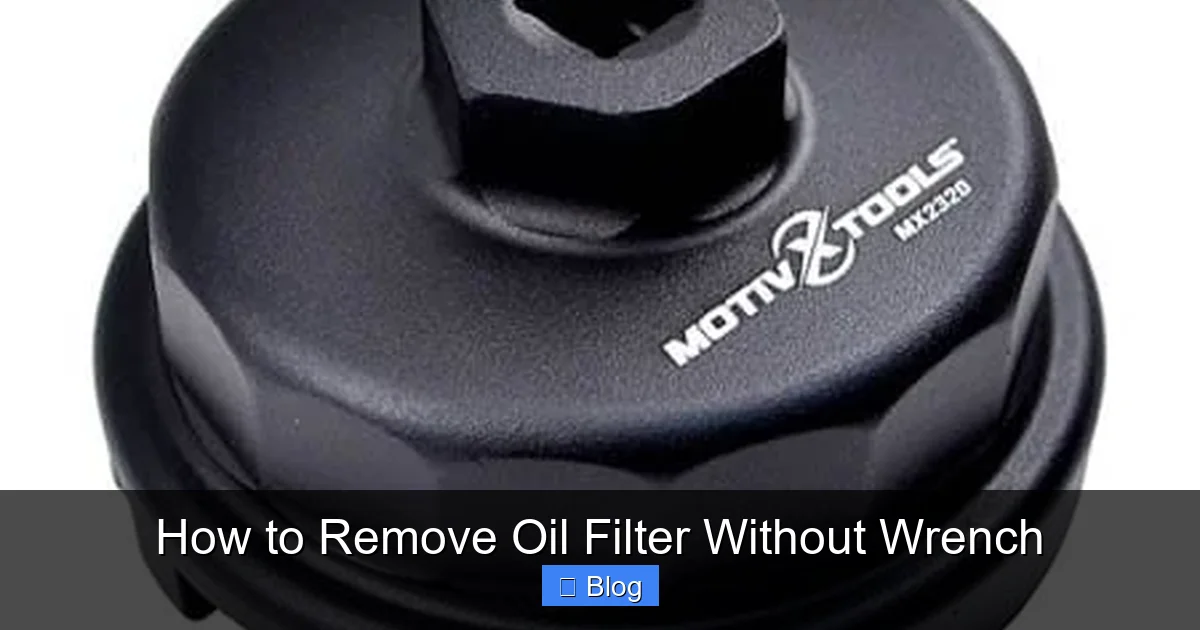
How to Remove Oil Filter Without Wrench Mercedes? You can remove a Mercedes oil filter without a wrench by using your hand if it is loose enough, or by creating extra grip with a rubber glove, cloth, or sandpaper. These materials increase friction, making it easier to twist the oil filter counterclockwise and loosen it safely without special tools.
Sometimes oil filters become tight due to heat and pressure inside the engine. In this case, using a thick cloth, belt, or rubber strap around the filter can provide better grip and leverage. This simple trick helps loosen the filter while preventing damage to the filter housing.
However, always ensure the engine is cool before attempting removal to avoid burns. Removing the oil filter carefully also prevents oil spills and protects surrounding engine components. If the filter is extremely stuck, using a proper oil filter wrench is still the safest option.
How to Remove Oil Filter Without Wrench
Picture this: It’s Saturday morning, the sun is shining, and you’re finally getting around to that long-overdue oil change. You’ve got the fresh oil, the drain pan is ready, and the new filter is sitting patiently. You drain the old oil, grab your tools, and then it hits you. The oil filter wrench is nowhere to be found. Or perhaps, the filter is just so incredibly stuck that your usual wrench can’t get a grip.
Don’t despair! Removing an oil filter without a wrench might seem like a daunting task, but it’s a common predicament with several ingenious DIY solutions. This comprehensive guide will walk you through various methods to safely and effectively remove a stubborn oil filter without a dedicated wrench. We’ll cover everything from crucial safety precautions to step-by-step instructions for different techniques, essential tips, and even what to do when things don’t go exactly as planned. Get ready to conquer that stuck filter and get your ride running smoothly again!
Key Takeaways
- Prioritize Safety: Always ensure your vehicle is secure and you’re wearing appropriate protective gear before attempting any oil filter removal.
- Multiple DIY Methods: There are several effective ways to remove a stubborn oil filter without a dedicated wrench, including the screwdriver pierce, sandpaper grip, and improvised belt/strap.
- Screwdriver Method is a Last Resort: While effective, piercing the filter with a screwdriver is destructive and messy; use it only when other, less invasive methods fail.
- Grip is Crucial: For many methods, enhancing your grip on the filter using sandpaper, rubber gloves, or a sturdy cloth can make all the difference.
- Leverage is Your Friend: When using improvised straps or tools like channel locks, focus on creating good leverage and applying steady, firm pressure to prevent damage.
- Patience Prevents Problems: A stuck filter requires patience. Rushing can lead to damage, spills, or injury. Take your time with each step.
- Proper Installation is Key: Always clean the mounting surface, lubricate the new filter’s gasket, and hand-tighten the new filter only to prevent future removal difficulties and leaks.
Quick Answers to Common Questions
Why is my oil filter so tight?
Oil filters are often overtightened during installation, either by a mechanic or a previous DIYer. Additionally, the rubber gasket can “bake on” over time due to engine heat, creating a very strong seal.
Can I reuse an oil filter?
Absolutely not. An oil filter is designed for a single use. It traps contaminants, and reusing it would reintroduce those contaminants into your fresh oil, quickly degrading its quality and potentially harming your engine.
What if I accidentally strip the oil filter mounting threads?
If you suspect you’ve stripped the threads on the engine block where the oil filter attaches, stop immediately. This is a serious issue that requires professional repair. Driving with stripped threads can lead to massive oil leaks and catastrophic engine damage.
Is it okay to drive my car with an oil filter that’s leaking slightly?
No. Even a slight oil leak from the filter can quickly turn into a significant loss of engine oil, leading to dangerously low oil levels. This can cause severe engine wear or even complete engine failure. Address any leaks immediately.
How often should I change my oil filter?
It’s generally recommended to change your oil filter every time you change your engine oil. This ensures that the new, clean oil is filtered effectively from the start, maximizing your engine’s protection.
Safety First: Preparing for Oil Filter Removal
Before you even think about twisting anything, safety must be your absolute top priority. Working under a vehicle can be dangerous if not done correctly. Taking a few moments to prepare can prevent injury and make the whole process much smoother.
Gather Your Essential Supplies
Even without an oil filter wrench, you’ll need a few common items. Gather these before you start:
- Safety Glasses: Oil can drip, spray, or splash. Protect your eyes!
- Work Gloves: Not just for grip, but also to protect your hands from hot oil and sharp edges.
- Oil Drain Pan: Essential for catching the old oil that will inevitably drip from the filter.
- Rags or Old Towels: For cleaning up spills and wiping down surfaces.
- Jack and Jack Stands: If you need to raise the vehicle for access. Never rely solely on a jack.
- Various Household Tools: Depending on the method you choose (e.g., a long flat-head screwdriver, sandpaper, an old belt, channel lock pliers, vice grips, a sturdy strap or rope).
- New Oil Filter: Have it ready for installation.
- Fresh Engine Oil: To refill your engine and lubricate the new filter’s gasket.
Prepare Your Vehicle
Proper vehicle preparation is crucial for both safety and effectiveness.
- Park on Level Ground: Ensure your vehicle is on a flat, stable surface.
- Engage Parking Brake: Always activate the parking brake to prevent the vehicle from rolling.
- Chock the Wheels: Place wheel chocks behind the rear wheels (if working on the front) or vice-versa for added security.
- Raise and Secure (If Needed): If you need more clearance, use a hydraulic jack to lift the front of your car. Once lifted, immediately place sturdy jack stands under the vehicle’s frame. Gently lower the vehicle onto the stands. Give it a slight shake to ensure it’s stable. Never work under a car supported only by a jack.
- Warm, Not Hot Engine: It’s often easier to remove an oil filter when the engine is slightly warm. This helps loosen the filter and allows oil to drain more freely. However, be cautious; a hot engine can cause severe burns. Let it cool for 15-30 minutes after running.
- Drain the Old Oil First: If you’re doing a full oil change, drain the engine oil from the sump plug before attempting to remove the filter. This reduces the amount of oil that will spill from the filter itself.
Method 1: The Trusty (But Destructive) Screwdriver Pierce
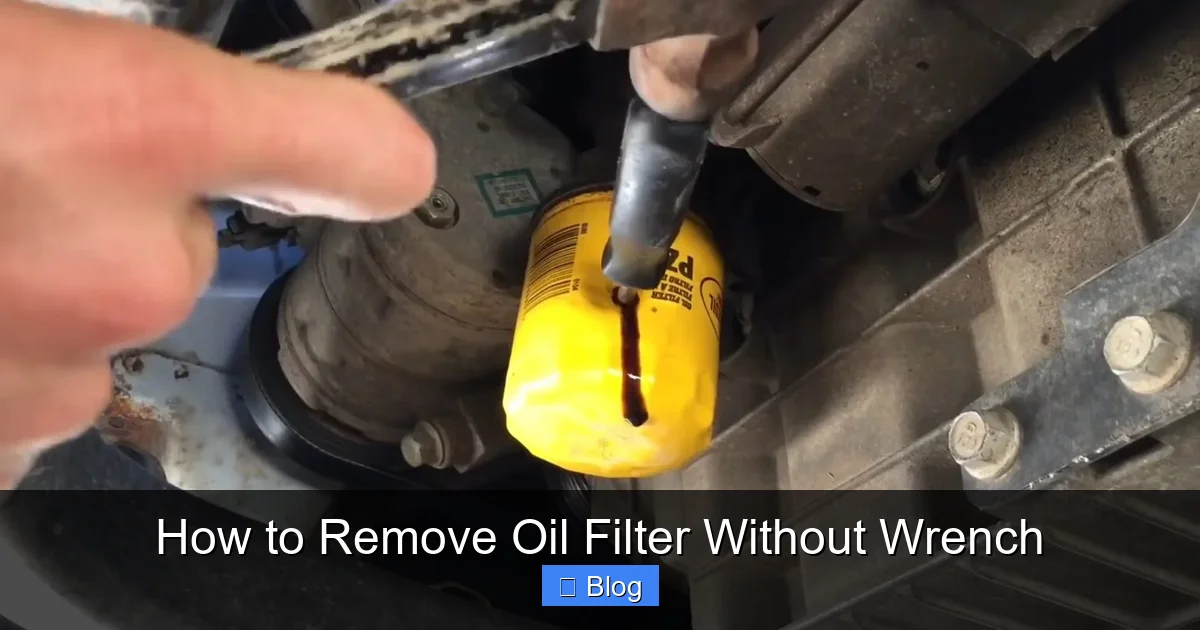
This is arguably the most common and often effective last-resort method for how to remove an oil filter without a wrench. It’s a bit aggressive and will destroy the old filter, but it works wonders on stubborn filters.
Visual guide about How to Remove Oil Filter Without Wrench
Image source: mechanicwiz.com
Step-by-Step Instructions
- Position Your Drain Pan: Place your oil drain pan directly beneath the oil filter. Be ready for oil to spill out once you pierce the filter.
- Select Your Screwdriver: Choose a long, sturdy flat-head screwdriver. It needs to be strong enough not to bend and long enough to provide good leverage once it’s through the filter.
- Carefully Pierce the Filter:
- Hold the screwdriver firmly.
- Position the tip about halfway up the side of the filter, away from the engine block (ideally on the “outboard” side).
- Using a rubber mallet or the palm of your hand, carefully tap the screwdriver through the side of the filter until it exits the other side. You’ve essentially created a handle through the filter.
- Important: Be extremely careful not to accidentally hit or pierce anything else on the engine block, especially oil lines or sensors.
- Leverage and Twist:
- With the screwdriver firmly through the filter, use it as a lever.
- Grab the handle of the screwdriver and apply steady, counter-clockwise pressure.
- The filter should begin to loosen and turn.
- Remove the Filter: Once the filter breaks loose, you can usually unscrew it by hand. Be prepared for oil to drip as you twist it off. Carefully lower it into your drain pan.
Pros and Cons
- Pros: Highly effective for extremely stuck filters; requires only a common tool.
- Cons: Destroys the filter; very messy; risk of damaging other engine components if not careful.
Tips for Success
- Use a long screwdriver for better leverage.
- Aim for the middle of the filter, away from the top where it seals to the engine.
- Don’t be afraid to apply significant force once the screwdriver is through, but always be mindful of surrounding components.
Method 2: The Grippy Solutions – Sandpaper, Gloves, or Cloth
If your filter isn’t super-glued on but just won’t give you enough grip, these methods are less invasive and often very effective. The key here is to increase friction between your hand and the filter housing.
Visual guide about How to Remove Oil Filter Without Wrench
Image source: filterspoint.com
Step-by-Step Instructions
- Ensure Filter is Clean and Dry: Wipe down the outside of the filter with a rag to remove any oil or grease. A dry surface will provide better grip.
- Choose Your Grip Enhancer:
- Sandpaper: Wrap a piece of coarse-grit sandpaper (around 80-120 grit works well) around the filter, grit side facing the filter.
- Rubber Gloves: Slip on a pair of heavy-duty rubber dishwashing gloves or mechanics gloves with a good textured grip.
- Sturdy Cloth: A thick, dry shop rag or a piece of leather can also provide extra grip.
- Grip Firmly and Twist:
- With your chosen grip enhancer in place, wrap both hands around the filter as tightly as possible.
- Apply firm, steady, counter-clockwise pressure. Try to rotate the filter.
- If it doesn’t budge immediately, try short, sharp bursts of twisting rather than continuous pressure. Sometimes a jolt is all it needs.
- Continue Until Loose: Once the filter starts to turn, it should be easier to remove by hand. Be ready for oil.
Pros and Cons
- Pros: Non-destructive; simple; requires only common household items; less messy than the screwdriver method.
- Cons: May not work on extremely tight filters; requires good hand strength and clear access.
Tips for Success
- Make sure your hands are dry, even under gloves, for the best grip.
- If using sandpaper, ensure it’s securely wrapped and doesn’t slip.
- Try turning the filter with both hands if space allows for maximum torque.
Method 3: The Improvised Strap Wrench – Belt, Rope, or Chain
This method replicates the action of a traditional strap wrench using items you might have lying around. It works by creating a loop that tightens around the filter as you apply leverage.
Step-by-Step Instructions (Using an Old Belt)
- Position Your Drain Pan: Prepare for oil drips.
- Select Your “Strap”: An old leather belt (without a buckle that could damage things), a sturdy nylon strap, a strong rope, or even a bicycle chain can work. The material needs to be strong and provide some friction.
- Wrap the Strap Around the Filter:
- Wrap the belt (or chosen strap) around the oil filter.
- Feed one end of the belt through the buckle (if it has one and is usable) or tie a knot so it forms a tight loop around the filter.
- The goal is to create a loop that can tighten as you apply pressure. For a belt without a usable buckle, wrap it around the filter and then cross the ends, pulling them tight.
- Create Leverage:
- With the belt tightly wrapped, use the free end of the belt (or a strong stick/bar inserted into the loop for a rope/chain) as a handle.
- Pull the handle in a counter-clockwise direction. The loop should tighten around the filter, providing grip.
- Ensure the strap is pulling the filter towards the “loosen” direction (counter-clockwise).
- Apply Steady Pressure and Twist:
- Apply steady, firm pressure to the handle. The friction of the strap against the filter should cause it to turn.
- If it slips, readjust the strap for a tighter grip.
- Remove the Filter: Once it breaks loose, remove the strap and unscrew the filter by hand.
Pros and Cons
- Pros: Non-destructive; can generate significant torque; uses readily available items.
- Cons: Can slip if the strap isn’t tight enough or material isn’t suitable; requires good technique.
Tips for Success
- Use a belt with a strong buckle or make sure your knot for rope is secure.
- Ensure the strap is pulling in the correct direction (counter-clockwise) and that the “handle” part provides good leverage.
- A bicycle chain wrapped around the filter can also work, especially if you can insert a screwdriver or bar into one of its links for leverage.
Method 4: The Powerful Pliers or Channel Locks
For smaller filters, or filters with good access, a large pair of slip-joint pliers (channel locks) or even vice grips can be used. This method relies on brute clamping force and twisting power.
Step-by-Step Instructions
- Position Your Drain Pan: Be ready for oil.
- Adjust the Pliers: Open the channel locks wide enough to get a firm grip around the circumference of the oil filter.
- Clamp Down Firmly:
- Place the jaws of the pliers around the filter.
- Adjust the pliers so they clamp down as tightly as possible without crushing the filter housing excessively. The goal is to grip, not to deform.
- Twist Counter-Clockwise:
- With a firm grip, apply steady, counter-clockwise pressure to the handles of the pliers.
- If the filter is very tight, you might need to apply a good amount of force.
- Re-grip and Repeat (If Necessary): If the pliers slip, re-adjust your grip and try again. Move the pliers to a different part of the filter if the housing starts to deform too much in one spot.
- Remove the Filter: Once it breaks loose, remove the pliers and unscrew the filter by hand.
Pros and Cons
- Pros: Effective for many filters; uses common tools; provides strong grip.
- Cons: Can dent or deform the filter housing; requires good hand strength and dexterity; not suitable for all filter sizes or locations.
Tips for Success
- Use the largest channel locks or vice grips you have for maximum leverage and grip.
- Try to grip the filter as close to the base (where it attaches to the engine) as possible to minimize deformation and maximize turning force.
- Avoid using regular pliers, as their grip is usually not strong enough and they are more likely to slip.
General Tips for a Smooth Removal
No matter which method you choose to remove your oil filter without a wrench, these general tips will help ensure a successful and less frustrating experience.
Patience is Your Best Friend
A stuck oil filter can be incredibly frustrating. Don’t rush or force things violently. Sudden, jerky movements can strip things, cause spills, or lead to injury. Apply steady, firm pressure, and if a method isn’t working, pause, re-evaluate, and try another approach.
“Lefty Loosey, Righty Tighty”
It sounds basic, but in a stressful situation, it’s easy to forget. Always turn the oil filter counter-clockwise to loosen it. Turning it clockwise will only make it tighter!
Cleanliness is Next to Godliness (and Prevents Future Headaches)
As you remove the old filter, be prepared for oil to drip. Having rags and your drain pan ready will help contain the mess. But more importantly, once the old filter is off, take a moment to clean the filter mounting surface on the engine block. Remove any old gasket material or debris. A clean surface ensures a proper seal for the new filter.
Warm Engine, Not Hot
As mentioned in the safety section, a slightly warm engine (cooled for about 15-30 minutes after running) can make the filter easier to remove. The metal expands slightly when warm, and the oil inside is less viscous, making it easier to break the seal. Just be sure it’s not too hot to touch.
Troubleshooting Common Hang-Ups
Even with the best preparation, things don’t always go perfectly. Here’s what to do if you encounter common issues while trying to remove an oil filter without a wrench.
The Filter Won’t Budge at All
- Try a Different Method: If sandpaper and gloves aren’t working, escalate to a screwdriver pierce or an improvised strap wrench.
- Apply More Leverage: For the strap wrench method, use a longer lever arm if possible. For the screwdriver method, ensure you have a long, strong screwdriver.
- Re-check Warmth: If the engine is completely cold, try running it for 5-10 minutes (if safe to do so) to warm things up, then let it cool slightly before trying again.
The Filter is Crushing or Deforming
- This often happens with the screwdriver pierce or pliers method if the filter housing is weak or you’re applying too much localized pressure.
- Stop and Re-evaluate: If the filter is deforming, you risk tearing it completely and making an even bigger mess, or even damaging the engine’s filter housing.
- Switch Methods: If pliers are crushing it, try a strap wrench method which distributes force more evenly. If a screwdriver is just ripping it apart, try another entry point or ensure you’re twisting, not just tearing.
- Consider a Professional: If the filter is badly damaged and still stuck, it might be time to call a mechanic.
Making a Horrible Mess
- Unfortunately, removing an oil filter without a wrench, especially the destructive methods, can be messy.
- Layer Protection: Place several layers of old newspaper or cardboard under your drain pan to catch splashes.
- Absorb Spills: Keep kitty litter, sand, or absorbent shop towels on hand to soak up any spills quickly.
- Containment: Once the filter is off, quickly transfer it to the drain pan. You can also use a plastic bag to wrap around it temporarily to contain drips as you move it.
Damaged Filter Housing or Mounting Threads
- This is a serious issue. If you notice metal shavings, cross-threading, or damage to the engine block where the filter attaches, stop immediately.
- Continuing to force it can lead to catastrophic oil leaks and severe engine damage.
- At this point, professional help is required to assess and repair the damage before installing a new filter.
Installing Your New Oil Filter (The Right Way)
Once the old, stubborn filter is off, installing the new one correctly is just as important to prevent future headaches and ensure your engine’s health. You certainly don’t want to need to learn how to remove oil filter without wrench again next time!
Clean the Mounting Surface
With the old filter off, thoroughly clean the mating surface on the engine block. Use a clean rag to wipe away any old oil, dirt, or—most importantly—any remnants of the old filter’s gasket. A smooth, clean surface is essential for a proper seal.
Lubricate the Gasket
This is a critical step that many overlook. Take a small amount of fresh engine oil and apply it to the rubber gasket on your new oil filter. A thin film of oil helps the gasket seal properly and, crucially, prevents it from sticking and making the filter incredibly difficult to remove next time.
Hand Tighten Only!
This cannot be stressed enough: new oil filters should only be tightened by hand.
- Screw the new filter onto the mounting stud until the gasket makes contact with the engine block.
- Once contact is made, tighten the filter an additional ¾ to 1 full turn by hand. Check the specific instructions on your new filter for exact torque or turns.
- Do not use any wrench (dedicated or improvised) to tighten the new filter. Overtightening can damage the filter, crush the gasket, or even strip the threads on the engine block, leading to leaks and extreme difficulty in future removal.
Check for Leaks
After refilling your engine with fresh oil and installing the new filter, start the engine. Let it run for a few minutes while you carefully inspect around the new oil filter for any signs of leaks. If you see any drips, immediately shut off the engine, re-check the filter’s tightness (by hand only!), and ensure the gasket is properly seated. Don’t drive the vehicle if it’s leaking oil.
Conclusion
So, you’ve successfully learned how to remove an oil filter without a wrench! While it might seem like a daunting challenge at first, having a few clever DIY methods in your arsenal can save you a trip to the mechanic and keep your oil change on schedule. Remember to always prioritize safety, choose the right method for your situation, and be patient. And most importantly, ensure your new filter is installed correctly, hand-tightened, and lubricated to prevent a repeat of this scenario next time. Happy wrenching (or non-wrenching)!

Sagor Jahan is the founder and author of Automopromo.com, dedicated to delivering insightful tips, reviews, and updates in the automotive and promotional industry. With a passion for innovation and clear guidance, Sagor helps readers make informed decisions and stay ahead in the ever-evolving automotive world.

