
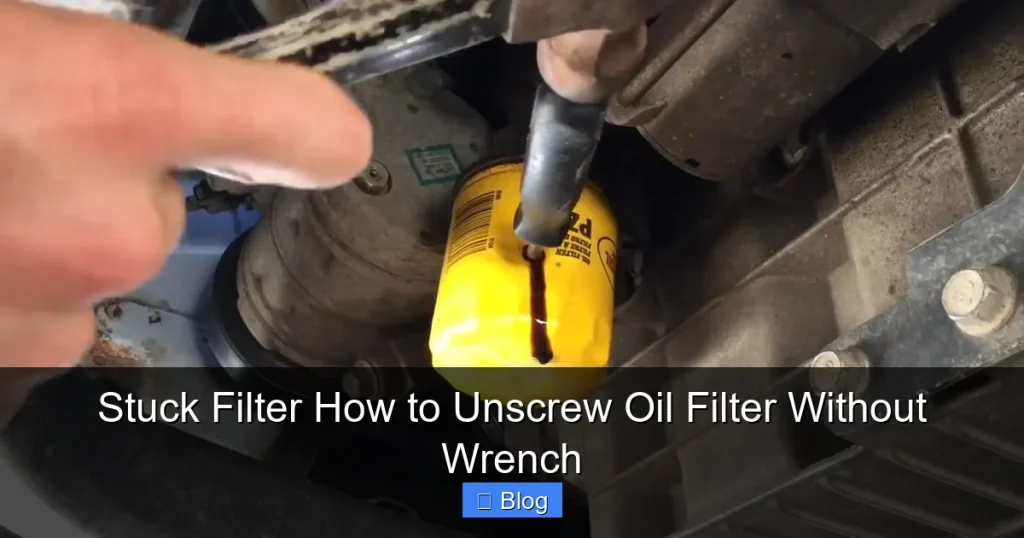
Facing a stuck oil filter with no wrench? Don’t panic! This guide shows you safe and effective ways to remove it using common household items or basic tools. Learn techniques like the strap method, sandpaper grip, and even the screwdriver trick (as a last resort!) to get your oil change done smoothly. We emphasize safety first and provide crucial tips to prevent future issues and ensure a successful oil filter removal, even without specialized tools.
If you don’t have an oil filter wrench, try using your hands first—wear rubber gloves for better grip. If it’s stuck, wrap a thick cloth, belt, or sandpaper around the filter and twist counter-clockwise. You can also use a screwdriver carefully pushed through the filter to create leverage, but expect oil to spill. Always turn gently to avoid damaging the engine mount.
Stuck Filter How to Unscrew Oil Filter Without Wrench
There’s nothing quite like the satisfaction of a successful DIY oil change. But sometimes, that satisfaction quickly turns into frustration. You’ve drained the old oil, you’re ready to swap out the filter, and then it happens: the oil filter is stuck. It won’t budge. And of course, your specialized oil filter wrench is nowhere to be found, or maybe it just isn’t gripping.
Don’t throw in the towel just yet! A stuck oil filter without a wrench can feel like a major roadblock. But with a bit of ingenuity and the right techniques, you can often unscrew that stubborn filter and get your vehicle back on track. This comprehensive guide will walk you through several proven methods to unscrew an oil filter without a wrench, focusing on safety, effectiveness, and what to do when things get really tough. You’ll learn how to use common household items and basic tools to tackle this common problem like a pro.
Key Takeaways
- Safety is Paramount: Always ensure your engine is cool, the vehicle is secure, and you have proper personal protective equipment before attempting any work.
- Assess Before Acting: Before trying any method, take a moment to understand why the filter might be stuck and choose the least invasive method first.
- Leverage Common Items: Everyday items like an old belt, sandpaper, or large pliers can often provide enough grip and leverage to unscrew a stubborn oil filter.
- The Screwdriver Method is a Last Resort: While effective, piercing the filter carries significant risks, including potential injury, damage to the filter housing, and a much messier clean-up. Use it only when all other options have failed.
- Penetrating Oil is Your Friend: A good penetrating oil can work wonders by seeping into the threads and helping to loosen the bond that’s making the filter stick.
- Correct Direction and Gentle Force: Remember to always turn counter-clockwise to loosen. Apply steady, increasing pressure rather than sudden jerks to avoid damaging the filter or yourself.
- Prevent Future Headaches: Always hand-tighten new oil filters, following manufacturer specifications, and lightly lubricate the gasket to make future removals much easier.
Quick Answers to Common Questions
What if I don’t have penetrating oil?
While dedicated penetrating oil is best, a small amount of engine oil or even transmission fluid can sometimes help to lubricate the threads and assist in loosening a stuck filter. Apply and let it soak for a while.
Which way do I turn the filter to loosen it?
Always turn an oil filter counter-clockwise to loosen it. This is universally true for standard threaded fasteners in most applications.
My filter is just spinning and tearing, what now?
If the filter casing is tearing or spinning without loosening, you’ve likely over-deformed it. At this point, you’ve exhausted most DIY methods. It’s time to call a professional mechanic who has specialized tools for severely damaged filters.
Can I use a monkey wrench or pipe wrench?
Yes, large monkey wrenches or pipe wrenches can be very effective as they offer a strong grip and excellent leverage. However, like channel lock pliers, they can deform the filter if not used carefully, so aim to grip the sturdiest part of the filter’s base.
How can I make sure my next oil filter doesn’t get stuck?
Always lubricate the new filter’s rubber gasket with a thin film of fresh engine oil before installation, and hand-tighten the filter according to the manufacturer’s specifications (usually 3/4 to 1 full turn after gasket contact). Avoid overtightening with a wrench.
Before You Begin: Safety First!
Working under your vehicle can be dangerous if you don’t take proper precautions. Your safety is the absolute priority. Do not rush, and always follow these essential safety steps before attempting to unscrew your oil filter without a wrench.
Engine Off and Cool
Ensure your engine has been off for at least an hour or two. A hot engine means hot oil and hot exhaust components, which can cause severe burns. Letting it cool also allows the oil to drain back into the pan, making less of a mess.
Vehicle Secure
If you’re lifting your car, always use a proper jack and then immediately support the vehicle with sturdy jack stands on a flat, level surface. Never rely solely on a jack. Engage the parking brake and block the wheels not being lifted.
Personal Protective Equipment (PPE)
- Gloves: Protect your hands from hot oil, sharp edges, and chemicals. Nitrile or mechanic’s gloves are ideal.
- Eye Protection: Safety glasses are a must to shield your eyes from splashing oil or debris.
- Old Clothes: You’re going to get dirty. Wear clothes you don’t mind ruining.
- Creeper or Cardboard: Make yourself comfortable if you’re working underneath the car.
Gather Your Supplies
Even without a specialized wrench, you’ll need some basic items nearby:
- Oil drain pan
- New oil filter and fresh engine oil
- Shop rags or paper towels (lots of them!)
- Penetrating oil (like WD-40 or PB Blaster)
- Maybe an old belt, a piece of sandpaper, large pliers, or a sturdy screwdriver.
Method 1: The Strap Wrench (DIY Version)
This is often the first and safest method to try when you need to unscrew an oil filter without a wrench. It leverages friction and leverage.
Using a Belt or Strap
Find an old leather belt, a sturdy fabric strap (like from a backpack or tie-down), or even a strong piece of rope. The idea is to create a makeshift strap wrench.
- Wrap it Tight: Loop the belt or strap around the circumference of the oil filter. Ensure it’s as tight as you can get it.
- Direction Matters: You’ll be turning the filter counter-clockwise to loosen it. Position the strap so that when you pull on it, the force rotates the filter in this direction. For example, if you’re looking at the bottom of the filter, wrap the strap around it and pull it towards your left.
How to Apply and Turn
Once the strap is wrapped, you need to create leverage.
- Grip Firmly: Hold the ends of the belt or strap firmly in one hand, pulling them together to tighten the loop around the filter.
- Apply Leverage: With your other hand, grip the part of the strap that extends away from the filter and pull with steady, increasing force. The goal is to make the strap grip the filter, then use that grip to rotate it.
- Small Turns: Often, the initial break is the hardest. Once you get it to move even a millimeter, the rest becomes much easier.
Practical Tip: If you have a strong friend nearby, one person can hold the strap tight while the other applies the turning force. This method is effective because it distributes the force evenly around the filter, reducing the risk of crushing it.
Method 2: Sandpaper or Rough Cloth
Sometimes, the filter is just too slippery to get a good hand grip, especially if it’s covered in oil or grime. Sandpaper or a rough cloth can provide the extra friction you need.
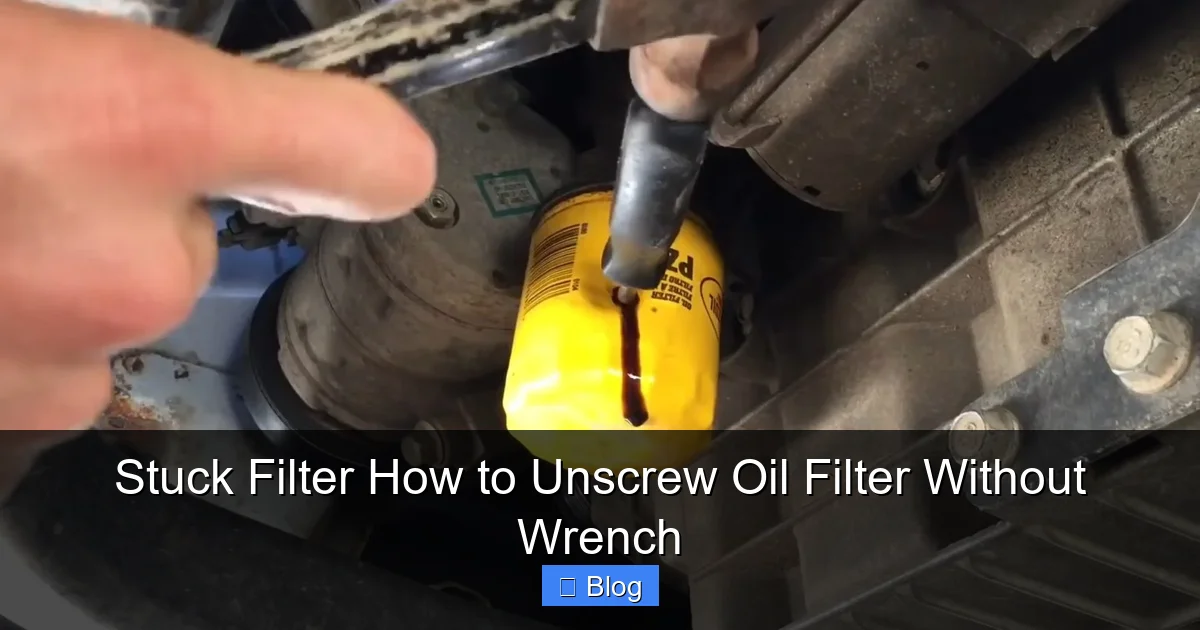
Visual guide about Stuck Filter How to Unscrew Oil Filter Without Wrench
Image source: mechanicwiz.com
Increasing Grip
Get a piece of coarse sandpaper (around 60-80 grit) or a very rough piece of fabric, like a denim scrap or an old towel. Make sure it’s clean enough not to introduce more grime.
- Wrap and Grip: Wrap the sandpaper (rough side towards the filter) or cloth around the oil filter.
- Hand Power: With your bare hands (or gloves for protection), firmly grip the filter over the sandpaper/cloth. The sandpaper acts as an intermediary, significantly increasing your grip.
Twisting Action
Once you have a solid grip, twist the filter counter-clockwise with a steady, strong motion. This method relies purely on your hand strength and the increased friction. It’s best for filters that are only moderately stuck or just too greasy to grip by hand.
Practical Tip: If you still can’t get enough leverage with just your hands, you can combine this method with the strap method. Wrap the sandpaper around the filter first, then apply your DIY strap wrench over the sandpaper. This gives you both enhanced grip and leverage.
Method 3: Channel Lock Pliers or Large Adjustable Wrench
If you have access to large pliers, like channel locks or water pump pliers, or a really big adjustable wrench, these can be quite effective. They provide immense gripping power.
The ‘Bite’ Method
Adjust your pliers or wrench to grip the oil filter as tightly as possible around its circumference. You want the jaws to bite into the filter’s metal casing slightly, but not crush it immediately.
- Position Correctly: Place the jaws around the thickest part of the filter housing, near the base where it screws into the engine block. This is the strongest part of the filter and least likely to deform excessively.
- Tighten the Grip: Adjust the pliers/wrench until they are biting firmly into the filter.
Applying Pressure and Turning
Once gripped, apply steady, strong force counter-clockwise to turn the filter.
- Even Pressure: Try to apply pressure evenly. You’re aiming to rotate the filter, not deform it into an oval.
- Rotate and Re-grip: If you can only get a small turn, release the pliers, re-grip, and repeat. Each small turn helps.
Caution: This method can deform the filter and potentially make it harder to remove if done improperly. Be careful not to crush the filter too much, which could make it slip more or even tear, leading to a much bigger mess and a more difficult removal.
Method 4: The Screwdriver (Last Resort!)
This is arguably the most aggressive and potentially messiest method. It should only be attempted when all other, less invasive options have failed. It involves piercing the filter body.
Understanding the Risk
Before you even think about this, understand the dangers. You’ll be creating a hole in the filter, which means hot, old oil will likely pour out immediately. There’s also a risk of the screwdriver slipping, causing injury to yourself or damaging other engine components. Additionally, if the filter tears, you might be left with an even worse situation.
The Piercing Technique
You’ll need a long, sturdy, flat-head screwdriver (at least 12-18 inches) and a hammer or mallet.
- Position Carefully: Choose a spot on the side of the filter, preferably close to the base but not directly at the very top or bottom. Angle the screwdriver so that when you hammer it through, it passes through the filter and ideally out the other side. This creates a leverage point. Avoid piercing the very top or bottom of the filter, as you risk hitting the engine block or the internal filter element, making leverage difficult.
- Hammer Through: Using the hammer, carefully and firmly tap the end of the screwdriver until it pierces through both sides of the filter housing. Be ready for oil to gush out. Have your drain pan directly underneath.
Applying Torque
Once the screwdriver is through, it becomes a makeshift handle for leverage.
- Leverage Point: Grab the screwdriver handle and use it to turn the filter counter-clockwise. You’ve essentially created a strong T-bar through the filter.
- Steady Force: Apply steady pressure. The filter may tear further, but with the screwdriver acting as a rigid bar, you should be able to unscrew it.
Warning: This method makes a significant mess. Be prepared with plenty of rags and your drain pan. It also compromises the structural integrity of the filter, so work carefully to avoid further tearing that could leave you with a harder-to-grip remnant.
General Tips for All Methods
Regardless of which method you choose, these tips can increase your chances of success when you need to unscrew an oil filter without a wrench.
Double-Check Rotation
Always remember: “Righty tighty, lefty loosey.” You need to turn the filter counter-clockwise to loosen it. It’s easy to get disoriented when working in tight spaces.
Tap it Lightly
Sometimes, a few light taps around the circumference of the filter with a rubber mallet can help break the seal or loosen any corrosion on the threads. Don’t hit it hard enough to dent or crush it.
Lubricate the Base
Apply penetrating oil (like WD-40, PB Blaster, or a similar product) around the base where the filter meets the engine block. Let it soak for 10-15 minutes, or even longer if it’s very stubborn. The oil can seep into the threads and help break the bond. You might need to reapply.
Patience is Key
A stuck filter rarely comes off with a single heroic yank. Apply steady, increasing pressure. Work slowly. If one method isn’t working after a few attempts, switch to another rather than forcing it to the point of damage.
Clean Up As You Go
Have plenty of rags ready. Oil spills are easier to clean up immediately rather than letting them spread and dry.
Troubleshooting: When It Just Won’t Budge
Even with the best DIY methods, some filters are just incredibly stubborn. If you’ve tried everything above and the filter still won’t move, or if you’ve damaged the filter casing to the point where no method works, it’s time to consider your options.
Re-evaluate the Situation
Take a step back. Is there anything you missed? Is there another angle you can approach it from? Sometimes, a short break can help you see the problem with fresh eyes.
Consider Professional Help
There’s no shame in calling a professional. Mechanics have specialized tools (like heavy-duty filter wrenches, chain wrenches, or even welding tools for extreme cases) and expertise to handle truly seized filters without damaging your engine. The cost of a tow and professional removal is far less than repairing damage to your engine block or oil filter housing threads.
What *Not* to Do
- Excessive Force: Don’t apply so much force that you risk slipping and injuring yourself or damaging other engine components.
- Heat: Do not use a torch or open flame to heat the filter. This is extremely dangerous due to flammable oil and can damage engine seals.
- Ignoring the Problem: Don’t just give up and leave the old filter on. It’s crucial for your engine’s health to change your oil and filter regularly.
After the Old Filter is Off
Congratulations, you’ve successfully removed the stuck filter! Now, finish the job right.
Clean the Mounting Surface
Use a clean rag to wipe down the engine’s filter mounting surface. Make sure there are no remnants of the old gasket or any dirt/debris that could prevent a proper seal with the new filter.
Lubricate the New Filter’s Gasket
Dip your finger in some fresh engine oil and lightly coat the rubber gasket on your new oil filter. This helps create a good seal and, crucially, makes it easier to remove the filter next time.
Hand-Tighten the New Filter
Screw the new oil filter on by hand. Once the gasket makes contact with the engine block, give it about an additional 3/4 to one full turn. Do NOT overtighten with a wrench. Hand-tightening is almost always sufficient and will prevent it from getting stuck again.
Add Fresh Oil and Check for Leaks
Refill your engine with the correct amount and type of fresh engine oil. Start the engine and let it run for a minute or two. Check for any leaks around the new oil filter. If you see leaks, shut off the engine, let it cool, and tighten the filter slightly more (by hand).
Conclusion
Encountering a stuck oil filter without a wrench can be a frustrating hurdle during an oil change. However, as this guide shows, you have several effective, DIY-friendly methods at your disposal. From using a simple belt to employing the more aggressive screwdriver technique (as a last resort), preparedness, patience, and safety are your best tools. Remember to always prioritize your safety, clean up thoroughly, and most importantly, properly install the new filter to prevent future headaches. With these tips, you’re well-equipped to tackle a stubborn oil filter and keep your engine running smoothly.

Sagor Jahan is the founder and author of Automopromo.com, dedicated to delivering insightful tips, reviews, and updates in the automotive and promotional industry. With a passion for innovation and clear guidance, Sagor helps readers make informed decisions and stay ahead in the ever-evolving automotive world.

