

Facing a leaky or cracked Toyota Tundra oil filter housing? This comprehensive guide provides an easy-to-follow walkthrough for replacement, covering everything from understanding the common plastic housing issues to a detailed step-by-step installation. You’ll learn essential tools, safety tips, and post-installation checks to ensure a successful DIY project, potentially saving you significant repair costs.
Easy Toyota Tundra Oil Filter Housing Replacement Walkthrough
Are you a proud Toyota Tundra owner who’s noticed a suspicious oil leak, perhaps a drip or two accumulating under your trusty truck? Or maybe you’re simply tired of wrestling with that stubborn plastic oil filter housing every time you do an oil change? You’re not alone! Many Toyota Tundra owners eventually face issues with their factory plastic oil filter housing, often leading to leaks or difficulties during routine maintenance. The good news is that replacing this component is a completely manageable DIY project, and with a bit of guidance, you can tackle it yourself, saving a significant amount of money in labor costs.
This comprehensive guide is designed to walk you through the entire Toyota Tundra oil filter housing replacement process, step by step. We’ll cover everything from identifying the problem and gathering the right tools to executing the replacement and ensuring a leak-free outcome. Whether you’re upgrading to a more robust aluminum housing or simply replacing a damaged plastic one, you’ll find all the practical advice and tips you need right here. Let’s get your Tundra back in top shape, without those pesky oil drips!
Key Takeaways
- Common Failure Point: The factory plastic oil filter housing on many Toyota Tundras is prone to cracking and leaking, often requiring replacement.
- Upgrade Option: Many owners choose to upgrade from the OEM plastic housing to a more durable aftermarket aluminum version to prevent future issues.
- Essential Tools: A specific oil filter cap wrench (64mm, 14-flute), a torque wrench, and basic hand tools are crucial for a successful replacement.
- Safety First: Always ensure the engine is cool, the vehicle is safely supported on jack stands, and personal protective equipment is used before starting.
- Proper Torque is Key: Overtightening can cause damage, while undertightening can lead to leaks. Using a torque wrench for both the housing and drain plug is critical.
- O-Ring Replacement: Always replace all O-rings (large and small) with new ones during the oil filter and housing replacement to ensure a leak-free seal.
- Post-Replacement Checks: After installation, refill the oil, start the engine, and meticulously check for any leaks before driving the truck.
Quick Answers to Common Questions
What is the most common reason for a Toyota Tundra oil filter housing replacement?
The most common reason is that the original plastic housing can become brittle, crack, or warp over time due to heat and repeated tightening, leading to oil leaks.
Can I upgrade to an aluminum oil filter housing on my Toyota Tundra?
Yes, many Toyota Tundra owners choose to upgrade from the plastic OEM housing to a more durable aftermarket aluminum version, which is a direct replacement and less prone to cracking.
What specific wrench do I need for the Toyota Tundra oil filter housing?
You typically need a specific 64mm, 14-flute oil filter cap wrench designed for Toyota/Lexus cartridge-style oil filters. A universal strap wrench is not recommended.
What are the critical torque specifications for the oil filter housing and drain plug?
While specifications can vary slightly by model year, the oil filter housing generally requires 18-25 ft-lbs (25-34 Nm), and the engine oil pan drain plug around 29 ft-lbs (39 Nm). Always consult your owner’s manual for exact figures.
Do I need to replace the O-rings when doing a Toyota Tundra oil filter housing replacement?
Absolutely, always replace all O-rings (the large one for the housing and any smaller ones on the center post) with new ones. New O-rings usually come with your new oil filter cartridge or the replacement housing.
📑 Table of Contents
Understanding Your Toyota Tundra Oil Filter Housing
Before we dive into the nitty-gritty of the replacement, let’s take a moment to understand what we’re dealing with. Your Toyota Tundra’s oil filter housing is an integral part of its lubrication system. Unlike traditional spin-on oil filters, many modern Toyota engines, including those found in the Tundra, use a cartridge-style filter. This means the filter element itself is housed within a separate, reusable canister – the oil filter housing.
The Vulnerable Plastic Housing
The main reason many Tundra owners consider a Toyota Tundra oil filter housing replacement is the factory plastic housing. While perfectly functional when new, plastic can degrade over time due to heat cycling, exposure to engine oil, and the stress of repeated tightening and loosening during oil changes. It’s not uncommon for these plastic housings to crack, especially if overtightened, leading to frustrating oil leaks. The plastic also becomes brittle, making it susceptible to damage from impacts or even just general wear and tear. This vulnerability often prompts owners to seek a more durable solution, typically an aftermarket aluminum housing.
Symptoms of a Failing Housing
How do you know if your Toyota Tundra oil filter housing is on its way out? Here are some common tell-tale signs:
- Visible Oil Leaks: This is the most obvious sign. You might see fresh oil drips on your driveway or notice oil residue around the oil filter area itself.
- Difficulty During Oil Changes: If the housing feels unusually sticky, excessively hard to remove, or if you hear cracking noises when loosening or tightening, it might be compromised.
- Engine Light (Rare, but Possible): In severe cases of oil pressure loss due due to a large leak, the engine’s oil pressure sensor might trigger a warning light, though this is less common for housing-specific leaks.
Addressing these symptoms promptly with a Toyota Tundra oil filter housing replacement can prevent larger issues and maintain your truck’s longevity.
Gathering Your Tools and Supplies
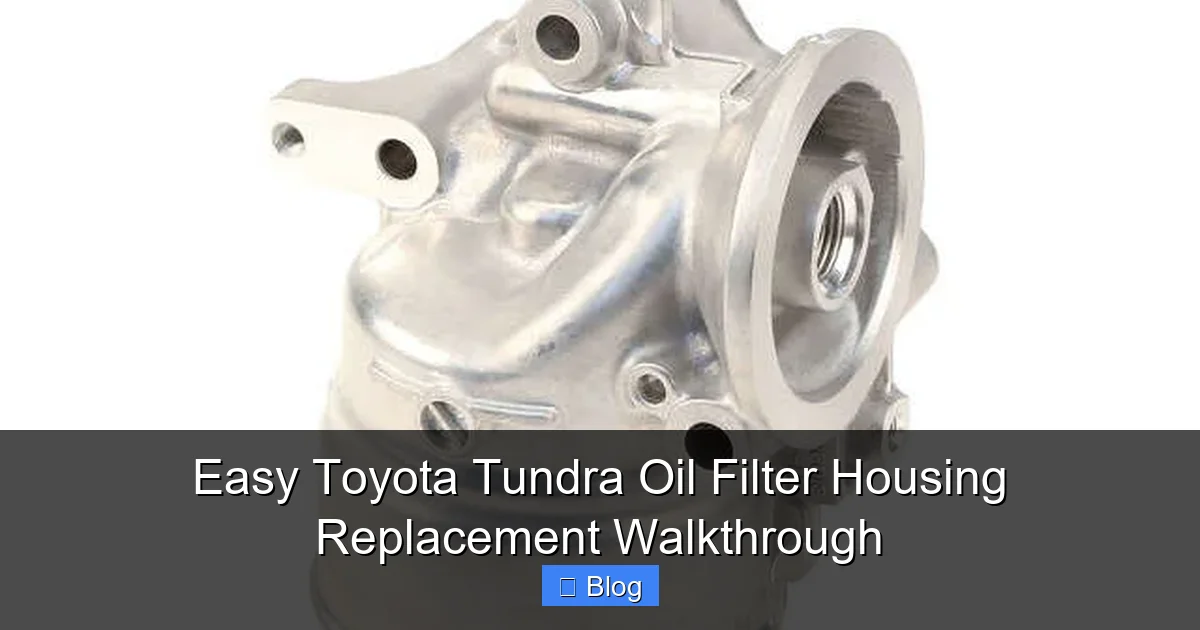
Visual guide about Easy Toyota Tundra Oil Filter Housing Replacement Walkthrough
Image source: partsgeek.com
Preparation is key to any successful DIY project, and replacing your Toyota Tundra oil filter housing is no exception. Having all your tools and parts ready before you start will make the process much smoother and prevent frustrating delays.
Essential Tools for the Job
You’ll need a mix of standard garage tools and a few specific items for this task:
- Socket Wrench Set: Various sizes, including a 14mm socket for the oil drain plug and possibly others for skid plate removal.
- Breaker Bar: For stubborn bolts.
- Torque Wrench: Absolutely critical for proper tightening of the drain plug and the new oil filter housing to prevent leaks or damage.
- Oil Filter Cap Wrench: This is a special tool. For most Tundras with the cartridge filter, you’ll need a 64mm with 14 flutes. Do NOT use a universal strap wrench, as it can damage the housing.
- Oil Drain Pan: Large enough to hold your Tundra’s full engine oil capacity (around 8-9 quarts).
- Funnel: For refilling engine oil.
- Rags or Shop Towels: Lots of them! Oil changes can get messy.
- Gloves: Protect your hands from oil and grime.
- Safety Glasses: Always protect your eyes.
- Jack and Jack Stands: Essential for safely lifting and supporting your truck. Never work under a vehicle supported only by a jack.
- Wheel Chocks: For added safety.
Choosing the Right Replacement Part
When it comes to the new oil filter housing, you generally have two main options:
- OEM Plastic Housing: If you’re simply replacing a damaged one and prefer to stick with the original design, a new OEM plastic housing is an option. It’s typically less expensive upfront.
- Aftermarket Aluminum Housing: This is a popular upgrade. Many aftermarket companies offer billet aluminum oil filter housings designed to be a direct replacement for the plastic OEM part. These are significantly more durable and less prone to cracking. While they cost a bit more initially, they offer peace of mind and are often considered a permanent fix for the plastic housing’s weaknesses.
Whichever you choose, ensure it’s specifically designed for your Toyota Tundra’s year and engine type (e.g., 5.7L V8). Also, make sure your replacement kit includes all necessary O-rings (a large one for the housing and a small one for the drain plug on the housing). It’s also a good idea to have a new oil filter cartridge and a new crush washer for your main oil pan drain plug.
The Step-by-Step Replacement Process: Pre-Replacement Steps
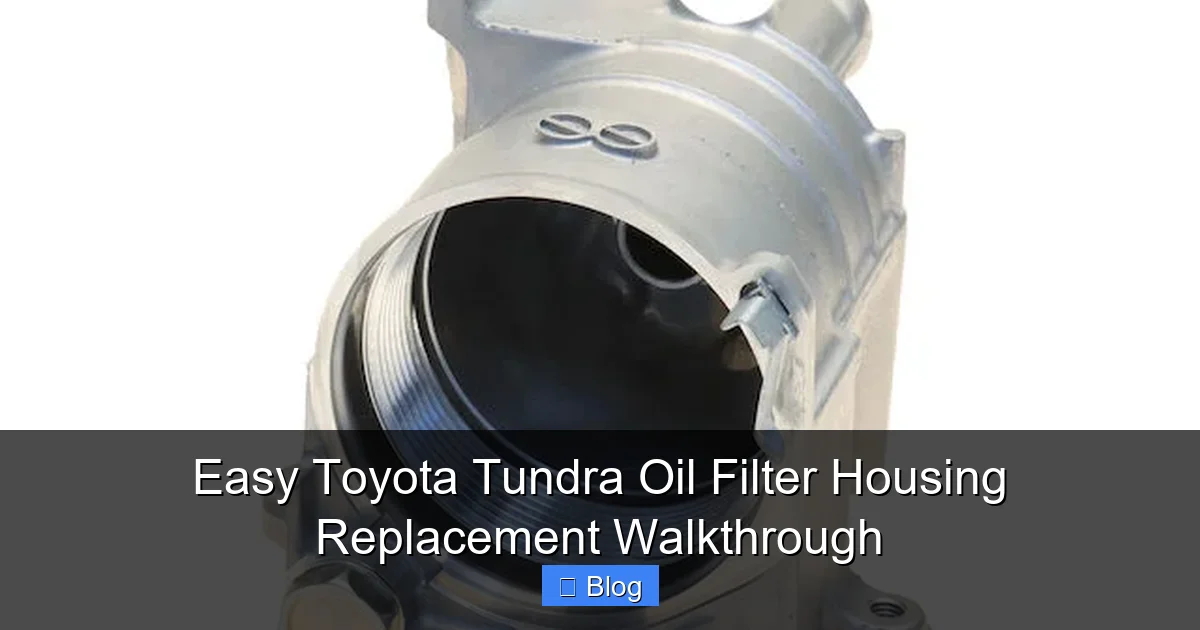
Visual guide about Easy Toyota Tundra Oil Filter Housing Replacement Walkthrough
Image source: partsgeek.com
Now that you have everything ready, let’s get started. Remember to always prioritize safety throughout this process.
Safety First: Preparing Your Truck
- Park on a Level Surface: Ensure your Tundra is parked on flat, stable ground.
- Engage Parking Brake: Apply the parking brake firmly.
- Chock Wheels: Place wheel chocks behind the rear wheels to prevent any movement.
- Lift and Secure: Using your jack, carefully lift the front of your Tundra high enough to comfortably access the oil filter housing and drain plug. Place sturdy jack stands under the frame rails and slowly lower the truck onto the stands. Give the truck a gentle shake to ensure it’s stable on the stands.
- Engine Cool Down: Make sure the engine is cool to the touch. Hot oil can cause severe burns. Letting it cool for an hour or two after a short drive is ideal, but avoid letting it get completely cold as warm oil drains more effectively.
Draining the Engine Oil
You’ll be performing an oil change as part of this process, so draining the old oil is the first step.
- Locate Drain Plug: Position your large oil drain pan directly under the engine oil pan drain plug.
- Remove Skid Plate (If Applicable): Many Tundras have a skid plate that covers the oil filter and drain plug. You’ll need to remove the necessary bolts (usually 12mm or 14mm) to detach or lower this plate for access.
- Remove Drain Plug: Use your socket wrench (typically 14mm) to loosen and remove the oil pan drain plug. Be prepared for oil to flow out quickly. Let the oil drain completely, which can take 10-15 minutes.
- Replace Crush Washer and Drain Plug: Once the oil has drained, clean the drain plug, install a new crush washer (always use a new one!), and hand-tighten the drain plug back into the oil pan.
- Torque Drain Plug: Use your torque wrench to tighten the drain plug to the manufacturer’s specified torque. For most Tundras, this is around 29 ft-lbs (39 Nm). Do NOT overtighten.
Removing the Old Oil Filter Element
Even though we’re replacing the housing, we still need to get the old filter element out.
- Locate Oil Filter Housing: The housing is typically found on the front underside of the engine, often slightly recessed.
- Position Drain Pan: Place your smaller drain pan or a collection container directly underneath the oil filter housing.
- Remove Small Drain Plug (on Housing): Most Toyota oil filter housings have a small plastic drain plug at the bottom. Use a 3/8″ drive extension or an appropriate tool to unscrew this plug. This allows residual oil from within the housing to drain out in a controlled manner, preventing a larger mess when you remove the main housing.
- Insert Drain Tool (Optional): Some kits come with a plastic drain tube that threads into the small drain hole, allowing for a cleaner drain.
- Let Drain: Allow the oil to fully drain from the housing. This usually only takes a minute or two.
- Replace Small Drain Plug: Once drained, replace the small plastic drain plug and ensure it’s snug, but don’t overtighten it.
The Step-by-Step Replacement Process: Housing Removal and Installation
This is where we actually remove the old housing and install the new one. This part requires careful attention to detail.
Detaching the Old Filter Housing
- Use the Cap Wrench: Place your specific 64mm 14-flute oil filter cap wrench over the end of the oil filter housing.
- Loosen the Housing: Using your socket wrench or breaker bar attached to the cap wrench, begin to slowly turn the housing counter-clockwise to loosen it. Be prepared for a small amount of residual oil to drip out as it loosens.
- Remove Housing: Once loose enough, you can usually unscrew the housing by hand. Carefully lower it, trying to keep it as upright as possible to avoid spilling any remaining oil inside.
- Remove Old Filter Element: Once the housing is off, pull out the old paper oil filter cartridge.
- Remove Old O-rings: Carefully remove the large O-ring from the housing itself and the smaller O-ring from the center post that the filter sits on (if applicable to your design). Inspect the area for any remaining O-ring pieces or debris. Clean the mounting surface on the engine block thoroughly with a clean rag.
Inspecting and Preparing the New Housing
- Inspect New Housing: Take a moment to inspect your new Toyota Tundra oil filter housing. Ensure there are no defects or damage. If it’s an aluminum upgrade, admire its solid construction!
- Install New O-rings: This is a crucial step for preventing leaks. Take the new large O-ring provided with your filter or housing kit and lubricate it with a thin film of fresh engine oil. Carefully place it into the groove on the new oil filter housing. Do the same for any smaller O-rings that go onto the housing itself or the center post.
- Insert New Filter Element: Place the new oil filter cartridge into the new housing. Ensure it sits correctly and snugly.
Installing the New Housing and Filter
- Thread New Housing On: Carefully thread the new oil filter housing, with the new filter and O-rings installed, back onto the engine block. Start by hand-tightening it to ensure you don’t cross-thread it. It should turn smoothly.
- Hand Tighten: Continue hand-tightening until the housing is snug against the engine block.
- Torque to Spec: This is perhaps the MOST critical step for a leak-free Toyota Tundra oil filter housing replacement. Use your oil filter cap wrench and torque wrench to tighten the housing to the manufacturer’s specified torque. For most Toyota Tundra oil filter housings, this is typically around 18-25 ft-lbs (25-34 Nm). Refer to your Tundra’s owner’s manual or a reliable service manual for the exact specification. Overtightening can crack even an aluminum housing, and undertightening will lead to leaks.
- Replace Skid Plate: Reinstall any skid plates that were removed, securing all bolts properly.
Post-Installation Checks and Tips
You’re almost done! The final steps involve refilling the oil and double-checking your work to ensure everything is perfect.
Refilling Engine Oil and Initial Startup
- Refill Engine Oil: Lower your Tundra off the jack stands. Using your funnel, carefully add the recommended type and amount of new engine oil to your Tundra’s engine through the oil filler cap. Most Tundras with the 5.7L V8 take around 8.5 quarts.
- Check Oil Level: After pouring, wait a few minutes for the oil to settle, then check the oil level using the dipstick. Add more if necessary, but avoid overfilling.
- Initial Startup: Start the engine. The oil pressure light might stay on for a second or two longer than usual as the system primes with new oil. Let the engine idle for a few minutes.
Checking for Leaks and Final Torque Specs
- Inspect for Leaks: While the engine is idling, carefully look underneath the truck, particularly around the oil filter housing and the oil pan drain plug. Use a flashlight if needed. Look for any drips, seeping, or signs of fresh oil.
- Turn Off and Re-Check: Turn off the engine and wait a few more minutes for the oil to settle again. Re-check the oil level on the dipstick and top off if needed. Then, do another thorough check for leaks. Sometimes leaks only appear after the engine has run for a bit.
- Test Drive: If everything looks good, take your Tundra for a short test drive. Drive normally, then park it back on a level surface and perform a final leak check after the engine has cooled slightly.
Important Maintenance Tips for Longevity
- Regular Oil Changes: Stick to your manufacturer’s recommended oil change intervals. Using quality synthetic oil (if specified) will also help.
- Correct Torque: Always use a torque wrench for the oil filter housing and drain plug during future oil changes. This is the single biggest factor in preventing future leaks and damage.
- New O-rings Every Time: Always replace all O-rings when you change your oil filter. Most new filter cartridges come with the necessary O-rings.
- Inspect Annually: During your regular maintenance, visually inspect the oil filter housing for any signs of cracking, wear, or leaks.
Congratulations! You’ve successfully completed your Toyota Tundra oil filter housing replacement. Not only have you fixed a potential problem, but you’ve also gained valuable experience and confidence in working on your own vehicle. This DIY task, while requiring attention to detail, is a fantastic way to maintain your Tundra and ensure it continues to be a reliable workhorse for years to come. Enjoy your leak-free ride!
Frequently Asked Questions
How often should the Toyota Tundra oil filter housing be replaced?
The oil filter housing itself isn’t a regularly scheduled maintenance item like an oil filter. It should only be replaced if it shows signs of damage, such as cracks, leaks, or if it becomes overly difficult to remove or install during an oil change. Many owners choose to replace the plastic OEM housing with a more durable aluminum one as a preventative measure or when the original fails.
Is it difficult to replace the oil filter housing on a Toyota Tundra myself?
Replacing the Toyota Tundra oil filter housing is a moderately difficult DIY task. It requires basic mechanical skills, the correct tools (especially a specific oil filter cap wrench and torque wrench), and a good understanding of safety procedures. If you’re comfortable performing oil changes, this is a manageable next step, but attention to detail and correct torque specifications are crucial.
What are the benefits of upgrading to an aluminum oil filter housing?
The main benefits of upgrading to an aluminum oil filter housing for your Toyota Tundra include enhanced durability and longevity. Aluminum is much stronger and less susceptible to cracking or warping from heat and repeated tightening compared to the OEM plastic housing, providing a more reliable, leak-free solution for the long term.
What should I do if I discover a leak after replacing the oil filter housing?
If you find a leak after replacing your Toyota Tundra oil filter housing, first turn off the engine. Common causes are improperly torqued housing or drain plug, or a pinched/missing O-ring. Re-check the torque on both the housing and the main drain plug using your torque wrench. If the leak persists, you may need to remove the housing, inspect the O-rings for proper seating or damage, and reassemble carefully, ensuring all surfaces are clean.
Can I reuse the old O-rings with my new oil filter housing?
No, you should never reuse the old O-rings when installing a new Toyota Tundra oil filter housing or even when simply changing the oil filter element. New O-rings (typically one large and one small) are critical for creating a proper, leak-free seal and are usually supplied with a new oil filter cartridge or the replacement housing.
Do I need to drain all the engine oil to replace the oil filter housing?
Yes, it is necessary to drain all the engine oil before attempting a Toyota Tundra oil filter housing replacement. The housing contains engine oil, and removing it without draining the pan first would result in a significant mess and incomplete oil change. It’s best practice to treat this job as part of a complete oil and filter change.

Sagor Jahan is the founder and author of Automopromo.com, dedicated to delivering insightful tips, reviews, and updates in the automotive and promotional industry. With a passion for innovation and clear guidance, Sagor helps readers make informed decisions and stay ahead in the ever-evolving automotive world.

