
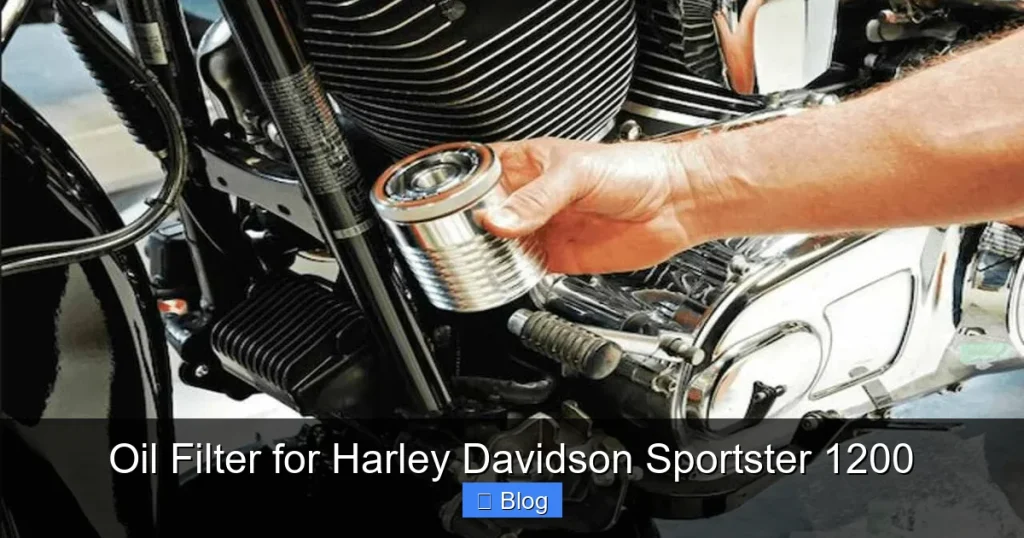
This guide provides a comprehensive, step-by-step walkthrough for maintaining the oil filter for your Harley Davidson Sportster 1200. You’ll learn everything from selecting the right filter and gathering tools to the complete replacement process, ensuring your Sportster runs smoothly and reliably. Proper oil filter maintenance is crucial for engine longevity and performance, making this a vital skill for every Sportster owner.
Oil Filter for Harley Davidson Sportster 1200
Hey there, fellow Sportster rider! Ready to get your hands a little dirty and save some cash while giving your beloved Harley Davidson Sportster 1200 the care it deserves? Changing your oil filter might seem like a daunting task, but it’s actually one of the most fundamental and rewarding maintenance jobs you can do yourself. Not only does it keep your engine running smoothly, but it also helps extend its life.
In this comprehensive guide, we’re going to walk you through everything you need to know about the oil filter for your Harley Davidson Sportster 1200. We’ll cover why it’s so important, what tools you’ll need, and a clear, step-by-step process to get the job done right. By the end of this, you’ll be confident in tackling this essential maintenance task, ensuring your Sportster 1200 continues to roar down the road for many miles to come.
Let’s dive in and learn how to properly maintain the heart of your Harley!
Key Takeaways
- The Right Filter Matters: Always choose an oil filter specifically designed for your Harley Davidson Sportster 1200, ensuring proper fit, filtration, and an effective anti-drain back valve.
- Safety First: Prioritize safety by working on a stable, cool motorcycle, wearing appropriate protection, and being mindful of hot components and fluids.
- Gather Your Tools: Having the correct tools, including an oil filter wrench, torque wrench, and drain pan, makes the job much smoother and prevents damage.
- Integrate with Oil Change: Always replace your oil filter whenever you change your engine oil. They work hand-in-hand to maintain engine health.
- Proper Torque is Key: Ensure the new oil filter and drain plug are tightened to the manufacturer’s specified torque to prevent leaks and damage.
- Check for Leaks: After completing the oil and filter change, run the engine briefly and thoroughly inspect for any leaks around the filter and drain plug.
- Responsible Disposal: Properly dispose of used engine oil and the old oil filter at a certified recycling center to protect the environment.
Quick Answers to Common Questions
What type of oil filter do I need for my Sportster 1200?
You need an oil filter specifically designed for Harley Davidson Sportster 1200 models. Look for OEM Harley filters (Part #63798-99A or similar, depending on year) or high-quality aftermarket options that explicitly state compatibility and feature a good anti-drain back valve. Always verify with your bike’s manual.
How often should I change the oil filter for my Harley Davidson Sportster 1200?
It’s generally recommended to change the oil filter every time you change your engine oil. For most Sportster 1200s, this is every 5,000 miles or once a year, whichever comes first. Consult your owner’s manual for precise intervals.
Can I use a regular car oil filter on my Sportster 1200?
No, you should never use a regular car oil filter on your Harley Davidson Sportster 1200. Motorcycle engines have different oil pressures, flow rates, and filter mounting orientations (requiring an effective anti-drain back valve) compared to car engines. Using an incorrect filter can lead to engine damage.
Do I need a special wrench to remove the oil filter?
Yes, an oil filter wrench is highly recommended. Most Sportster 1200 oil filters require a specific cap-style wrench that fits the flutes on the end of the filter, or a strap/jaw-style wrench might work. Using the wrong tool can damage the filter or make removal difficult.
What is the torque specification for the oil filter on a Sportster 1200?
The exact torque specification for the oil filter on a Harley Davidson Sportster 1200 can vary slightly by model year. Always refer to your specific owner’s manual or service manual for the precise ft-lbs or Newton-meters. Typically, it’s around 14-18 ft-lbs or a specific turn after contact (e.g., 1/2 to 3/4 turn).
Understanding Your Sportster 1200 Oil Filter
Before we grab any wrenches, let’s talk a bit about the unsung hero of your engine: the oil filter. Its job is simple yet critical – it cleans the engine oil, removing contaminants like dirt, metal shavings, and carbon deposits. Clean oil means less wear and tear on your engine’s internal components, leading to a longer, healthier life for your Sportster 1200.
Why is the Right Oil Filter for Harley Davidson Sportster 1200 Crucial?
Harley Davidson engines, especially the Sportster 1200, are built tough, but they rely on precise lubrication. Using the correct oil filter for your Harley Davidson Sportster 1200 is not just a recommendation; it’s a necessity. Here’s why:
- Proper Fit: An incorrect filter might not seal properly, leading to dangerous oil leaks.
- Filtration Efficiency: High-quality filters capture more harmful particles without restricting oil flow. Harley-specific filters are designed to handle the unique oil pressures and flow rates of your engine.
- Anti-Drain Back Valve: Most modern filters include an anti-drain back valve. This prevents oil from draining out of the filter when the engine is off, ensuring instant oil pressure upon startup. This is especially important for the vertical mounting of the oil filter for Harley Davidson Sportster 1200 models.
When to Change Your Sportster 1200 Oil Filter
General consensus and Harley Davidson’s recommendations suggest changing your engine oil and the oil filter for your Harley Davidson Sportster 1200 every 5,000 miles or once a year, whichever comes first. However, if you ride in dusty conditions, or your bike is subjected to extreme temperatures, more frequent changes might be beneficial. Always refer to your Sportster 1200 owner’s manual for the most accurate and up-to-date service intervals.
Gathering Your Tools and Supplies
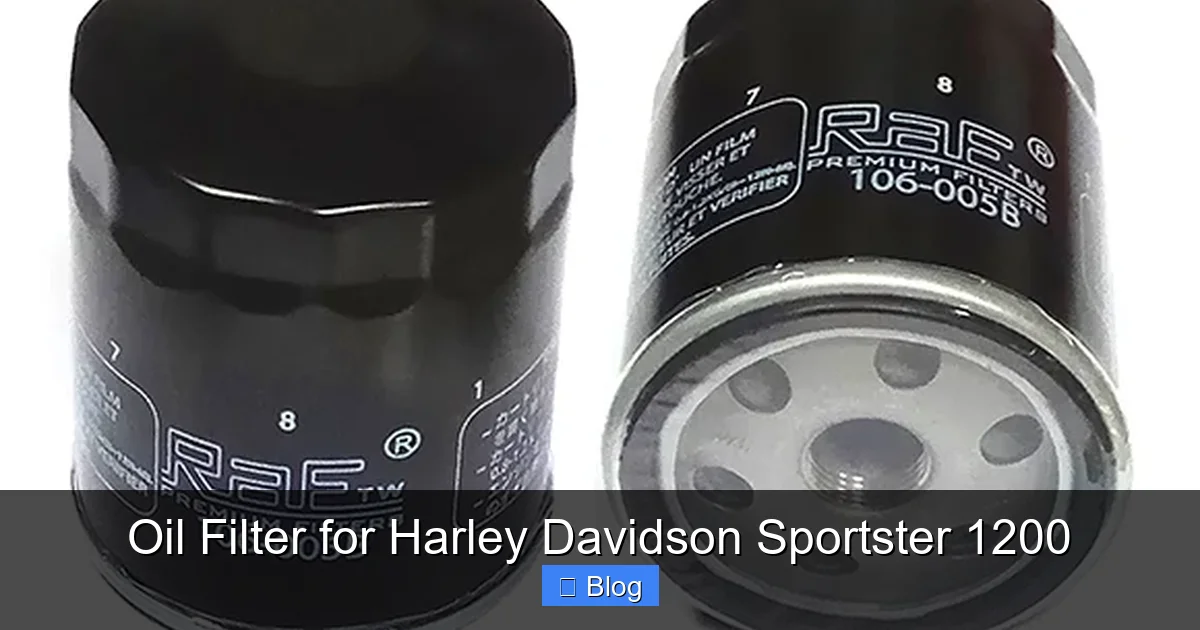
Preparation is key! Having all your tools and supplies ready before you start will make the process smooth and hassle-free. Here’s what you’ll need to change the oil filter for your Harley Davidson Sportster 1200:
Visual guide about Oil Filter for Harley Davidson Sportster 1200
Image source: sunwayautoparts.com
Essential Tools:
- Oil Filter Wrench: Make sure it’s the right size and type for your Sportster 1200 oil filter. Many Sportster filters use a cap-style wrench that fits over the end.
- Socket Wrench/Ratchet: To use with your oil filter wrench.
- Torque Wrench: Absolutely vital for tightening the oil filter and drain plug to spec, preventing leaks or overtightening damage.
- Drain Pan: A large one, capable of holding at least 3-4 quarts of used oil.
- Funnel: For mess-free refilling of new engine oil.
- Shop Rags or Paper Towels: You’ll need plenty for spills and cleanup.
- Rubber Mallet (optional): Sometimes helpful for gently tapping a stubborn drain plug socket.
Supplies You’ll Need:
- New Oil Filter for Harley Davidson Sportster 1200: Use an OEM Harley filter or a high-quality aftermarket equivalent known for its filtration and anti-drain back valve.
- Engine Oil: Approximately 3-3.5 quarts of the correct weight and type of motorcycle oil (e.g., Harley-Davidson Genuine Motor Oil SAE 20W-50). Always check your owner’s manual.
- New Drain Plug O-ring (optional but recommended): It’s good practice to replace the rubber O-ring on the drain plug to ensure a leak-free seal.
- Disposable Gloves: To keep your hands clean from oil and grime.
- Safety Glasses: Protect your eyes from splashes.
Safety First: Essential Precautions
Working on your motorcycle requires attention to safety. Don’t skip these crucial steps:
Visual guide about Oil Filter for Harley Davidson Sportster 1200
Image source: mpm-motorsports.com
- Warm Engine, But Not Too Hot: Oil drains better when warm, but a hot engine and exhaust can cause burns. Let your Sportster 1200 cool down for about 20-30 minutes after a ride. It should be warm to the touch, not scorching.
- Stabilize Your Motorcycle: Use a proper motorcycle stand, a lift, or ensure your kickstand is on a stable, level surface. The bike needs to be secure and unable to tip over.
- Personal Protective Equipment (PPE): Always wear safety glasses to protect against oil splashes and disposable gloves to keep your hands clean and safe from chemicals.
- Ventilation: Work in a well-ventilated area, especially when handling oil.
Step-by-Step Guide to Changing Your Sportster 1200 Oil Filter
Alright, let’s get down to business! Follow these steps carefully to successfully replace the oil filter for your Harley Davidson Sportster 1200.
Step 1: Prepare Your Sportster
Getting your bike ready is the first step towards a smooth oil and filter change.
Warm Up the Engine
Ride your Sportster 1200 for a few minutes or let it idle to warm up the engine oil. Warm oil flows more easily, allowing for a more complete drain. Then, shut off the engine and let it cool for about 20-30 minutes to prevent burns.
Stabilize the Motorcycle
Place your Sportster on a stable, level surface. Ideally, use a motorcycle lift or a paddock stand to keep the bike upright. If using the kickstand, ensure it’s secure. You want the bike as level as possible for a complete oil drain.
Position Your Drain Pan
Slide your drain pan directly under the engine’s oil drain plug. Ensure it’s large enough to hold all the old oil, with some extra capacity to spare for splashes.
Step 2: Drain the Old Engine Oil
Now it’s time to get that old, dirty oil out of your Sportster 1200.
Locate the Drain Plug
The oil drain plug on most Harley Davidson Sportster 1200 models is typically located on the bottom of the oil tank, which is separate from the engine’s primary casing. On some models, especially newer ones, there might be two drain plugs: one for the engine and one for the primary. For engine oil, it’s usually on the oil tank. Consult your owner’s manual if you’re unsure.
Remove the Drain Plug
Using the appropriate wrench or socket, carefully loosen and remove the oil drain plug. Be prepared, as warm oil will start flowing out immediately. Let the oil drain completely. This can take 10-15 minutes. While it’s draining, inspect the drain plug and the O-ring for any damage. Replace the O-ring if it looks flattened or cracked.
Allow Complete Drainage
Once the flow slows to a trickle, briefly rock your Sportster 1200 gently from side to side to help release any remaining oil trapped inside. This ensures a more thorough drain.
Step 3: Remove the Old Oil Filter
With the oil draining (or fully drained), you can now focus on the old oil filter.
Prepare for Spills
The oil filter for Harley Davidson Sportster 1200 models is usually mounted vertically or at an angle. Even after draining the oil tank, there will still be some oil trapped inside the filter. Position your drain pan directly underneath the oil filter and place some rags around the area to catch any drips.
Use the Oil Filter Wrench
Attach your oil filter wrench to the old filter. Turn the wrench counter-clockwise to loosen the filter. It might be quite tight, so apply steady pressure. Once it starts to turn, you should feel it loosen up.
Carefully Remove the Filter
Once loose, you can usually unscrew the filter by hand. As you twist it off, be ready for a small amount of oil to spill out. Keep it over the drain pan. Remove the old oil filter completely and set it aside in your drain pan to continue draining.
Inspect the Filter Area
Wipe down the mounting surface on the engine where the old filter sat. Ensure there are no pieces of the old gasket left behind. A clean mounting surface is crucial for a good seal with the new oil filter for your Harley Davidson Sportster 1200.
Step 4: Prepare and Install the New Oil Filter
Now for the fresh stuff! This is where your new oil filter for Harley Davidson Sportster 1200 comes into play.
Lubricate the New Filter Gasket
Take your new oil filter. Dip your finger into some of the new, clean engine oil and apply a thin film to the rubber gasket on the top of the new filter. This lubrication helps create a good seal and prevents the gasket from sticking or tearing during installation.
Hand-Tighten the New Filter
Carefully thread the new oil filter onto the engine mount by hand. Turn it clockwise. Make sure it threads on smoothly. If you feel resistance, stop, remove the filter, and try again, ensuring it’s not cross-threaded. Hand-tighten until the gasket makes firm contact with the engine block.
Torque the Filter to Spec
This is where your torque wrench comes in. Consult your Sportster 1200 owner’s manual for the exact torque specification for the oil filter. Typically, it’s a specific number of foot-pounds (e.g., 14-18 ft-lbs or a specific turn after contact, like 1/2 to 3/4 turn). Use your oil filter wrench and torque wrench to tighten the filter to the specified value. Do not overtighten, as this can damage the filter or its mount.
Step 5: Refill with Fresh Engine Oil
With the new filter in place, it’s time to add the clean oil.
Replace the Drain Plug
Once all the old oil has drained, clean the drain plug and install the new O-ring (if you chose to replace it). Reinsert the drain plug into the oil tank. Use your torque wrench to tighten the drain plug to the manufacturer’s specified torque. Again, consult your manual. Overtightening can strip threads, and undertightening will lead to leaks.
Add the Correct Amount of Oil
Using your funnel, carefully pour the recommended amount and type of fresh engine oil into the oil tank fill hole. For most Sportster 1200 models, this is typically around 3.0 to 3.5 quarts. Refer to your owner’s manual for the exact capacity. Pour slowly to avoid spills and allow the oil to settle.
Check the Oil Level
After adding the oil, screw the dipstick back in and then remove it to check the level. It’s often recommended to check the oil level on a Sportster when the engine is warm. Start the engine, let it idle for a minute or two, then shut it off and wait a few more minutes for the oil to settle. Re-check the dipstick. Add more oil in small increments if needed, bringing the level between the “add” and “full” marks. Do not overfill.
Step 6: Final Checks and Cleanup
Almost done! A few final steps to ensure everything is perfect.
Run the Engine Briefly
Start your Sportster 1200 engine and let it run for a couple of minutes. Listen for any unusual noises and keep an eye on your oil pressure light (it should go off shortly after starting). This circulates the new oil through the engine and the new filter.
Re-check for Leaks and Oil Level
Shut off the engine. Wait a few minutes for the oil to settle, then thoroughly check around the new oil filter and the drain plug for any signs of leaks. If you see a leak, tighten gently (but do not overtighten) or inspect the gasket/O-ring. Re-check the oil level on the dipstick. It might have dropped slightly as the filter filled with oil. Top it off if necessary.
Properly Dispose of Old Oil and Filter
Never pour used engine oil down the drain or throw the old filter in the trash. Collect the old oil in a sealed container (like the empty new oil bottles) and place the old filter in a plastic bag. Take them to an authorized oil recycling center, an auto parts store, or your local hazardous waste facility. They will ensure it’s disposed of responsibly.
Troubleshooting Common Issues
Even with careful steps, sometimes issues can pop up. Here are a few common problems you might encounter when changing the oil filter for your Harley Davidson Sportster 1200:
Oil Filter is Stuck
If the old filter won’t budge, try a different type of oil filter wrench. Sometimes a strap wrench or a jaw-style wrench provides better grip than a cap-style wrench. For extremely stubborn filters, some mechanics carefully puncture the filter with a screwdriver (making sure not to damage the engine mount) and use it as leverage, but this should be a last resort and done with extreme caution.
Leaks After Oil Change
A leak usually points to a few culprits:
- Overtightened/Undertightened Filter: The filter gasket might be compressed too much or not enough. Ensure you used a torque wrench.
- Damaged Filter Gasket: The new filter’s gasket might have been pinched or damaged during installation. Remove and inspect.
- Old Gasket Remains: Check if part of the old filter’s gasket stuck to the engine block. Clean the surface thoroughly.
- Drain Plug O-ring: If you didn’t replace the drain plug O-ring, it might be the source. Replace it and retorque.
- Loose Drain Plug: Ensure the drain plug is tightened to the correct torque.
Incorrect Oil Level
If your dipstick reading is off, remember to check the oil on a warm engine after letting it sit for a few minutes. If it’s too low, add oil slowly in small amounts. If it’s too high, you’ll need to drain a small amount out. Overfilling can cause damage.
Maintenance Tips for Your Sportster 1200
Keeping your Harley Davidson Sportster 1200 in top shape is an ongoing commitment. Here are some extra tips:
- Stick to the Schedule: Follow Harley Davidson’s recommended service intervals for oil and oil filter changes. Regular maintenance is the best way to prevent major issues.
- Check Oil Level Regularly: Get into the habit of checking your oil level every few rides, especially before long trips. It only takes a minute and can catch potential problems early.
- Use Quality Products: Always use high-quality engine oil and genuine Harley Davidson oil filters or reputable aftermarket alternatives specifically designed for your Sportster 1200. Cheap filters or incorrect oil can harm your engine.
- Keep Records: Note down the date and mileage of each oil and filter change. This helps you track maintenance and serves as a valuable record if you ever sell your bike.
Conclusion
And there you have it! You’ve successfully learned how to change the oil filter for your Harley Davidson Sportster 1200. This essential maintenance task might seem intimidating at first, but with the right tools, a bit of patience, and this step-by-step guide, you’re now equipped to handle it with confidence.
Regular oil and oil filter changes are the backbone of a healthy engine. By taking the time to perform this maintenance yourself, you’re not only saving money but also gaining a deeper understanding and appreciation for your Sportster 1200. Keep riding safe, keep riding smart, and enjoy the open road with the peace of mind that your Harley’s heart is well-cared for!

Sagor Jahan is the founder and author of Automopromo.com, dedicated to delivering insightful tips, reviews, and updates in the automotive and promotional industry. With a passion for innovation and clear guidance, Sagor helps readers make informed decisions and stay ahead in the ever-evolving automotive world.

