
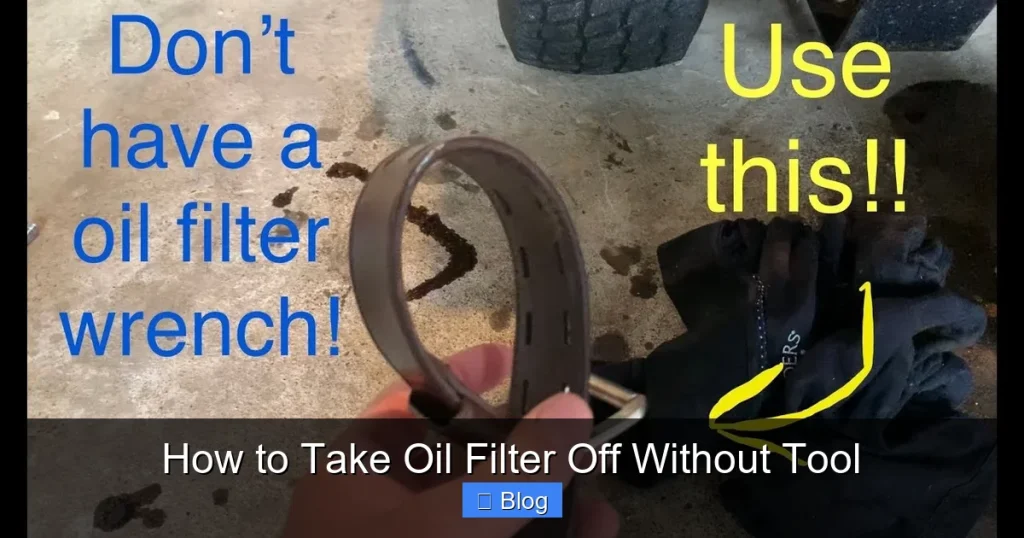
Learning how to take oil filter off without tool can be a lifesaver when you’re in a pinch or caught unprepared. This comprehensive guide walks you through several clever, tool-free methods, from utilizing friction and hand strength to employing common household items like belts or screwdrivers as makeshift leverage. We emphasize safety, preparation, and knowing when to seek professional help, ensuring you can tackle this DIY task responsibly and effectively.
How to Take Oil Filter Off Without Tool
Ever found yourself mid-oil change, only to realize you don’t have the specific wrench needed for your oil filter? Or perhaps your trusty filter wrench slipped and damaged the filter, leaving you stranded? Don’t panic! While specialized tools certainly make the job easier, learning how to take oil filter off without tool is a valuable skill that can save your day and your wallet.
This comprehensive guide will walk you through various ingenious methods to remove even the most stubborn oil filters using common household items or just your bare hands. We’ll cover everything from simple hand-grip techniques to more drastic, last-resort measures. Our goal is to empower you with the knowledge and confidence to complete your oil change, even when your toolkit is incomplete. We’ll prioritize safety, provide step-by-step instructions, and offer practical tips to ensure a successful, albeit tool-free, oil filter removal.
Before You Begin: Preparation is Key
No matter which method you choose for how to take oil filter off without tool, proper preparation is paramount. It ensures your safety, minimizes mess, and increases your chances of success.
Safety Precautions
Your safety should always be the top priority.
- Cool Engine: Always work on a cool or slightly warm engine, never a hot one. Hot oil can cause severe burns, and hot engine components are dangerous to touch.
- Eye Protection: Oil can drip and splash, potentially irritating or damaging your eyes. Wear safety glasses or goggles.
- Gloves: Disposable nitrile or heavy-duty work gloves will protect your hands from hot oil, grime, and sharp edges. They can also enhance grip.
- Oil Pan: Place a large drain pan directly underneath the oil filter to catch all the oil that will come out. A larger pan is better to accommodate potential spills.
- Jack Stands (If Needed): If you need to raise your vehicle for access, use sturdy jack stands on a level surface. Never rely solely on a jack.
Gathering “Makeshift” Tools
You might not have a dedicated oil filter wrench, but you likely have items that can serve a similar purpose.
- Rags/Towels: For cleaning, absorbing spills, and providing extra grip.
- Sandpaper: A strip of coarse-grit sandpaper can provide incredible friction.
- Heavy-Duty Rubber Gloves: Kitchen or dishwashing gloves can offer better grip than bare hands.
- Screwdriver (Flathead): Only for the last-resort puncture method.
- Old Belt/Strap: A sturdy leather belt, a strong piece of cloth, or robust zip ties can act as a filter wrench.
- Hammer (Optional): For very gentle taps in one specific method.
- Penetrating Oil (Optional): For extremely stubborn filters, a little penetrating oil around the base might help, but let it soak for a while.
Parking and Access
Ensure your vehicle is on a level surface. Give yourself enough room to maneuver comfortably. If you need to raise the vehicle, do so safely with jack stands.
Draining the Old Oil
It’s usually best to drain the engine oil from the oil pan first. This prevents a massive gush of oil when you finally loosen the filter, making the process cleaner and safer.
Method 1: The Hand-Grip and Friction Technique (The Gentle Approach)
This is the first and often most successful method when learning how to take oil filter off without tool, especially if the filter wasn’t overtightened during the last installation. Many manufacturers actually recommend hand-tightening filters.
Why it Works
A filter installed correctly should only be hand-tightened, usually a half to three-quarters turn after the gasket makes contact. A slightly warm engine can also help loosen the filter.
Step 1: Get a Good Grip
Ensure the oil filter’s surface is clean and dry. Any oil residue will make it incredibly slippery. Put on your heavy-duty work gloves, or better yet, heavy-duty rubber gloves (like dishwashing gloves) that offer superior grip.
Step 2: Apply Pressure and Twist
Wrap both hands around the filter, getting as much contact as possible. With a firm, steady grip, twist the filter counter-clockwise. Apply consistent pressure. Avoid jerky movements, which can cause your hands to slip. If it’s a bit stubborn, try a short, powerful twist rather than a slow grind.
Step 3: If it Slips (Sandpaper or Rag Assist)
If your hands keep slipping, don’t give up. This is where friction comes in.
- Sandpaper: Take a strip of coarse-grit sandpaper (around 80-120 grit) and wrap it around the oil filter. Grip the sandpaper-covered filter with your gloved hands and twist. The sandpaper provides excellent friction.
- Thick Rag: A clean, dry, thick rag can also provide more grip than bare hands or even some gloves. Wrap it tightly around the filter and twist.
Keep trying, applying consistent counter-clockwise pressure. Once you feel it give way, it should loosen easily by hand.
Method 2: The Screwdriver/Punch Through Method (Last Resort!)
This method is effective for how to take oil filter off without tool, but it’s messy, damaging to the filter (rendering it useless), and should only be used as a last resort when all other methods have failed.
When to Use It
Only resort to this if the filter is severely stuck and you have no other options. Be prepared for a significant oil spill.
Step 1: Prepare the Area
Place your large drain pan directly underneath the oil filter. You might want to put down extra cardboard or old newspapers to catch splatter.
Step 2: Puncture the Filter
Take a long, sturdy flathead screwdriver. Position the tip of the screwdriver near the base of the oil filter, approximately one-third to halfway up from the bottom (where the filter housing is strongest). With a hammer or your hand, firmly tap the screwdriver through the side of the filter until it emerges on the opposite side. Ensure the screwdriver is pushed all the way through, creating a solid handle.
—Warning: Be extremely careful not to puncture anything else, especially engine components, wires, or hoses behind the filter. Make sure the screwdriver is parallel to the engine block and perpendicular to the filter, avoiding contact with critical parts.—
Step 3: Create Leverage
Now you have a makeshift lever. The screwdriver acts as a handle. You’ll use this leverage to rotate the filter. Have your oil pan ready.
Step 4: Rotate and Remove
Grab the screwdriver firmly by the exposed end. Slowly and steadily, twist the screwdriver counter-clockwise. You should feel the filter begin to turn. As it loosens, oil will start to pour out. Keep twisting until the filter is completely unscrewed. This will be messy, so be ready to catch the oil and the filter quickly.
Method 3: The Strap/Belt/Zip Tie Method
This method for how to take oil filter off without tool creates a makeshift “strap wrench” and is a great alternative if your hands slip or you need more leverage.
Finding a “Strap”
Look for something strong and non-stretching:
- An old leather belt (your own or from a toolbox)
- A sturdy cloth strap (like from a cargo tie-down, not a flimsy bag strap)
- Several heavy-duty zip ties fastened together to form a loop.
- A bicycle inner tube cut open to form a flat strip.
Step 1: Loop the Strap
Wrap your chosen strap around the oil filter. Ensure it’s as close to the base (engine side) as possible for maximum grip. The strap should go around the filter once, with the ends overlapping. For a belt, feed one end through the buckle to secure it. For a plain strap or zip ties, you’ll create a loop.
Step 2: Tighten and Grip
Pull the strap as tight as possible around the filter. The tighter it is, the more grip it will have. If using a belt, use the buckle to secure it snugly. If using a plain strap, hold both ends firmly. You want to create a situation where twisting one end pulls the strap even tighter, effectively gripping the filter.
Step 3: Apply Leverage
With the strap tight around the filter, grab the free end of the strap or the excess length. Pull or push the strap in the counter-clockwise direction, using the tension of the strap to twist the filter. You might need to use two hands or even brace one end against something sturdy for extra leverage. This method mimics a specialized strap wrench quite well.
Method 4: The Sandpaper/Rubber Glove Method for Extra Grip
Sometimes, all you need is that extra bit of friction to turn a stubborn filter by hand. This method, a variation of Method 1, focuses purely on enhancing your grip.
Enhancing Hand Grip
This technique combines the best of hand-grip with superior friction material.
Step 1: Donning Gloves
Put on a pair of heavy-duty rubber gloves. Dishwashing gloves, especially those with textured palms, are excellent for this. They offer far more grip on an oily or smooth surface than bare hands or even standard work gloves.
Step 2: Adding Sandpaper
Cut a strip of coarse-grit sandpaper (around 60-100 grit). Wrap this strip completely around the oil filter. The grit side should be facing the filter. Overlap the ends slightly if needed to ensure full coverage.
Step 3: Twist Firmly
With the rubber gloves on, firmly grip the sandpaper-wrapped filter. Use both hands if possible. Apply steady, strong counter-clockwise pressure. The combination of the rubber gloves and the sandpaper should provide an unparalleled grip, often enough to break even moderately stuck filters loose. The key is applying sustained force.
Method 5: The “Old Cloth and Hammer” Technique (Gentle Persuasion)
This method isn’t about brute force but rather a clever way to jar a stuck filter loose without damaging it.
How it Works
The idea is to deliver a quick, sharp, but not overly forceful shock to the filter housing, which can sometimes break the seal or loosen threads that are “locked” due to over-tightening or corrosion.
Step 1: Wrap the Filter
Take a thick, sturdy cloth or several layers of old rags. Wrap it tightly around the oil filter. This cushioning is critical to prevent denting or damaging the filter housing during the next step.
Step 2: Gentle Taps
Using a rubber mallet, a small hammer, or even the handle of a heavy screwdriver, gently but firmly tap the wrapped filter in the counter-clockwise direction. Don’t hit it hard! The goal is to deliver quick, sharp taps, not to smash it. Tap in several spots around the filter’s circumference. The gentle vibration and impact can sometimes be enough to break the filter’s seal or loosen corrosion.
Step 3: Try to Twist
After a few taps, remove the cloth and immediately try the hand-grip and friction technique (Method 1 or 4). The taps might have just enough to allow your hands or a sandpaper/glove combination to get the job done. If it doesn’t budge after a few attempts, avoid hitting harder, as you could damage the filter and create a bigger mess.
Troubleshooting Common Issues
Even when you know how to take oil filter off without tool, things can go wrong. Here’s what to do:
Filter Won’t Budge at All
If the filter seems utterly welded on, don’t just keep trying the same method harder. Switch methods. If you started with hand-grip, try the strap method. If that fails, and you’re truly desperate, consider the screwdriver puncture method as a last resort.
Filter Starts to Crush/Dent
If you’re applying force and the filter housing is denting or crushing, STOP immediately. This indicates the filter is extremely stuck, and you risk a major rupture. Puncturing a crushed filter is more difficult. At this point, it might be time to consider professional help. A mechanic has specialized tools for this exact situation.
Making a Huge Mess
Expect some mess when removing an oil filter, especially with the puncture method. Have plenty of rags on hand. If the oil pan overflows, quickly contain the spill with absorbent materials like kitty litter or shop towels.
Punctured Filter, Still Stuck
If you’ve resorted to the screwdriver method, and the filter is still refusing to turn, you have a serious problem. The filter might be cross-threaded or seized onto the engine block. Further attempts could damage the engine block’s threads, leading to a much more expensive repair. This is definitely a scenario where you should stop and call a professional mechanic.
Post-Removal: Installation Tips (Without Tools)
Once you successfully learn how to take oil filter off without tool, installing the new one is much simpler. And remember, how you install it prevents future headaches.
Clean the Mounting Surface
Before installing the new filter, wipe down the engine’s filter mounting surface with a clean rag. Ensure there’s no old gasket material, dirt, or debris that could cause leaks.
Lubricate the Gasket
Dip your finger into some fresh engine oil and apply a thin film to the rubber gasket on the new oil filter. This lubrication helps create a good seal and prevents the gasket from sticking or tearing during installation, making future removal easier.
Hand-Tighten the New Filter
This is crucial! Screw the new filter onto the engine by hand until the gasket makes firm contact with the engine block. Then, give it an additional 3/4 to 1 full turn by hand. Do NOT overtighten it with any tool. Overtightening is the primary reason filters become impossible to remove by hand. Your hands provide enough torque for a secure, leak-free seal.
Conclusion
Learning how to take oil filter off without tool can be incredibly empowering, saving you time and frustration during an unexpected situation. From the simple hand-grip technique to more aggressive (but necessary) methods like the screwdriver puncture, you now have a range of options at your disposal. Always remember to prioritize safety above all else, wear protective gear, and have an oil pan ready. While these DIY methods are effective, understand their limitations. If a filter is truly seized or you risk damaging your engine, don’t hesitate to seek professional help. With careful preparation and a bit of ingenuity, you can confidently tackle your next oil change, even without that specialized wrench.
Key Takeaways
- Safety First: Always prioritize safety by working on a cool engine, wearing protective gloves and eyewear, and having an oil pan ready to catch spills.
- Preparation is Crucial: Before attempting any method, ensure you have good access to the filter, drain the old oil, and clean the filter’s surface for optimal grip.
- Hand-Grip and Friction: Often, a warm engine and a strong, clean grip are enough to loosen a hand-tightened filter. Use sandpaper or rubber gloves to enhance friction if needed.
- Makeshift Straps: An old belt, robust zip ties, or a strong cloth strap can create a simple yet effective wrench by providing leverage to twist stubborn filters.
- Screwdriver/Punch Method (Last Resort): Puncturing the filter with a screwdriver offers significant leverage, but it’s messy, damages the filter, and should only be used when all other methods fail.
- Gentle Persuasion: Sometimes, gentle taps with a hammer or screwdriver handle (through a thick cloth) can help loosen a very stuck filter before attempting to twist it by hand.
- Proper Installation: Always install the new filter hand-tight only. Over-tightening can make future removal difficult and is a common reason filters get stuck.
Quick Answers to Common Questions
What if my hands are too small to grip the filter?
If you have smaller hands, the strap or belt method (Method 3) can be particularly effective as it creates leverage that doesn’t rely on a full hand grip. Alternatively, focus on using rubber gloves and sandpaper (Method 4) to maximize the friction you can apply.
Is it safe to reuse a belt after using it on an oily filter?
It depends on the belt. If it’s an old, worn-out belt you don’t care about, it’s fine. If it’s a good leather belt, be prepared for it to get greasy and potentially stained. Clean it thoroughly afterwards with degreaser, but generally, it’s better to use something you don’t mind getting dirty.
How do I know if I’ve overtightened the new filter by hand?
After the new filter’s gasket makes contact with the engine block, give it about 3/4 to a full turn more, by hand. You should feel it snug up firmly. If you keep turning and turning, or feel like you’re straining excessively, you’re likely overtightening. Hand-tightening until snug plus the extra turn is usually sufficient without needing extreme force.
Can I use channel locks or pliers instead of a wrench?
While channel locks or large pliers might seem like a tool-free option, they often just crush or deform the oil filter housing, making it even harder to remove without actually getting a good grip to twist it. It’s generally not recommended for removal and can quickly lead to needing the “last resort” screwdriver method.
What if I don’t have sandpaper, but my hands keep slipping?
If sandpaper isn’t available, try a piece of heavy-duty rubber, like a section of an old inner tube or a thick rubber mat. The friction properties of rubber are excellent. Alternatively, a clean, dry, coarse-weave cloth (like canvas or denim) can also provide a surprising amount of grip when wrapped tightly around the filter.

Sagor Jahan is the founder and author of Automopromo.com, dedicated to delivering insightful tips, reviews, and updates in the automotive and promotional industry. With a passion for innovation and clear guidance, Sagor helps readers make informed decisions and stay ahead in the ever-evolving automotive world.

