

Dealing with a seized spark plug can be frustrating, but with the right approach, you can remove it safely and get your engine running smoothly again. This guide walks you through preparation, step-by-step removal methods, and troubleshooting common issues to avoid costly mistakes. Whether you’re a beginner or seasoned DIYer, follow these tips to tackle how to remove seized spark plug like a pro.
Key Takeaways
- Safety First: Always disconnect the battery and let the engine cool before attempting to remove a seized spark plug to prevent burns or electrical hazards.
- Use Penetrating Oil: Apply a quality penetrating lubricant like WD-40 and let it soak for several hours to loosen rust and corrosion around the plug.
- Right Tools Matter: Invest in a quality spark plug socket and torque wrench to avoid stripping threads or breaking the plug during removal.
- Go Slow and Steady: Apply even pressure and avoid excessive force; if it doesn’t budge, use heat or tapping techniques instead of brute strength.
- Inspect After Removal: Check the plug threads and cylinder head for damage, and consider thread repair if needed to prevent future seizures.
- Prevent Future Issues: Regularly change spark plugs and use anti-seize compound during installation to keep them from seizing up again.
Quick Answers to Common Questions
What’s the best penetrating oil for seized plugs?
PB Blaster or Kroil work wonders due to their strong formula that cuts through rust quickly. Apply it liberally and give it time to penetrate—rushing this step often leads to failure.
Can I use WD-40 instead of penetrating oil?
WD-40 is okay for light seizing but isn’t as effective as dedicated products like Sea Foam Deep Creep. It’s better for cleaning after removal than heavy loosening jobs.
How long should I wait after applying heat?
Try turning the plug while it’s still warm, about 30-60 seconds after heating. Then let it cool for 10 minutes before reapplying oil if needed.
Is it safe to remove plugs from a hot engine?
No—always let it cool to avoid burns and thread damage from thermal expansion. Waiting prevents warping and makes the job safer overall.
What if I break the plug porcelain?
Use needle-nose pliers or a vacuum to remove fragments carefully. Then focus on extracting the metal base with an extractor to avoid debris in the cylinder.
Introduction
Hey there, fellow car enthusiast! If you’ve ever turned a wrench on your engine and found a spark plug that’s stuck like glue, you know the headache it can cause. A seized spark plug happens when corrosion, heat, or age makes it fuse to the cylinder head, turning a simple tune-up into a potential nightmare. But don’t worry—this guide on how to remove seized spark plug will walk you through everything you need to know.
By the end, you’ll learn safe preparation steps, tried-and-true removal techniques, practical tips to make the job easier, and how to troubleshoot if things go sideways. Whether you’re working on an older truck or a modern sedan, these methods can save you time and money over towing it to a shop. Let’s dive in and get that plug out without drama.
Understanding Seized Spark Plugs
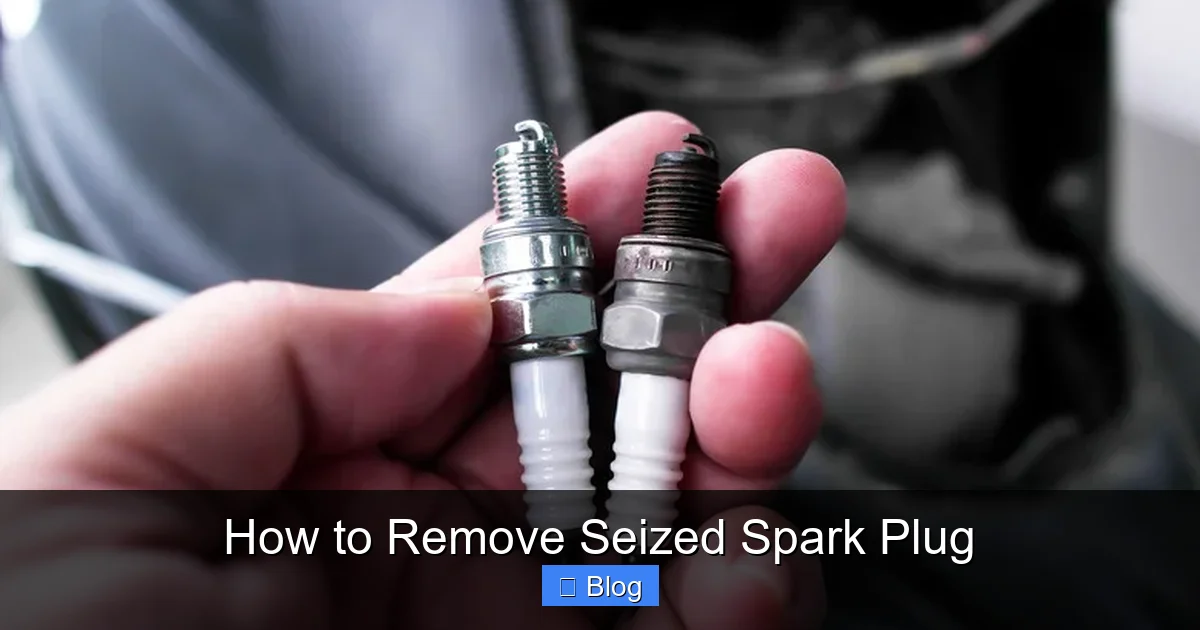
Before we jump into the hands-on part, it’s helpful to know why spark plugs seize in the first place. Over time, the intense heat and pressure in your engine cause the metal threads of the plug to bond with the aluminum cylinder head. Add in rust from moisture or carbon buildup, and you’ve got a real stuck situation. This is common in vehicles that haven’t had plugs changed in years or those driven in harsh conditions like salty roads.

Visual guide about How to Remove Seized Spark Plug
Image source: carobjective.com
Removing a seized spark plug isn’t just about force—it’s about patience and the right strategy. Rushing can lead to broken plugs, damaged threads, or even a cracked head, which means big repair bills. With the steps ahead, you’ll approach how to remove seized spark plug methodically, minimizing risks and maximizing success.
Tools and Materials You’ll Need
Gathering the right gear is the foundation of any successful DIY job. For how to remove seized spark plug, you’ll want tools that provide leverage without causing more harm. Start with basics like a ratchet set and extensions, but don’t skimp on specialized items.
Visual guide about How to Remove Seized Spark Plug
Image source: slashgear.com
Here’s a quick rundown: a thin-wall spark plug socket (usually 5/8-inch for most cars), penetrating oil, a torque wrench for reinstallation, and safety gear like gloves and eye protection. If things get tough, you’ll also need a torch for heat application and a tap-and-die set for thread repairs. Pro tip: Lay everything out on a clean workbench to stay organized.
Step-by-Step Guide: Preparing Your Vehicle
Preparation sets the stage for a smooth removal. Skipping this can lead to frustration or injury, so take your time. The goal here is to create a safe, accessible workspace.
Step 1: Safety First
Park your vehicle on a flat surface and engage the parking brake. Disconnect the negative battery terminal to avoid any electrical surprises. Let the engine cool completely—at least two hours after driving—to prevent burns from hot metal. Wear gloves and safety glasses; spark plug wells can hide sharp edges or debris.
Step 2: Locate the Spark Plug
Open the hood and find the ignition coils or wires leading to the plugs. In most cars, they’re on top of the engine block. Remove any plastic covers by gently prying them off. Label the coils or wires with tape and numbers to make reinstallation easy. This step is crucial for how to remove seized spark plug without mixing up cylinders.
Step 3: Remove Ignition Components
Unplug the electrical connector from the coil, then pull the coil straight up. If it’s stuck, wiggle it gently—don’t yank. Once off, you’ll see the spark plug nestled in its well. Use a flashlight to inspect for visible rust or damage, which gives clues about how seized it might be.
Practical tip: If your engine has a tight layout, like in a V6, consider removing nearby components such as the air intake for better access. This might add 10-15 minutes but saves hassle later.
Step-by-Step Guide: Applying Penetrating Oil
Now we’re getting to the loosening phase. Penetrating oil is your best friend when learning how to remove seized spark plug. It seeps into the threads and breaks down the bonds holding it tight.
| Tool/Material | Purpose | Notes/Tips |
|---|---|---|
| Spark Plug Socket (Thin-Wall) | Fits over the plug without rounding edges | Use with rubber insert to grip porcelain; size matches plug (e.g., 16mm for many imports) |
| Penetrating Oil (e.g., PB Blaster) | Loosens rust and corrosion | Apply generously; let soak 1-2 hours or overnight for best results |
| Ratchet and Extensions | Provides leverage for turning | 6-inch or longer extension for deep wells; avoid universal joints if possible |
| Torque Wrench | Ensures proper tightening on reinstall | Set to 15-20 ft-lbs for most plugs; prevents over-torquing |
| Propane Torch or Heat Gun | Expands metal to break the seal | Use cautiously; heat the head, not the plug, for 1-2 minutes |
| Anti-Seize Compound | Prevents future seizures | Apply sparingly to new plug threads before installation |
| Thread Chaser or Tap Set | Cleans or repairs damaged threads | Essential if removal strips the cylinder head |
Step 1: Spray the Plug
Insert the spark plug socket loosely over the plug without the ratchet. Spray penetrating oil around the base where the plug meets the head. Let it drip down into the threads. For really stubborn cases, use a straw extension on the can to target the seam precisely.
Step 2: Soak Time
Wait at least 15-30 minutes before attempting removal. For severe seizures, soak overnight or repeat applications every few hours. While waiting, you can work on other plugs if this is a full tune-up. Example: On my old Ford, a 24-hour soak turned a rock-solid plug into something that unscrewed with ease.
Step 3: Tap to Loosen
With the socket still on, lightly tap the ratchet end with a hammer. This vibration helps the oil work deeper. Do this gently—think of it as encouraging the plug, not beating it. Avoid heavy hits, which could crack the porcelain insulator inside.
Tip: If oil isn’t enough, combine it with heat in the next section, but always prioritize chemical loosening first.
Step-by-Step Guide: Removal Techniques
If soaking doesn’t do the trick, it’s time for active removal methods. Go slow to avoid breaking the plug, which complicates things big time. These techniques build on each other for how to remove seized spark plug effectively.
Step 1: Basic Turning with Ratchet
Attach the ratchet to the socket and try turning counterclockwise. Apply steady, even pressure. If it moves even a tiny bit, keep going and reapply oil as needed. Stop if it binds to prevent stripping.
Step 2: Apply Heat if Needed
Heat expands the aluminum head more than the steel plug, breaking the seal. Use a propane torch to warm the area around the plug for 1-2 minutes until it’s hot but not glowing. Immediately try turning while it’s warm— the sudden cooling can help too. Safety note: Keep a fire extinguisher nearby and avoid overheating plastic parts.
Example: In a rusty Chevy, heat after oil got the plug out in under five minutes, saving me from drilling.
Step 3: Use Leverage Tools
If still stuck, add a breaker bar for more torque or an impact wrench on low setting. For extreme cases, insert a screw extractor into a drilled pilot hole, but that’s a last resort. Always clean the well as you go to spot any debris causing extra resistance.
Pro tip: Work in short bursts—turn a quarter turn, re-oil, and rest. This prevents fatigue and overheating the threads.
Troubleshooting Common Problems
Even with careful steps, issues can pop up when trying how to remove seized spark plug. Here’s how to handle them without panicking.
Problem: Plug Breaks Off. If the top snaps, use an easy-out extractor or magnetic pickup tool for porcelain bits. For the base, drill carefully with a left-hand drill bit to back it out. Take it to a shop if you’re unsure—better safe than sorry.
Problem: Stripped Threads. Inspect the hole; if damaged, run a thread chaser to clean it. For bad stripping, a thread insert kit like Heli-Coil can repair it permanently. This happened to me on a Honda—fixed in an afternoon with the kit.
Problem: No Movement After Heat and Oil. Let it cool fully and try again, or use a punch to tap the plug sideways gently. If all else fails, consult a mechanic to avoid engine damage.
Another common snag: Contaminated oil pooling in the well. Suck it out with a turkey baster or shop vac before proceeding. Prevention is key—next time, use anti-seize on new plugs.
Troubleshooting builds confidence. Remember, most seizures respond to patience, not power tools right away.
After Removal: Inspection and Reinstallation
Success! With the old plug out, inspect it for clues to the seizure, like excessive wear or fouling. Check the cylinder head threads for pitting or debris—clean with a soft brush and compressed air.
For reinstallation, gap your new spark plug to spec (usually 0.030-0.060 inches) using a feeler gauge. Apply a thin layer of anti-seize to the threads, but not on the electrode end. Hand-thread it first, then torque to 10-15 ft-lbs. Reattach the coil securely and reconnect the battery.
Test-run the engine and listen for smooth idling. If it misfires, double-check connections. This wraps up how to remove seized spark plug—now your ride should purr like new.
Bonus tip: Document the job with photos for future reference, especially on unfamiliar engines.
Conclusion
There you have it—a complete roadmap for how to remove seized spark plug that keeps your DIY project on track. From soaking with oil to smart use of heat, these steps emphasize safety and patience over brute force. You’ll not only fix the issue but also gain skills to prevent it next time.
Grab your tools, roll up your sleeves, and tackle that seized plug. If you run into unique challenges, local auto forums are gold for model-specific advice. Happy wrenching—your engine will thank you!

Sagor Jahan is the founder and author of Automopromo.com, dedicated to delivering insightful tips, reviews, and updates in the automotive and promotional industry. With a passion for innovation and clear guidance, Sagor helps readers make informed decisions and stay ahead in the ever-evolving automotive world.

