
Keeping your dirt bike’s engine breathing clean air is paramount for its longevity and performance, and that starts with a properly oiled air filter. This comprehensive guide walks you through every step, from removing a dirty filter to expertly applying fresh oil and reinstalling it, ensuring you achieve the best results every time. Mastering how to oil air filter dirt bike is a simple yet crucial maintenance task that will save you money and headaches down the road.
Clean the air filter with a proper cleaner and let it dry completely. Apply foam filter oil evenly, working it into the foam by hand. Make sure all areas are coated, but not dripping. Remove excess oil, then reinstall the filter securely to prevent dirt entering the engine.
How to oil air filter dirt bike properly for best results
Riding a dirt bike is an exhilarating experience, but to keep that thrill alive, proper maintenance is key. One of the most critical, yet often overlooked, tasks is regularly cleaning and oiling your air filter. Your air filter is the first line of defense against dirt, dust, and debris entering your engine. Without a properly oiled filter, microscopic particles can slip past, causing accelerated wear on internal engine components, reducing performance, and ultimately leading to costly repairs. Learning how to oil air filter dirt bike properly isn’t just a recommendation; it’s a necessity for any serious rider.
This comprehensive guide will walk you through every step of the process, ensuring you understand not just *how* to oil your air filter, but *why* each step is important. We’ll cover everything from removing your dirty filter to expertly applying fresh oil and reinstalling it for maximum engine protection and optimal performance. By the end, you’ll be confident in your ability to oil air filter dirt bike with professional precision, extending the life of your machine and keeping you on the trails longer. Let’s get started!
Key Takeaways
- Start with a Spotless Filter: Always clean and completely dry your dirt bike air filter thoroughly before applying new oil. Never oil a dirty or damp filter.
- Choose the Right Oil: Use high-quality, purpose-specific air filter oil that matches your filter type (foam or gauze) and riding conditions. Consult your bike’s manual or filter manufacturer.
- Wear Protective Gear: Air filter oil can be messy and irritating. Always wear chemical-resistant gloves and consider eye protection to protect your skin and eyes.
- Ensure Even Saturation: The key to proper oiling is even coverage. Work the oil thoroughly into the filter material, ensuring no dry spots remain, but avoid oversaturation.
- Allow for Curing Time: After oiling, gently squeeze out any excess and allow the filter to “tack up” or cure for a short period before reinstallation. This helps the oil become sticky and ready to trap dirt.
- Proper Installation is Crucial: Double-check that the oiled air filter is correctly seated and sealed within the airbox to prevent unfiltered air from bypassing it and damaging your engine.
Quick Answers to Common Questions
How often should I oil my dirt bike air filter?
The frequency depends on your riding conditions. For dusty conditions, clean and oil after every ride. For light use in clean areas, every 2-3 rides might be sufficient. Always inspect your filter before each ride.
Can I use motor oil to oil my air filter?
No! Never use motor oil. Air filter oil is specially formulated to be very sticky and tacky to trap fine dust particles while allowing proper airflow. Motor oil will not filter effectively and can damage your engine.
What if I get air filter oil on my hands?
Air filter oil is difficult to remove. Use a dedicated hand cleaner, soap, and warm water, or even a small amount of filter cleaner, followed by soap and water. Wearing chemical-resistant gloves is highly recommended to avoid this.
How do I know if my air filter is completely dry before oiling?
A completely dry filter will feel crisp and light, and there should be no dampness to the touch. It’s best to let it air dry overnight or for several hours in a warm, dry, dust-free environment.
Should I grease the air filter rim?
Yes, especially for foam filters! Applying a thin bead of waterproof grease around the filter’s sealing lip creates an extra barrier, preventing fine dust from bypassing the filter and entering your engine.
Tools and Materials You’ll Need
Before you begin, gather all your supplies. Having everything ready will make the process smooth and efficient.
- New or freshly cleaned dirt bike air filter (if replacing, or after cleaning your existing one)
- Air filter cleaner (specifically designed for your filter type, usually foam or fabric)
- Air filter oil (again, specific to your filter type, available in pour-on or aerosol forms)
- Two buckets or wash tubs (one for cleaning, one for rinsing)
- Warm water
- Mild dish soap (optional, for a final rinse)
- Clean rags or shop towels
- Paper towels
- Chemical-resistant gloves (a must-have!)
- Eye protection (recommended)
- Airbox cleaning spray (optional, but good for a thorough job)
- Grease (waterproof, for the air filter rim seal)
- A well-ventilated work area
Step 1: Remove the Dirty Air Filter
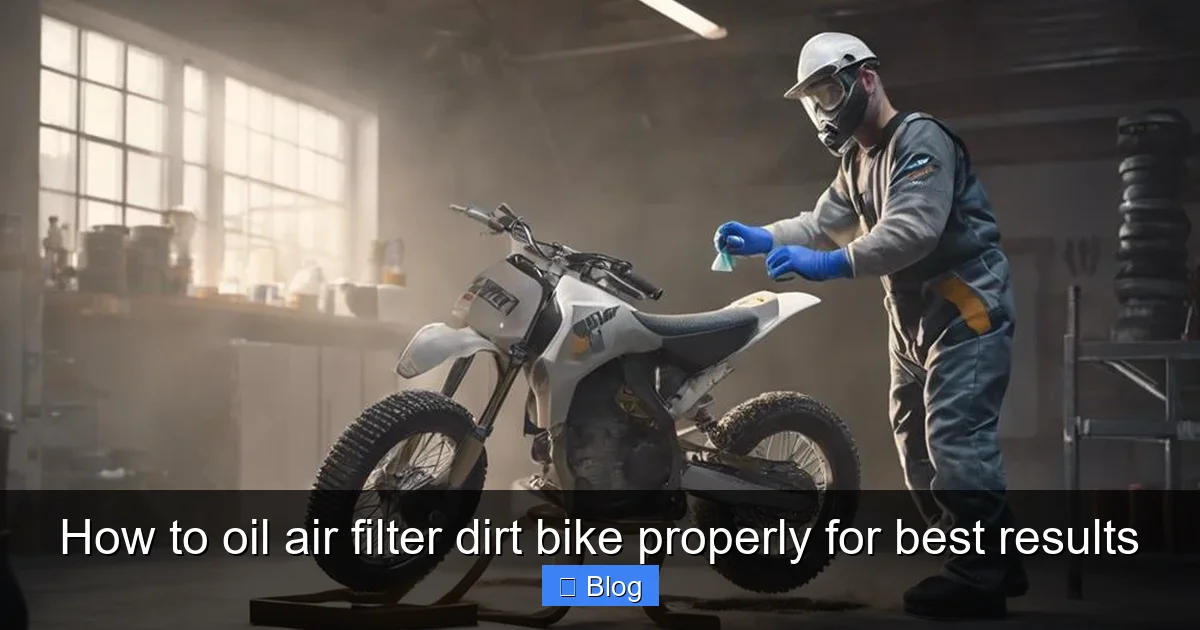
The first step in knowing how to oil air filter dirt bike is getting the old one out. This process is generally straightforward but varies slightly by bike model.
Locate Your Airbox
On most dirt bikes, the airbox is located under the seat. You’ll usually need to unbolt or quick-release your seat to access it.
Visual guide about How to oil air filter dirt bike properly for best results
Image source: dirtbikedynasty.com
Unlatch or Unscrew the Airbox Cover
Once the seat is off, you’ll see a plastic cover. This cover is often held in place by clips, quick-release fasteners, or a few screws. Carefully unlatch or unscrew these and remove the cover. Take note of how it sits, as you’ll need to reinstall it later.
Carefully Remove the Air Filter
Inside the airbox, you’ll find the air filter, usually mounted on a plastic cage. This cage helps the filter hold its shape. Most filters are secured by a wing nut, a bolt, or a snap-in system. Unscrew the wing nut or bolt, or gently unclip the filter from its mounting points.
Pro Tip: Be extremely careful not to let any dirt or debris fall into the carburetor or throttle body intake opening once the filter is removed. Cover the opening with a clean rag or duct tape immediately after taking the filter out. This is a critical step to prevent engine damage.
Step 2: Clean Your Dirty Air Filter Thoroughly
You cannot oil air filter dirt bike if it’s not perfectly clean and dry. This step is absolutely non-negotiable. Oiling a dirty filter traps abrasive particles, making it useless and harmful to your engine.
Shake Out Loose Debris
Before you get it wet, give the dirty filter a good shake or gentle tap to dislodge any large chunks of dirt, mud, or grass. You can also use a soft brush to lightly dust off surface grime.
Visual guide about How to oil air filter dirt bike properly for best results
Image source: firstcheckpoint.com
Apply Air Filter Cleaner
Working in a well-ventilated area and wearing your chemical-resistant gloves, apply your specialized air filter cleaner. Follow the product instructions carefully. For most foam filters, you’ll saturate the filter with the cleaner. For fabric/gauze filters (like K&N), specific cleaning kits are used.
Work the Cleaner In
Gently massage the cleaner into the foam using your gloved hands. Squeeze and knead the filter to ensure the cleaner penetrates all the dirty areas. You’ll see the cleaner dissolving the old oil and dirt, turning the filter murky. Let it sit for the recommended time, usually a few minutes.
Rinse Thoroughly
Fill one bucket with warm water and immerse the filter. Squeeze and rinse the filter repeatedly until the water runs clear. You can also rinse under a faucet with low-pressure warm water. If the filter is still stained, repeat the cleaning and rinsing process. Many riders follow up with a mild dish soap rinse to remove any lingering cleaner residue, then a final pure water rinse.
Important: Avoid using gasoline or harsh solvents to clean your filter, as these can degrade the foam or glue, shortening the filter’s life.
Allow to Dry Completely
This is arguably the most crucial part of the cleaning process before you oil air filter dirt bike. Gently squeeze out as much water as you can from the clean filter. Do NOT wring it aggressively, as this can damage the foam. Pat it with a clean towel. Then, set the filter in a clean, dust-free area to air dry completely. This can take several hours, or even overnight, depending on humidity and airflow. Some riders use a fan, but avoid direct heat sources like hair dryers, which can damage the foam.
The filter must be bone dry before you apply new oil. A damp filter will not allow the oil to adhere properly, creating dry spots that let dirt through.
Step 3: Choose the Right Air Filter Oil
The type of oil you use when you oil air filter dirt bike matters. There are specific oils for foam filters and different ones for cotton gauze filters. Always use an oil designed for air filters.
Foam Filter Oil
Most dirt bikes use foam air filters. Foam filter oil is typically very sticky and designed to trap even the finest dust particles. It comes in pour-on bottles or aerosol spray cans.
Cotton Gauze Filter Oil (K&N Style)
If you have a reusable cotton gauze filter, you’ll need a specific oil designed for those, usually red in color. This guide focuses primarily on foam filters, which are more common on dirt bikes, but the principles of even coverage apply.
Aerosol vs. Pour-On
- Pour-On Oil: Offers excellent saturation and control. It can be messier but ensures deep penetration.
- Aerosol Spray Oil: Convenient and less messy for some, but can be harder to achieve truly even saturation, especially in thick foam.
Many experienced riders prefer pour-on oil for foam filters, believing it provides superior protection. Whichever you choose, ensure it’s a reputable brand.
Step 4: Oil Your Air Filter Properly
Now for the main event: applying the oil. This is where precision and patience pay off. Remember those gloves!
Put On Your Gloves (and Eye Protection)
Air filter oil is incredibly sticky and designed to be difficult to remove, which means it’s also tough to get off your skin. Wear good quality chemical-resistant gloves throughout this step to protect your hands. Eye protection is also a good idea to prevent splashes.
Method A: Pour-On Oil Application (Recommended for Foam Filters)
Apply Oil Generously
Place your completely dry air filter on a clean surface or hold it over your second clean bucket. Pour a generous amount of air filter oil directly onto the foam. Start with the outer edges and work your way around, ensuring you get oil on all surfaces.
Work the Oil In
Using your gloved hands, gently but thoroughly squeeze and knead the oil into the foam. Think of it like massaging a sponge. The goal is to distribute the oil evenly throughout the entire filter, from the outer surface to the inner core. Continue kneading until the entire filter appears consistently saturated. You should see a uniform color (often blue or red, depending on the oil) throughout the foam.
Check for Even Coverage
Hold the filter up to a light source. You shouldn’t see any dry, light-colored spots. Every part of the foam should be saturated with oil. If you find dry spots, add a little more oil to those areas and continue kneading.
Remove Excess Oil
Once the filter is evenly saturated, gently squeeze out any excess oil. Do NOT wring it out aggressively. The goal is for the filter to be thoroughly oiled, but not dripping wet. A slightly tacky, uniformly colored filter is perfect. Too much oil can restrict airflow, while too little defeats the purpose.
Method B: Aerosol Spray Oil Application
Spray Evenly
Hold the aerosol can about 6-8 inches away from the filter. Spray a fine, even mist over the entire surface of the filter. Rotate the filter to ensure complete coverage on all sides, including the inside.
Work the Oil In (Even with Spray)
Even with aerosol oil, it’s beneficial to gently knead the filter with your gloved hands after spraying. This helps to distribute the oil more evenly and push it deeper into the foam. This prevents surface-only coverage and ensures full protection.
Check and Remove Excess
Similar to the pour-on method, check for any dry spots and reapply if necessary. Once fully saturated, gently squeeze out any excess oil. The filter should be uniformly colored and tacky, not dripping.
Allow to Tack Up (Cure)
After oiling and squeezing out excess, let the filter sit in a clean, dust-free area for about 15-20 minutes. This allows the solvents in the oil to evaporate, leaving behind a super-sticky, tacky surface that is incredibly effective at trapping dirt. Some oils may have specific curing times, so check the product instructions.
Step 5: Install the Oiled Air Filter
Proper installation is just as important as proper oiling. A perfectly oiled filter won’t protect your engine if it’s not sealed correctly.
Clean the Airbox Interior
Before installing the fresh filter, take a moment to inspect the airbox. Clean out any lingering dirt, dust, or old grease. You can use a clean rag and specialized airbox cleaner or simply wipe it down thoroughly. Ensure the sealing surface where the filter seats is perfectly clean. This is where a lot of dirt tries to bypass the filter.
Apply Grease to the Filter Rim (Crucial for Foam Filters)
For foam filters, apply a thin bead of waterproof grease (like a marine grease or specific air filter grease) around the sealing lip of the filter, where it makes contact with the airbox. This creates an extra barrier, ensuring a perfect seal and preventing any tiny dust particles from sneaking around the filter. This step is often overlooked but provides an extra layer of protection.
Install the Filter Cage
Carefully slide the oiled filter onto its plastic cage. Ensure it’s seated properly and isn’t twisted or stretched.
Seat the Filter Correctly in the Airbox
Now, carefully insert the filter (with its cage) into the airbox opening. Make sure the filter’s lip seats perfectly against the airbox wall, compressing the grease you applied. Rotate and adjust as needed to ensure a snug, even fit all the way around.
Secure the Filter
Re-attach the wing nut, bolt, or clips that hold the filter in place. Tighten it securely, but don’t overtighten, as this can deform the filter or cage. The goal is a firm, even seal.
Reinstall the Airbox Cover and Seat
Replace the airbox cover, ensuring all clips or screws are fastened correctly. Finally, reinstall your dirt bike’s seat.
Step 6: Final Checks and Maintenance Tips
You’ve successfully learned how to oil air filter dirt bike! A quick final check ensures everything is perfect.
Double-Check Everything
Before you ride, quickly go over all the steps in your mind. Is the filter seated correctly? Are all clips secured? Is there any dirt that might have fallen into the intake? A quick check can prevent future issues.
Regular Inspection is Key
The frequency of cleaning and oiling depends heavily on your riding conditions. If you ride in dusty, dry environments, you might need to clean your air filter after every ride. In cleaner conditions, every few rides might suffice. Regularly pull off your seat and visually inspect the filter. If it looks dirty, it’s time to clean and oil it.
Consider a Spare Filter
Many serious riders keep two or three pre-oiled filters on hand. This way, when one gets dirty, you can quickly swap it out and then clean and oil the dirty one at your leisure. This saves time at the track or trail and ensures you always have a fresh filter ready.
Troubleshooting Common Air Filter Oiling Issues
Even with the best intentions, things can sometimes go wrong. Here’s how to handle common problems when you oil air filter dirt bike.
Too Much Oil
Symptom: Dripping oil from the airbox, restricted engine performance, excessive smoke from exhaust.
Solution: Remove the filter. Gently squeeze out the excess oil using paper towels. Allow it to tack up for a longer period. If it’s truly oversaturated, you might need to re-clean and re-oil, using less next time. A slightly tacky filter is good; a dripping filter is not.
Not Enough Oil / Dry Spots
Symptom: Visible light-colored or dry patches on the filter. Engine may ingest dirt.
Solution: Remove the filter. Apply a small amount of oil directly to the dry spots and gently knead it in until coverage is even. Remember, even coverage is critical for filtration.
Uneven Coverage
Symptom: Some areas are heavily saturated, others are dry. This is similar to “not enough oil” but distributed poorly.
Solution: This often happens with aerosol sprays if not worked in. Remove the filter and thoroughly knead the existing oil to redistribute it. If still uneven, a light re-spray or small amount of pour-on oil in dry areas, followed by kneading, will fix it.
Filter Falling Off or Not Sealing Properly
Symptom: Filter is loose in the airbox, or appears to have come off its mounting post. Dirt bypassing the filter.
Solution: Re-install the filter, paying extra attention to how it seats. Ensure the mounting bolts/clips are secure but not overtightened. The grease on the rim helps seal but also holds it in place. Double-check that the filter cage is correctly assembled inside the filter. Sometimes, the cage can be slightly bent, causing issues. Inspect the airbox mounting surface for damage.
Difficulty Removing Old Oil/Dirt
Symptom: Filter remains stained or feels gritty after cleaning.
Solution: Use a stronger, purpose-specific air filter cleaner. Allow it to soak longer. Repeat the cleaning and rinsing process multiple times. For very stubborn filters, a new filter might be the best solution. Never compromise on cleanliness before oiling.
Conclusion
Mastering how to oil air filter dirt bike is a fundamental skill that every dirt bike owner should possess. It’s a small investment of time and effort that yields significant returns in engine longevity, performance, and reliability. By following these steps carefully, you’re not just performing maintenance; you’re actively protecting the heart of your machine from the harsh environments of dirt biking. A clean, properly oiled air filter ensures your engine breathes clean air, runs optimally, and continues to provide you with countless hours of adrenaline-pumping fun. So grab your gloves, get dirty, and enjoy the peace of mind that comes with a job well done!

Sagor Jahan is the founder and author of Automopromo.com, dedicated to delivering insightful tips, reviews, and updates in the automotive and promotional industry. With a passion for innovation and clear guidance, Sagor helps readers make informed decisions and stay ahead in the ever-evolving automotive world.

