
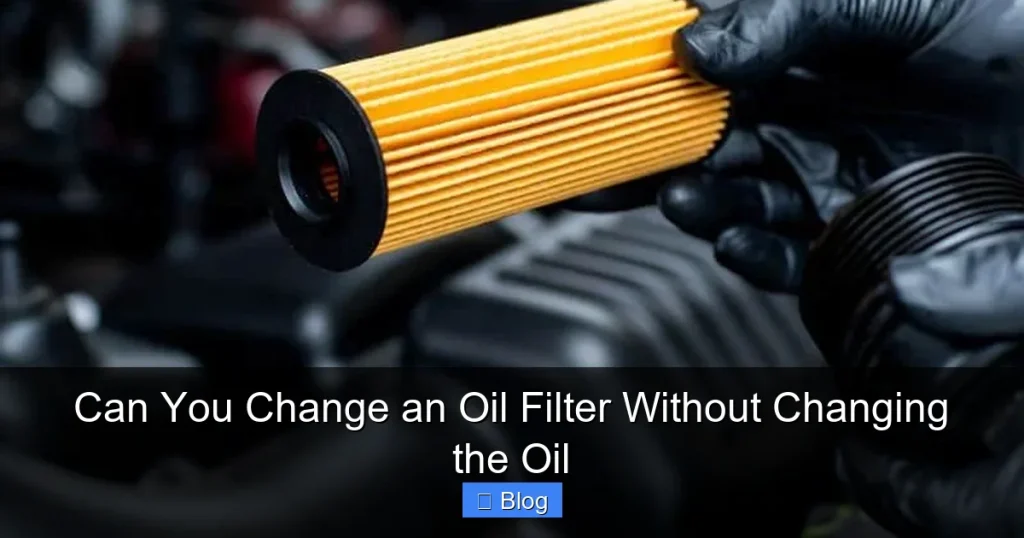
Can you change an oil filter without changing the oil? Yes, it is possible to change an oil filter without changing the oil, though it’s generally not recommended as a regular practice. This guide provides step-by-step instructions for safely replacing just your oil filter, minimizing oil loss and mess. While convenient for specific situations like a defective filter or switching types, it should not replace regular, full oil changes for optimal engine health.
Can You Change an Oil Filter Without Changing the Oil
Hey there, fellow car enthusiast! Have you ever wondered if it’s possible to change an oil filter without changing the oil? Maybe you just had an oil change, but something feels off with the filter, or you want to upgrade to a higher-quality filter without draining perfectly good, new oil. It’s a common question, and one we’re here to answer thoroughly.
The short answer is: Yes, you can! But like most things in car maintenance, there’s a right way to do it, risks involved, and scenarios where it makes more sense than others. This comprehensive guide will walk you through everything you need to know about how to change an oil filter without changing the oil, ensuring you do it safely and effectively. We’ll cover the tools you’ll need, the step-by-step process, crucial safety tips, and when this procedure is appropriate—or when it’s better to simply do a full oil and filter change.
Let’s dive in and demystify the process of changing an oil filter without changing the oil!
Key Takeaways
- It’s Possible, But Not Ideal: You can change an oil filter without changing the oil, but it’s typically a situational fix, not a substitute for a full oil change.
- Minimal Oil Loss: When done correctly, especially with a warm (but not hot) engine, the amount of oil lost is usually minimal—typically only the oil contained within the filter itself.
- Specific Scenarios: This procedure is useful for addressing a faulty filter, upgrading to a better filter type, or in situations where the engine oil itself is still very new.
- Tools and Preparation are Key: Proper tools (filter wrench, drain pan, new oil) and safety measures (level ground, cool engine, jack stands if needed) are crucial for a smooth process.
- Always Top Off: You will always lose some oil, so having fresh engine oil on hand to top off your engine to the correct level immediately after is essential.
- Not a Substitute for Routine Maintenance: Even if you change your filter this way, adhere to your vehicle’s recommended full oil and filter change intervals for optimal engine longevity.
- Consider Filter Type: The ease and mess associated with this process can vary significantly between spin-on and cartridge-style oil filters, with cartridge filters often being less messy for this specific task.
Quick Answers to Common Questions
Why might I only change the filter?
You might choose to change just the filter if you’ve recently performed an oil change but suspect a faulty filter, or if you’re upgrading to a higher-quality filter type without needing a full oil replacement yet.
Will I lose a lot of oil?
When done correctly, especially with a warm (but not hot) engine, the amount of oil lost is usually minimal—typically only the oil contained within the filter itself and a small amount from the housing. Have a drain pan ready!
Is it harder than a full oil change?
The process of removing and installing the filter is similar, but it requires extra care to minimize spillage since you’re not draining the entire system. Access can sometimes be tricky depending on your vehicle, and you’ll need to be quick to swap filters.
What if my filter is stuck?
If your filter is stuck, a proper oil filter wrench is essential. Ensure it’s the right size and type for your filter. If it still won’t budge, apply steady pressure and try rotating slightly in both directions to break the seal before fully loosening it.
How important is topping off the oil?
Extremely important! Even minimal oil loss can affect your engine’s lubrication. Always check your dipstick after installing the new filter and add fresh oil until it reaches the ‘full’ mark to prevent engine damage and ensure proper engine function.
Is It Possible? Understanding the Mechanics
First, let’s understand why this is even a possibility. Your car’s engine oil circulates through the engine, lubricating moving parts, cleaning, and cooling. The oil filter’s job is to catch contaminants and debris from that circulating oil, preventing them from damaging your engine.
When you think about it, the oil filter is usually located at a point in the lubrication system where it can be removed without completely draining the entire oil pan. When you remove the filter, you’ll primarily lose the oil contained within the filter itself and a small amount from the immediate housing area. The majority of your engine oil remains in the oil pan and various engine passages.
This distinction is key to understanding how you can change an oil filter without changing the oil. However, it’s important to note that you will *always* lose some oil, so you’ll need to be prepared to top off your engine afterwards.
Why Might You Want to Change Just the Filter?
While a full oil and filter change is always the best practice for routine maintenance, there are specific situations where you might consider changing just the oil filter without changing the oil:
- Faulty or Defective Filter: Sometimes, a brand new filter might be faulty, perhaps leaking or making noise. If you just did an oil change, you wouldn’t want to drain fresh oil to replace a bad filter.
- Upgrading Filter Quality: You might want to switch to a higher-quality, extended-life oil filter, even if your oil isn’t due for a change yet.
- Accidental Damage: The oil filter might get accidentally damaged (e.g., hit by road debris), causing a minor leak. Replacing just the filter can resolve this quickly.
- Extended Oil Change Intervals: If you use synthetic oil with very long change intervals (e.g., 10,000+ miles), some manufacturers or enthusiasts recommend changing the filter mid-cycle to maintain optimal filtration, even if the oil itself is still good.
- Convenience: In a pinch, if you notice a minor filter-related issue, changing an oil filter without changing the oil can be a quicker fix than a full oil change.
These are all valid reasons to consider this procedure. However, remember it’s a specific solution, not a general maintenance routine.
The Risks and Considerations
Before you proceed to change an oil filter without changing the oil, it’s crucial to understand the potential downsides:
- Contamination Risk: When you open the filter housing, there’s a slight chance of introducing debris or contaminants into the oil system. You need to be meticulous about cleanliness.
- Oil Spillage: Even though you’re not draining all the oil, some spillage is almost inevitable. It can be messy, and engine oil is an environmental pollutant that needs proper disposal.
- Not a Substitute for a Full Oil Change: This cannot be stressed enough. Changing just the filter does not refresh your engine oil. Old, degraded oil still has its impurities, reduced lubrication properties, and decreased ability to protect your engine.
- Reduced Filter Life: If you’re putting a new filter on old, dirty oil, the new filter will have to work harder and might clog faster than if it were paired with fresh oil.
- Manufacturer Recommendations: Always check your vehicle’s owner’s manual. Some manufacturers have specific guidelines, and some engine designs (like certain cartridge filters) might make this process cleaner and more straightforward than others.
Weigh these risks against your reasons for wanting to change an oil filter without changing the oil. If your oil is due for a full change anyway, just do the full change.
Before You Begin: Essential Tools and Supplies
To successfully change an oil filter without changing the oil, you’ll need a few key items. Gather everything before you start to avoid interruptions.
- New Oil Filter: Ensure it’s the correct type and size for your vehicle (spin-on or cartridge).
- Oil Filter Wrench: There are various types (cup, strap, claw). Choose one that fits your filter perfectly.
- Drain Pan: To catch any spilled oil. Even a small amount needs to be contained.
- Clean Shop Rags or Paper Towels: Lots of them, for cleaning up spills and wiping surfaces.
- Gloves: Protect your hands from oil and grime.
- New Engine Oil: To top off the engine. Have at least a quart (or liter) of the correct type and viscosity for your vehicle.
- Torque Wrench: Especially important for cartridge-style filter housings, where specific torque settings prevent leaks and damage.
- Funnel: For accurately topping off the oil.
- Jack and Jack Stands (Optional but Recommended): If your oil filter is hard to reach from above or requires access from underneath the vehicle. Always use jack stands for safety!
- Safety Glasses: Protect your eyes from drips and debris.
Step-by-Step Guide: How to Change an Oil Filter Without Changing the Oil
Alright, let’s get to the main event! Follow these steps carefully to change an oil filter without changing the oil.
Step 1: Prepare for Safety and Access
Safety is paramount whenever you’re working on your vehicle. Don’t skip these crucial first steps.
Visual guide about Can You Change an Oil Filter Without Changing the Oil
Image source: takeuroil.com
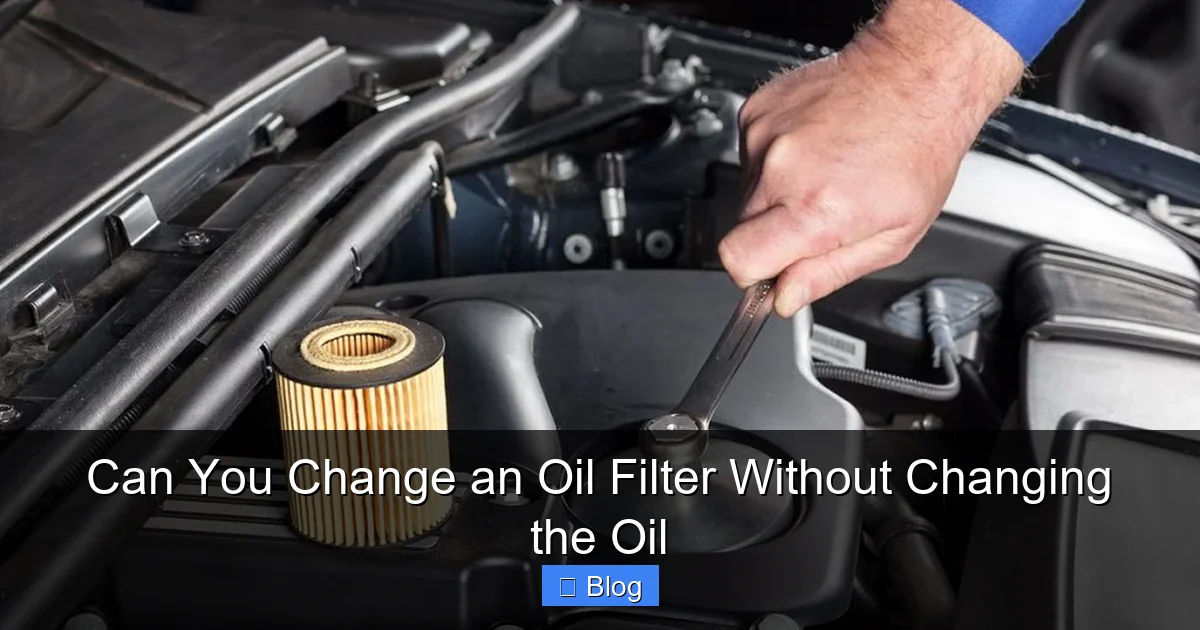
Visual guide about Can You Change an Oil Filter Without Changing the Oil
Image source: blog.amsoil.com
Park on a Level Surface
Always park your car on a flat, level surface. This ensures stability if you need to lift the vehicle and helps you get an accurate oil level reading later.
Allow Engine to Cool (Slightly Warm is Okay)
Working on a completely hot engine is dangerous, as oil can be extremely hot and cause severe burns. Allow the engine to cool down for at least 30 minutes to an hour. A slightly warm engine can help the oil flow out of the filter more easily, minimizing residual oil, but it shouldn’t be too hot to touch.
Gather Your Tools
Double-check that you have all the tools and supplies listed above within arm’s reach. This prevents delays and allows for a quicker filter swap, further minimizing oil loss.
Lift and Secure Your Vehicle (If Needed)
If your oil filter is difficult to access from the top of the engine bay, you’ll need to lift the front of your car. Use a hydraulic jack to lift the vehicle and then immediately place sturdy jack stands under the designated lift points. Never rely solely on a jack. Ensure the vehicle is stable before going underneath.
Step 2: Locate and Prepare the Filter Area
Now that safety is covered, let’s find the filter.
Identify the Oil Filter Location
The oil filter’s location varies significantly between vehicles. It can be on the side of the engine block, near the front, or sometimes hidden deeper in the engine bay. Consult your owner’s manual if you can’t find it. Modern vehicles often use cartridge filters housed in a plastic or metal canister, which might be on top of the engine.
Position the Drain Pan
Even though you’re not draining all the oil, some will definitely come out when you remove the filter. Place your drain pan directly underneath the oil filter to catch any drips and spills. Position it wide enough to cover the expected splash area.
Clean the Area Around the Filter
Use a clean rag to wipe away any dirt, grime, or old oil from around the filter and its mounting base. This prevents contaminants from falling into your engine’s fresh oil when you change an oil filter without changing the oil.
Step 3: Remove the Old Oil Filter
This is where the actual filter swap begins.
Loosen the Filter (Spin-On) or Housing (Cartridge)
- For Spin-On Filters: Use your oil filter wrench to loosen the filter by turning it counter-clockwise. You’ll likely need the wrench for the initial break, but once it’s loose, you might be able to spin it off by hand.
- For Cartridge Filters: Use your wrench (often a large socket or special tool) to loosen the housing cap or cover. These usually have a hex head on top. Again, turn counter-clockwise.
Carefully Spin Off/Remove the Filter
Once loose, slowly spin the filter (or housing cap) off by hand. Keep the drain pan directly underneath. As you unscrew it, oil will start to trickle out. Try to maintain control and keep the filter upright as long as possible to minimize spillage. For cartridge filters, remove the cap and then pull out the old filter element.
When you change an oil filter without changing the oil, speed and control are key here to limit the mess and oil loss.
Catch Spilled Oil
Allow all the oil from the filter and housing to drain into your pan. Have those rags ready to wipe up any immediate spills on engine components.
Step 4: Prepare and Install the New Oil Filter
Now, let’s get that new filter in place.
Inspect the Filter Mount Surface
Before installing the new filter, carefully inspect the mating surface on the engine where the filter mounts. Ensure there are no old rubber gasket remnants from the previous filter stuck to the engine. If there are, gently scrape them off. A double gasket will almost certainly lead to a severe oil leak.
Lubricate the New Filter Gasket (Spin-On) or O-Rings (Cartridge)
- For Spin-On Filters: Dip your finger in some fresh engine oil and lightly coat the new rubber gasket on the new filter. This ensures a good seal and makes it easier to remove next time.
- For Cartridge Filters: The new filter will usually come with new O-rings for the housing cap. Remove the old O-rings and install the new ones, lubricating them with fresh engine oil.
Install the New Filter
- For Spin-On Filters: Carefully thread the new filter onto the engine by hand. Make sure it’s not cross-threaded. Spin it until the gasket makes contact with the engine block.
- For Cartridge Filters: Insert the new filter element into the housing, ensuring it’s seated correctly. Then, carefully thread the housing cap back onto the engine by hand.
Tighten to Specification
- For Spin-On Filters: Once the gasket makes contact, tighten the filter by hand another 3/4 to 1 full turn. Do NOT overtighten with a wrench, as this can damage the filter or engine block and make future removal extremely difficult. Check the filter’s instructions; some filters specify tighter.
- For Cartridge Filters: Use your torque wrench to tighten the housing cap to the manufacturer’s specified torque setting. This is crucial for preventing leaks and damage to the plastic housing.
Step 5: Final Checks and Cleanup
You’re almost done! A few last steps to ensure everything is perfect.
Check for Leaks
Before lowering the vehicle, do a visual inspection around the new filter. Make sure everything looks tight and clean. Now, start the engine and let it run for about 30 seconds to a minute. Shut it off and immediately check underneath the car and around the filter area for any signs of leaks. If you see drips, tighten the filter slightly more (for spin-on) or re-check the torque (for cartridge). If it continues to leak, something might be wrong with the installation (e.g., double gasket or damaged gasket).
Top Off Engine Oil
Since you lost some oil during the filter swap, you MUST top off your engine oil. Pull out your dipstick, wipe it clean, reinsert it, and then pull it out again to check the current oil level. Add fresh engine oil (of the correct type and viscosity) through the oil fill cap, using a funnel, until the dipstick shows the oil level is at the “full” or “max” mark. Add oil gradually and recheck the dipstick often to avoid overfilling.
Dispose of Old Filter and Oil Properly
Never throw old oil filters or used engine oil in the trash. Place the old filter in a sealed plastic bag or container. Pour any collected spilled oil into an old, sealable container. Take both to an authorized recycling center or auto parts store that accepts used oil and filters for proper disposal.
Lower Vehicle and Test Run
If you used a jack and jack stands, carefully lower your vehicle. Take it for a short test drive, listening for any unusual noises and keeping an eye on your oil pressure gauge or warning lights. After the drive, re-check the oil level once the engine has cooled for a few minutes and top off if necessary.
Troubleshooting Common Issues When You Change an Oil Filter Without Changing the Oil
Even with the best preparation, you might encounter a few hiccups when you change an oil filter without changing the oil. Here’s how to tackle them:
- Stuck Filter: If the old filter won’t budge, ensure you’re using the correct type and size of filter wrench. Sometimes, tapping the filter wrench with a rubber mallet can help break the seal. For extremely stubborn filters, a claw-type wrench offers superior grip.
- Leaking After Installation: This is usually due to an improperly tightened filter, a damaged gasket, or a forgotten old gasket (double gasket). Double-check the tightness, visually inspect the gasket seal, and ensure no old gasket material is present. Re-lubricate and reinstall if necessary.
- Not Enough Oil to Top Off: Always have at least a quart of the correct oil on hand. If you run out, do not drive the car until the oil level is correct. Head to the nearest auto parts store to get more.
- Cross-threaded Filter: If the new filter doesn’t screw on smoothly by hand, stop immediately. Do not force it. You’ve likely cross-threaded it, which can damage the engine block or filter housing. Unscrew, inspect threads, and try again carefully.
Conclusion
So, can you change an oil filter without changing the oil? Absolutely, it’s a feasible task for certain situations. By following this detailed guide, you can confidently undertake the job, minimize mess, and ensure your engine continues to run smoothly. Remember, the key is careful preparation, precise execution, and thorough cleanup.
However, it’s vital to reiterate that this procedure is a specific solution, not a replacement for your vehicle’s recommended full oil and filter change intervals. Fresh oil is just as important as a clean filter for long-term engine health. Think of changing an oil filter without changing the oil as a specialized maintenance task for particular circumstances, not a shortcut to regular servicing. Always prioritize your vehicle’s overall health and your personal safety above all else. Happy wrenching!

Sagor Jahan is the founder and author of Automopromo.com, dedicated to delivering insightful tips, reviews, and updates in the automotive and promotional industry. With a passion for innovation and clear guidance, Sagor helps readers make informed decisions and stay ahead in the ever-evolving automotive world.

