

Installing a Can Am Defender oil filter relocation kit can dramatically simplify your routine oil changes, making them cleaner and more accessible. This comprehensive guide walks you through every step, from preparing your vehicle and gathering tools to the final leak check. You’ll learn how to remove the old filter, install the new adapter and remote mount, route oil lines safely, and ensure a proper, leak-free installation, ultimately saving you time and hassle on future maintenance.
Yes, a Can-Am Defender oil filter relocation kit moves the oil filter to an easier-to-reach location. It improves access during oil changes, reduces mess, and helps protect the filter from dirt and damage. These kits are popular for maintenance convenience, especially on tight or muddy riding conditions.
Can Am Defender Oil Filter Relocation Kit: Your Ultimate Installation Guide
Hey there, fellow Can Am Defender owner! Are you tired of wrestling with your oil filter in a tight, awkward spot every time you need to do an oil change? Does the thought of oil dripping all over your skid plate or exhaust system make you cringe? If so, you’re not alone! Many Defender enthusiasts face these same frustrations with the stock oil filter location. But don’t worry, there’s a fantastic solution that will make your life a whole lot easier: the Can Am Defender oil filter relocation kit**.
This comprehensive guide is designed to walk you through the entire process of installing an oil filter relocation kit on your Can Am Defender. We’ll cover everything from what tools you’ll need to the final leak check, ensuring you can tackle this project with confidence. By the end, you’ll have a much more accessible oil filter, making routine maintenance a breeze and keeping your Defender running smoothly for years to come. Let’s dive in!
Key Takeaways
- Enhanced Accessibility: A Can Am Defender oil filter relocation kit moves the filter to a more convenient, easy-to-reach location, eliminating awkward access issues common with stock setups.
- Cleaner Oil Changes: Relocating the filter often prevents oil spills onto engine components or the skid plate, making maintenance a much cleaner process.
- Tools and Safety are Crucial: Always gather all necessary tools and prioritize safety (e.g., disconnecting the battery, allowing the engine to cool, wearing protective gear) before starting any work.
- Proper Installation Steps: The process involves draining oil, removing the old filter, installing an engine block adapter, mounting the new filter base, carefully routing oil lines, and performing a thorough leak check after refilling.
- Careful Line Routing: Ensure oil lines are routed away from hot exhaust components, moving parts, and sharp edges to prevent damage and potential leaks.
- Post-Installation Checks: After installation, always start the engine, check for leaks immediately, monitor oil pressure, and re-check the oil level after a short run.
- Long-Term Benefits: While requiring an initial installation effort, the relocation kit provides significant long-term benefits in terms of ease of maintenance and potentially extended engine life through more consistent oil changes.
Quick Answers to Common Questions
What’s the best mounting location for the filter?
The best mounting location is usually a sturdy, easily accessible spot that’s protected from impact, heat, and moving parts. Many owners choose a clear area on the frame or within the engine compartment where a full-size filter can be easily reached and removed.
Do I need special tools for AN fittings?
While standard adjustable wrenches can work, dedicated AN wrenches (sometimes called aluminum wrenches) are recommended. They are designed to fit the hexagonal shape of AN fittings without marring their anodized finish, ensuring a clean, professional look and preventing damage.
Should I pre-fill the new oil filter?
Yes, pre-filling the new oil filter with fresh engine oil is highly recommended. It helps to reduce the amount of time the engine runs without full oil pressure after a change, minimizing wear during startup. Just fill it slowly until the media is saturated, then install.
How do I know if my oil lines are routed safely?
Safe routing means keeping lines away from exhaust components, suspension travel, steering linkages, and sharp edges. Use zip ties or P-clamps to secure them every 12-18 inches, ensuring they have enough slack for engine movement but aren’t rubbing or kinked.
What if my kit requires cutting hoses?
If your kit includes bulk hose, use a specialized hose cutter for a clean, straight cut. A hacksaw or utility knife can leave frayed edges that may compromise the fitting seal. Measure twice, cut once, and ensure both ends are cut squarely for optimal connection.
What is an Oil Filter Relocation Kit?
Before we get our hands dirty, let’s quickly understand what a Can Am Defender oil filter relocation kit actually is. In simple terms, it’s a system designed to move your engine’s oil filter from its original, often inconvenient, factory location to a new, easily accessible spot. This is typically achieved using an adapter that screws onto the original filter port, flexible oil lines, and a remote filter mount that you can secure in a more convenient area on your Defender.
The benefits are clear: easier access for oil changes, less mess, and in some cases, even the ability to use a larger or more common filter size. It’s a fantastic upgrade for anyone who performs their own maintenance or wants to simplify service for their technician.
Gather Your Tools and Supplies
Preparation is key to any successful project. Before you begin, make sure you have all the necessary tools and supplies laid out. This will save you time and frustration during the installation process.
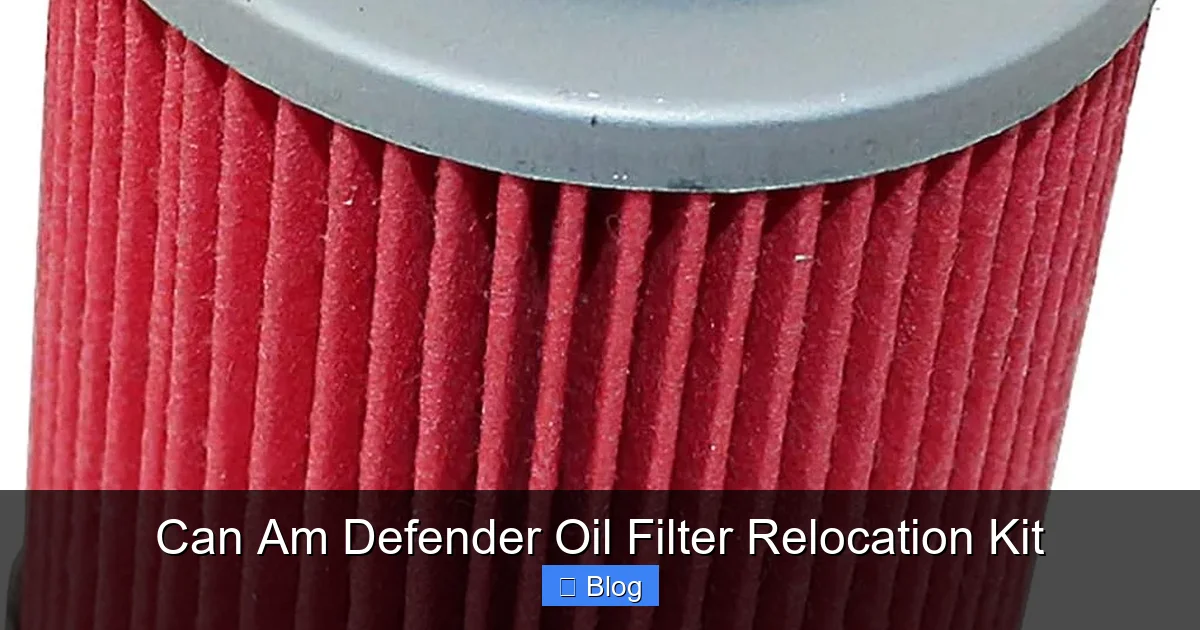
Visual guide about Can Am Defender Oil Filter Relocation Kit
Image source: m.media-amazon.com
What You’ll Need:
- Can Am Defender Oil Filter Relocation Kit: Make sure it’s specifically designed for your Defender model and year.
- New Oil Filter: Check your kit’s instructions for the compatible filter type/part number.
- Engine Oil: The correct type and amount for your Defender (check your owner’s manual).
- Oil Drain Pan: Large enough to hold all the old oil.
- Socket Wrench Set: Various sizes for bolts and fittings.
- Torque Wrench: Essential for proper tightening and preventing leaks.
- Adjustable Wrench or Line Wrenches: For oil line fittings.
- Oil Filter Wrench: For removing the old filter.
- Hose Cutters (if applicable): Some kits require you to cut oil lines to length.
- Zip Ties or Cable Clamps: For securing oil lines.
- Shop Rags or Paper Towels: For cleanup.
- Brake Cleaner or Degreaser: For final cleanup of any spilled oil.
- Safety Glasses and Gloves: Always prioritize personal safety.
- Floor Jack and Jack Stands or Vehicle Lift (Optional but recommended): For safe access underneath.
Safety First: Pre-Installation Checklist
Working on any vehicle requires attention to safety. Please read through these points before starting.
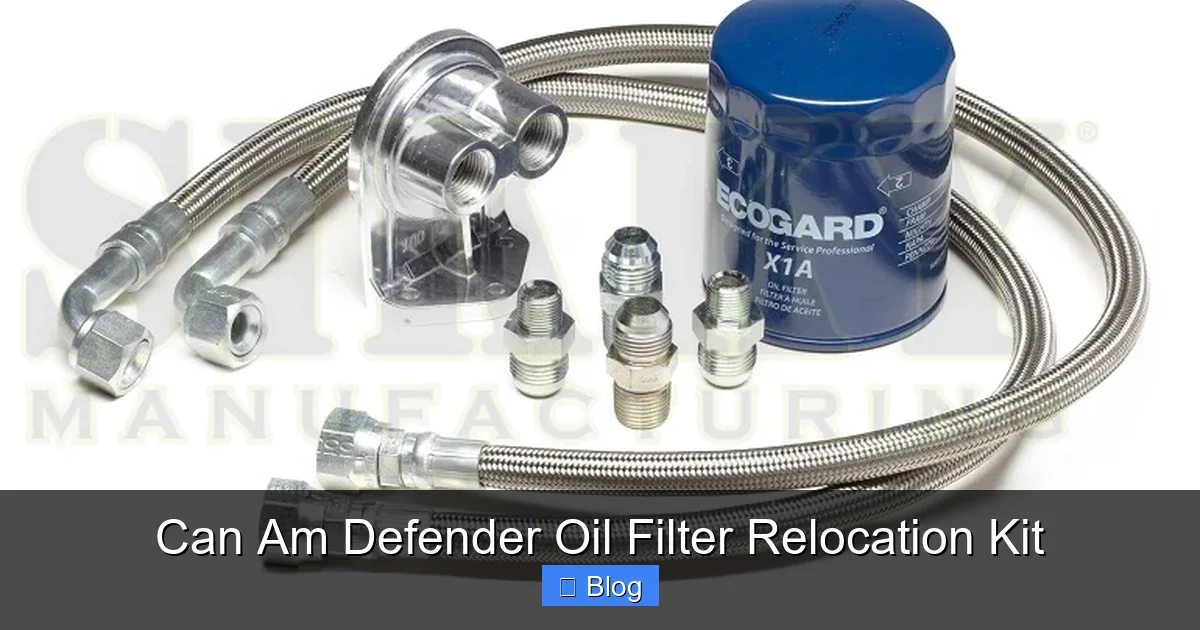
Visual guide about Can Am Defender Oil Filter Relocation Kit
Image source: sikky.com
- Engine Cool Down: Ensure your Defender’s engine is completely cool. Hot oil and engine components can cause severe burns.
- Flat and Level Surface: Park your Defender on a flat, stable surface.
- Chock Wheels: Use wheel chocks to prevent any accidental movement.
- Disconnect Battery: For electrical safety, disconnect the negative terminal of your Defender’s battery. This prevents accidental starts or electrical shorts.
- Read Kit Instructions: Every relocation kit can be slightly different. Always review the specific instructions provided by your kit manufacturer.
Step-by-Step Installation Guide
Step 1: Prepare for Oil Drainage
Before you can install your new kit, you need to drain the old oil and remove the existing filter.
- Locate Drain Plug: Position your oil drain pan directly beneath the engine oil drain plug.
- Remove Drain Plug: Using the appropriate socket wrench, carefully loosen and remove the drain plug. Allow all the old oil to drain completely into the pan. This usually takes about 10-15 minutes.
- Reinstall Drain Plug: Once drained, clean the drain plug and its washer. Reinstall the drain plug, tightening it to the manufacturer’s specified torque. Do not overtighten!
Step 2: Remove the Old Oil Filter
Now, let’s get that old filter out of the way.
- Locate Oil Filter: Find the factory oil filter. It’s often in a tight spot, which is precisely why you’re installing this kit!
- Prepare for Spills: Place a rag or a smaller drip pan underneath the filter area, as some residual oil will undoubtedly leak out.
- Remove Filter: Use your oil filter wrench to loosen and remove the old oil filter. Be careful as it will be full of oil.
- Clean Mount Surface: Once the filter is off, thoroughly clean the engine block’s filter mounting surface, ensuring no old gasket material or debris remains. This is crucial for a leak-free seal with the new adapter.
Step 3: Install the Engine Block Adapter
This is where your relocation kit truly begins to take shape.
- Identify Adapter: Your kit will include an adapter that screws onto the engine where the old filter used to be. It will have ports for the “in” and “out” oil lines.
- Apply Thread Sealant (If Recommended): Some adapters come with an O-ring or gasket; others might recommend a thread sealant. Follow your kit’s instructions carefully.
- Install Adapter: Carefully screw the adapter onto the engine block by hand until snug. Then, use a wrench to tighten it to the specified torque. Again, do not overtighten, but ensure it’s secure!
- Orient Adapter: Pay attention to the orientation of the adapter. You’ll want the oil line ports to be easily accessible and point in a direction that allows for smooth hose routing.
Step 4: Choose and Mount the Remote Filter Base
This is your chance to make oil changes truly convenient.
- Select Location: Find a suitable, sturdy, and easily accessible location for the remote filter base. Consider areas away from extreme heat (exhaust), moving parts, and potential impact zones. Popular spots include inside the engine compartment, on the frame, or behind a specific body panel if accessible. Ensure there’s enough clearance for the new filter to be screwed on and removed easily.
- Prepare Mounting Surface: If drilling is required, mark your pilot holes carefully. Double-check for any wires or lines behind the drilling area before you begin.
- Mount Filter Base: Securely attach the remote filter base using the hardware provided in your kit. Ensure it’s mounted firmly and won’t vibrate loose.
Step 5: Route and Connect Oil Lines
Proper hose routing is critical for performance and safety.
- Identify “In” and “Out” Ports: Your kit’s instructions will specify which port on the engine block adapter connects to the “in” side of the remote filter base and which connects to the “out” side. It’s usually marked, or one port leads directly to the filter’s center. Getting these reversed can cause serious engine damage!
- Measure and Cut Hoses (if necessary): If your kit requires custom hose lengths, carefully measure the distance for each line, allowing for some slack but avoiding excessive length. Cut the hoses squarely with specialized hose cutters for a clean connection.
- Install Fittings: Attach the hose fittings to the oil lines according to your kit’s instructions. This often involves specific techniques for push-lock or AN fittings.
- Connect Lines: Connect one end of the first hose to the engine block adapter’s “out” port (oil going from the engine) and the other end to the “in” port of the remote filter base. Repeat for the second hose, connecting the “out” port of the filter base to the “in” port of the engine block adapter (oil returning to the engine).
- Secure Hoses: Use zip ties, hose clamps, or factory mounting points to route the hoses securely. Keep them away from hot exhaust pipes, sharp edges, and any moving suspension or steering components. Avoid tight bends that could restrict oil flow.
- Tighten Fittings: Use your adjustable or line wrenches to carefully tighten all oil line fittings. Be firm, but avoid overtightening, which can damage threads or crush gaskets.
Step 6: Install the New Oil Filter
You’re almost there!
- Apply Oil to Gasket: Lightly coat the rubber gasket of your new oil filter with fresh engine oil.
- Install Filter: Carefully screw the new oil filter onto the remote filter base by hand until the gasket makes contact. Then, turn it an additional 1/2 to 3/4 turn, or as specified by the filter manufacturer. Do not overtighten with a wrench! Hand-tight is usually sufficient.
Step 7: Refill Engine Oil
Now it’s time to put fresh oil into your Defender.
- Pour in Oil: Locate your engine’s oil fill cap. Using a funnel, slowly add the specified amount and type of engine oil for your Defender.
- Check Level: After pouring, wait a few minutes for the oil to settle, then check the dipstick. You’ll likely be slightly below the “full” mark.
Step 8: Initial Startup and Leak Check
This is a critical step to ensure everything is installed correctly and safely.
- Reconnect Battery: Reconnect the negative terminal to your Defender’s battery.
- Prime the System (Optional but Recommended): Before starting, you can temporarily remove the spark plugs and crank the engine for a few seconds (without starting) to help circulate oil and prime the new lines and filter. Reinstall spark plugs afterward.
- Start Engine: Start your Defender’s engine. Immediately look for any signs of leaks around the engine block adapter, oil lines, and the remote filter base.
- Monitor Oil Pressure: Keep an eye on your Defender’s oil pressure light or gauge. It should come on briefly and then turn off quickly, indicating proper oil pressure. If it stays on, shut off the engine immediately!
- Run Briefly: Let the engine run for a couple of minutes while continuously checking for leaks.
- Shut Off Engine and Re-check Oil Level: Turn off the engine, wait 5-10 minutes for the oil to drain back into the pan, and then re-check the oil level on the dipstick. Top off as needed until it reaches the “full” mark. The new filter and lines will absorb some oil, so you will almost certainly need to add more.
Step 9: Final Checks and Cleanup
Almost done!
- Double-Check All Connections: Visually inspect all fittings, bolts, and hose clamps one last time to ensure they are secure.
- Clean Up Spills: Use brake cleaner or degreaser to clean up any spilled oil on the engine, frame, or ground. This helps prevent future confusion about potential leaks.
- Dispose of Old Oil and Filter: Properly dispose of your old engine oil and filter at an authorized recycling facility.
Troubleshooting Common Issues
Even with careful installation, sometimes issues can arise. Here are a couple of common problems and their solutions.
Issue: Oil Leaks
- Cause: Most commonly, leaks are due to improperly tightened fittings, damaged O-rings, old gasket material left behind, or incorrect hose connections.
- Solution:
- Pinpoint the Leak: Thoroughly clean the suspected area with brake cleaner and then run the engine briefly. Carefully observe where the oil emerges.
- Check Torque: Ensure the engine block adapter is torqued correctly.
- Inspect Fittings: Tighten all oil line fittings carefully. If using AN fittings, ensure they are assembled correctly. For push-lock hoses, ensure they are fully seated.
- Gasket/O-ring Check: If the leak is at the engine block adapter, you might need to remove it, inspect the O-ring or gasket for damage, replace it if necessary, and reinstall. Ensure the mounting surface is perfectly clean.
- Hose Damage: Check the hoses for any cuts, abrasions, or pinholes, especially where they might rub against other components. Replace damaged hoses immediately.
Issue: Low Oil Pressure Light Stays On
- Cause: This is a serious issue that indicates a lack of oil reaching critical engine components. It could be due to extremely low oil level, reversed oil lines, a faulty filter, or a significant leak.
- Solution:
- Immediately Shut Off Engine: Do not run the engine with the oil pressure light on.
- Check Oil Level: Verify the oil level on the dipstick. If it’s low, top it off.
- Verify Hose Connections: Double-check that the “in” and “out” ports on the engine block adapter and the remote filter base are correctly connected. Reversed lines will prevent oil flow.
- Inspect Filter: Ensure the filter is correctly installed and not faulty.
- Look for Massive Leaks: A sudden, large leak could cause rapid oil loss.
- If Unresolved: If the issue persists after these checks, do not restart the engine. Consult a professional mechanic.
Conclusion
Congratulations! You’ve successfully installed your Can Am Defender oil filter relocation kit. This upgrade will undoubtedly make your future oil changes a significantly more pleasant and less messy experience. You’ve not only improved the practicality of your Defender but also gained valuable experience working on your machine.
Remember, regular maintenance is the backbone of a long-lasting and reliable off-road vehicle. With your new, easy-access oil filter, there’s no excuse to skip those crucial oil changes. Enjoy the peace of mind that comes with knowing you’ve taken steps to keep your Can Am Defender performing at its best, season after season.
Happy trails, and happy wrenching!

Sagor Jahan is the founder and author of Automopromo.com, dedicated to delivering insightful tips, reviews, and updates in the automotive and promotional industry. With a passion for innovation and clear guidance, Sagor helps readers make informed decisions and stay ahead in the ever-evolving automotive world.

