
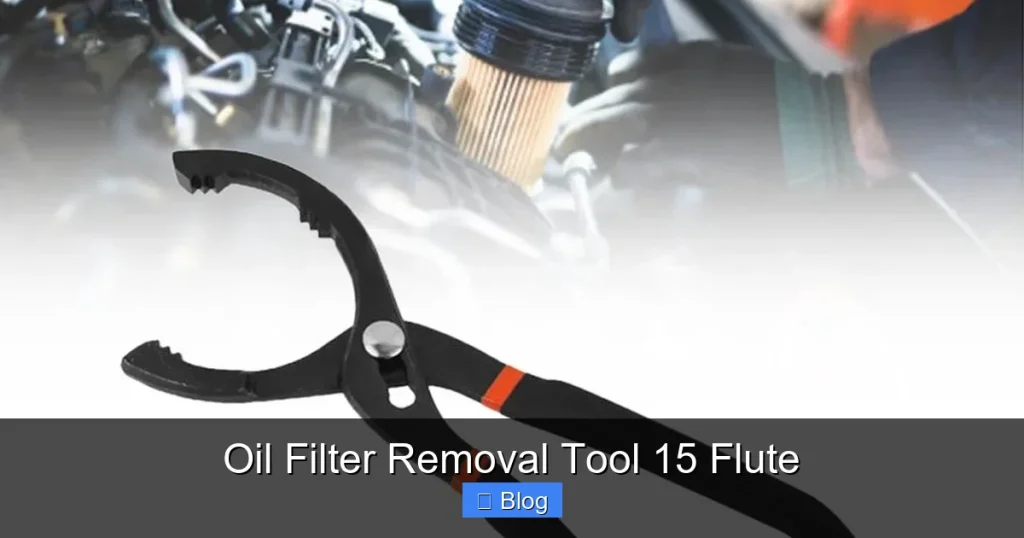
Changing your vehicle’s oil is a fundamental maintenance task, and the right tools make all the difference. The oil filter removal tool 15 flute is an indispensable item for many DIY mechanics, offering a precise fit for specific oil filter types. This specialized cap-style wrench ensures you can remove stubborn filters without damage, making your oil change process smoother and more efficient.
Oil Filter Removal Tool 15 Flute
There are few things as satisfying for a car owner as successfully completing routine maintenance on their own vehicle. Among these tasks, the oil change stands out as one of the most fundamental and frequent. It’s the lifeblood of your engine, keeping everything lubricated and running smoothly. But while draining the old oil and pouring in the new might seem straightforward, there’s often one step that gives DIY mechanics a bit of a headache: removing the old oil filter.
Often, oil filters can be incredibly stubborn. They’re tightened by strong hands (sometimes too strong!), exposed to engine heat and grime, and can seize up, making removal a wrestling match. This is where the right tool makes all the difference, transforming a potentially frustrating ordeal into a quick, clean job. And for a specific range of vehicles, particularly many models from Toyota, Lexus, and certain Honda and Mazda cars, that “right tool” is often a specialized item known as the oil filter removal tool 15 flute.
This article will dive deep into everything you need to know about the 15-flute oil filter tool. We’ll explore what makes it unique, why it’s so effective, how to choose the best one for your needs, and walk you through the process of using it like a pro. Get ready to conquer your next oil change with confidence and precision!
Key Takeaways
- Precision Fit: The oil filter removal tool 15 flute is designed for specific oil filters, primarily found on many Toyota, Lexus, and some Honda/Mazda vehicles, ensuring a snug, non-damaging grip.
- Damage Prevention: Unlike universal tools that can slip or crush the filter, a 15-flute cap wrench minimizes the risk of rounding off the filter housing or breaking a plastic filter cap.
- Ease of Use: Its cap-style design allows for easy attachment and removal, even in cramped engine bays where strap or claw wrenches might struggle to fit or grip.
- Enhanced Safety: A secure grip means less chance of slipping, which can prevent injury to you and damage to surrounding engine components.
- Choosing Wisely: Selecting a durable, correctly sized 15-flute tool made from high-quality materials (like stamped steel or cast aluminum) is crucial for longevity and effective performance.
- DIY Empowerment: Mastering the use of this specific oil filter removal tool 15 flute empowers vehicle owners to confidently perform their own oil changes, saving time and money.
- Troubleshooting: Practical tips for dealing with overtightened or stubborn filters include using extensions, ensuring correct tool engagement, and knowing when to apply steady, firm pressure.
Quick Answers to Common Questions
What is the primary use of an oil filter removal tool 15 flute?
It is specifically designed to remove oil filters that have a 15-flute pattern on their cap or housing, common on many Toyota, Lexus, and some Honda/Mazda vehicles, providing a precise, non-damaging grip.
Why should I use a 15-flute tool instead of a universal wrench?
A 15-flute tool offers a snug, precise fit that prevents slipping, rounding off, or crushing the oil filter and its housing, which is a common issue with universal tools, especially on plastic housings.
How do I know if my car needs a 15-flute oil filter tool?
Check your vehicle’s owner’s manual or a reliable parts guide. You can also visually inspect your current oil filter to count the flutes and measure its diameter if accessible.
Can I use an impact wrench with a 15-flute oil filter tool?
While possible for very stubborn filters, it should be used with extreme caution and on a low setting. Excessive impact can damage the filter housing, particularly if it’s plastic.
What should I do if my filter is still stuck even with the 15-flute tool?
Try using a longer breaker bar or extension for more leverage. As a last resort, gentle tapping or penetrating oil might help. If it’s severely stuck or damaged, consider professional help to avoid further issues.
📑 Table of Contents
- Understanding the Oil Filter Removal Tool 15 Flute
- Benefits of Using the Correct Oil Filter Removal Tool 15 Flute
- How to Choose the Right Oil Filter Removal Tool 15 Flute
- Step-by-Step Guide to Using Your Oil Filter Removal Tool 15 Flute
- Common Mistakes to Avoid and Troubleshooting for Stubborn Filters
- Maintaining Your Tool and Investing in Quality
- Conclusion
Understanding the Oil Filter Removal Tool 15 Flute
At its core, an oil filter removal tool 15 flute is a specialized cap-style wrench. Unlike the more generic strap wrenches, claw wrenches, or plier-style tools, a cap wrench is designed to fit precisely over the end of an oil filter, engaging with the flutes (or facets) molded into its casing. The “15 flute” designation means it has 15 distinct indentations or teeth that mate perfectly with filters designed with that specific pattern. This precision fit is its greatest strength.
Think of it like choosing a socket for a bolt. You wouldn’t use a 12mm socket on a 13mm bolt, would you? The same principle applies here. An ill-fitting tool will slip, round off edges, or even crush the filter, making your job harder and potentially damaging components. The 15-flute oil filter tool eliminates this guesswork for compatible filters.
The Anatomy of a 15-Flute Tool
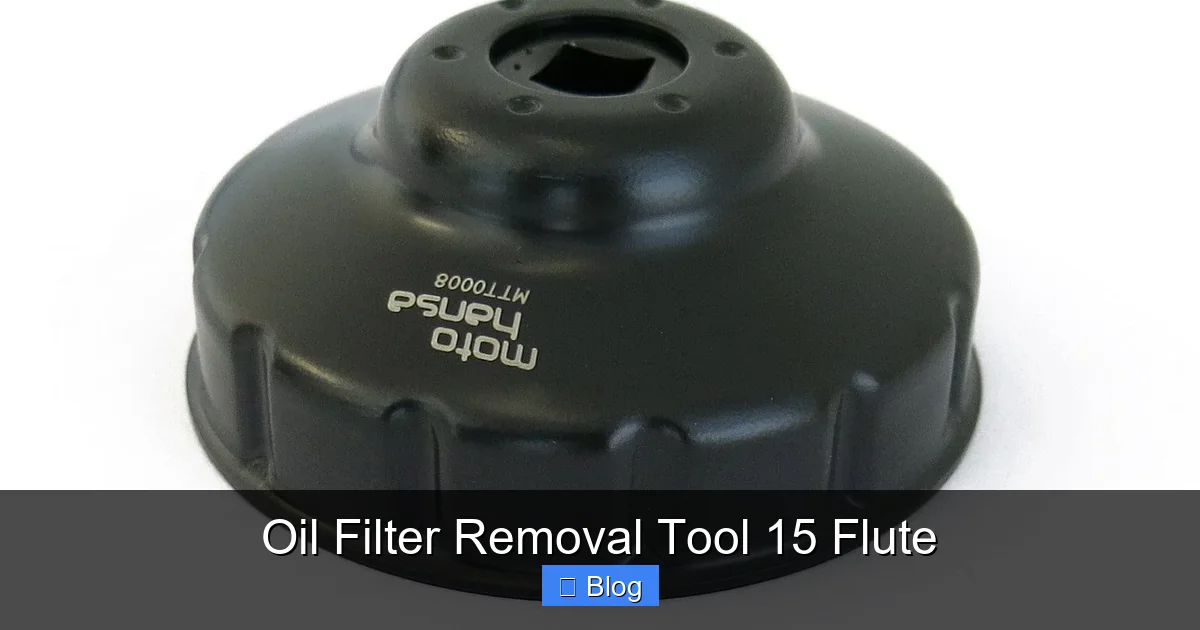
Most 15-flute tools are made from either stamped steel or cast aluminum. Stamped steel versions are typically thinner but very strong, while cast aluminum offers a robust, sometimes heavier feel. They feature a square drive opening, usually 3/8-inch, which allows you to attach a standard ratchet, extension, or torque wrench. This enables you to apply even, controlled force, which is crucial for both removal and proper tightening of the new filter.
The inside of the cap features the distinctive 15 flutes. These are precisely angled to grip the corresponding ridges on the oil filter. Good quality tools will have tight tolerances, ensuring a snug fit that prevents slipping even when dealing with extremely tight or stubborn filters. Some designs may also incorporate a slightly tapered interior to help guide the tool onto the filter.
Why 15 Flutes? Common Applications
The “15 flute” standard isn’t universal for all oil filters, but it is remarkably common for several popular vehicle manufacturers. Most notably, a vast array of Toyota and Lexus vehicles use filters (and often plastic filter housings) that require an oil filter removal tool 15 flute. This includes many models of the Camry, Corolla, RAV4, Highlander, Tacoma, Tundra, 4Runner, and their Lexus equivalents like the ES, GS, IS, RX, and LX.
Beyond Toyota and Lexus, some Honda and Mazda models also utilize filters with a 15-flute pattern, though it’s always wise to double-check your specific vehicle’s requirements. This widespread application is why owning a dedicated 15-flute oil filter wrench is a smart investment for many car enthusiasts and DIY mechanics. It ensures you’re prepared for oil changes on a significant portion of the vehicles on the road today.
Benefits of Using the Correct Oil Filter Removal Tool 15 Flute
When it comes to oil changes, using the right tool isn’t just a matter of convenience; it’s about efficiency, safety, and preventing costly damage. The oil filter removal tool 15 flute brings a host of advantages to the table, making it a preferred choice for compatible applications.
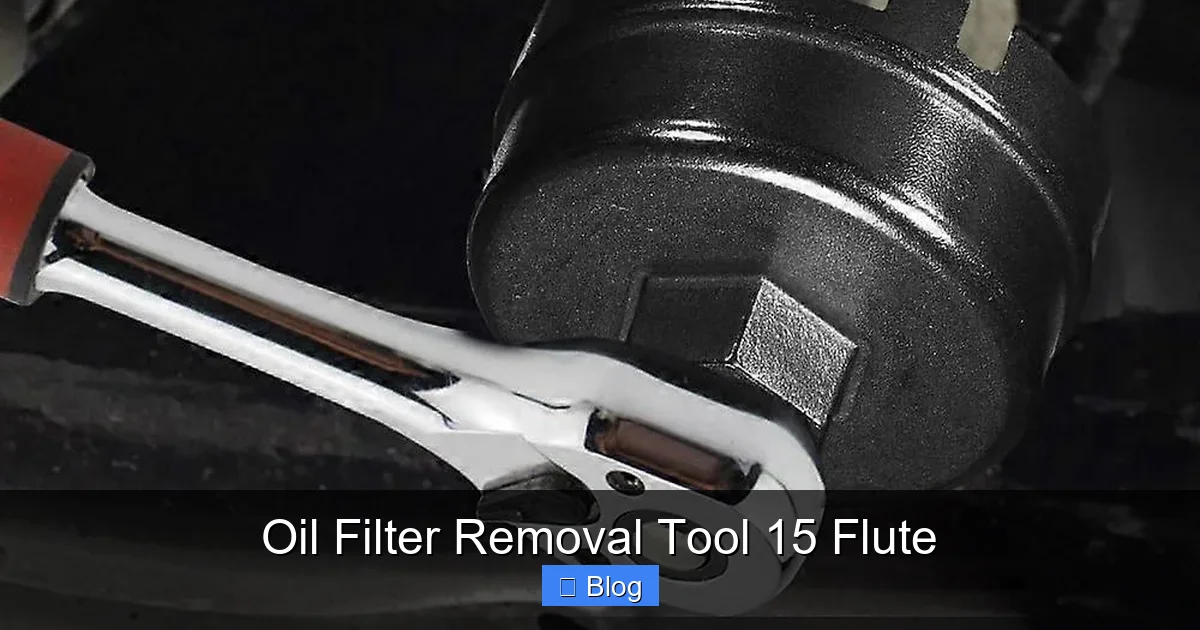
Visual guide about Oil Filter Removal Tool 15 Flute
Image source: img.fruugo.com
Damage Prevention for Filter and Housing
One of the biggest headaches during an oil change is damaging the filter itself. Universal strap wrenches can crush the filter casing, making it even harder to remove. Plier-style wrenches can gouge and deform the filter, potentially causing leaks or making it impossible to get a proper grip. Worst of all, trying to force a generic tool onto a specific filter can round off the flutes on the filter’s cap, leaving you with a smooth, un-grippable surface. This can turn a simple oil change into a major ordeal, requiring specialized (and sometimes destructive) methods for removal.
For vehicles with plastic oil filter housings (common on many newer Toyota/Lexus engines), using the wrong tool is even riskier. These housings are prone to cracking or stripping if excessive or uneven force is applied. A precisely fitting oil filter removal tool 15 flute distributes the force evenly across all 15 flutes, drastically reducing the risk of damage to both the filter element and, more importantly, the housing itself. Replacing a cracked filter housing can be a time-consuming and expensive repair.
Enhanced Grip and Control in Confined Spaces
Engine bays are often cramped, with components packed tightly together. Reaching the oil filter, which is sometimes tucked away, can be a challenge. Universal tools like strap wrenches require room to wrap around the filter and provide leverage. Claw wrenches need space to articulate and grip. These can be difficult or impossible to use in tight spots.
A cap-style 15-flute tool, by contrast, slides directly onto the end of the filter. Once it’s seated, you simply attach your ratchet. This compact form factor allows you to access filters in much tighter confines. The direct engagement provides superior grip and control, meaning you need less swinging room and can apply more controlled torque, making the job much easier and less frustrating.
The Efficiency and Safety Advantage
When you’re underneath a hoisted vehicle, safety is paramount. Struggling with a slipping tool not only wastes time but also increases the risk of injury. A universal tool that suddenly slips can lead to scraped knuckles, falls, or worse. The positive engagement of a 15-flute oil filter tool virtually eliminates slippage, providing a safer working environment.
Beyond safety, there’s the undeniable efficiency. What could be a half-hour struggle with the wrong tool can become a 5-minute job with the right one. This saves you valuable time and reduces the overall effort required for regular maintenance, making you more likely to tackle the job yourself. The precision fit means less effort to break the filter free, making the entire process smoother and more enjoyable. Investing in a good oil filter removal tool 15 flute pays dividends in convenience and peace of mind.
How to Choose the Right Oil Filter Removal Tool 15 Flute
While the basic concept of a 15-flute tool is straightforward, there are still variations and quality differences to consider. Selecting the best one for your garage will ensure reliability and performance for years to come. Don’t just grab the cheapest option; consider these factors.
Visual guide about Oil Filter Removal Tool 15 Flute
Image source: hoglights.com.au
Material and Construction Quality
As mentioned, 15-flute tools are generally made from stamped steel or cast aluminum. Both can be effective, but quality varies widely. Look for tools made from durable, high-strength materials. Stamped steel wrenches should feel robust, not flimsy, and have clean, well-formed flutes. Cast aluminum tools should be precisely cast with no rough edges or imperfections that could compromise the fit or strength.
Some premium tools might feature a low-profile design, which is excellent for extremely tight spaces. Others might have a chrome or black oxide finish for corrosion resistance. A good quality tool will withstand repeated use without deforming or cracking, even when dealing with very stubborn filters. Remember, you’re relying on this tool to apply significant torque, so its integrity is key.
Matching Drive Size and Profile
Most 15-flute oil filter removal tools feature a 3/8-inch square drive. This is standard for most hand ratchets and torque wrenches. However, some larger or heavy-duty versions might come with a 1/2-inch drive. Ensure the drive size matches the tools you already own (or plan to purchase) to avoid needing additional adapters.
Beyond the drive size, also consider the internal profile. While “15 flute” dictates the number of flutes, the precise diameter and depth of the flutes can vary slightly between manufacturers. Ideally, the tool should fit snugly onto your specific oil filter or filter housing without any significant play. Some filters might have a slightly rounded profile on their flutes, while others are sharper. A well-designed tool will accommodate these minor differences with a secure grip. When in doubt, checking reviews from other users with the same vehicle or filter type can be incredibly helpful.
Verifying Vehicle and Filter Compatibility
This is perhaps the most critical step. Even though we’ve highlighted that the oil filter removal tool 15 flute is common for Toyota, Lexus, and some Honda/Mazda, it is not universal for every model from these brands, nor for every year. Always consult your vehicle’s service manual or a reliable online parts catalog to confirm the exact specifications of your oil filter. Most manufacturers list the number of flutes and the diameter required for the filter wrench. This information is usually found in the maintenance section or when looking up replacement oil filters.
If you’re unsure, you can also measure your existing filter’s diameter and count its flutes once you’ve removed it (or before, if you’re lucky enough to have it exposed). There are also “variable” cap wrenches that claim to fit a range of sizes, but for maximum precision and damage prevention, a dedicated 15-flute tool for your specific filter is always the best choice. Don’t let a small oversight here turn your oil change into a bigger project.
Step-by-Step Guide to Using Your Oil Filter Removal Tool 15 Flute
You’ve got your new oil, a fresh filter, and now your trusty oil filter removal tool 15 flute. Let’s walk through the process of changing that oil filter safely and effectively.
Pre-Removal Checklist and Safety Gear
Before you even think about touching the oil filter, ensure your vehicle is safely prepared. Park on a level surface, engage the parking brake, and if you’re lifting the vehicle, use sturdy jack stands on appropriate lift points. Never rely solely on a jack. Gather your tools: your 15-flute oil filter tool, a ratchet (and possibly an extension), an oil drain pan, a new oil filter, new engine oil, a funnel, and rags. Safety gear is crucial: wear mechanic gloves to protect your hands from hot oil and sharp edges, and safety glasses to shield your eyes from splashes.
It’s generally easier to remove an oil filter when the engine is warm (not scalding hot), as the metal has expanded slightly, which can loosen the seal. However, be cautious of hot oil. Some people find it easier to drain the oil first, then remove the filter. Others prefer to tackle the filter before draining. We’ll assume you’ve already drained your oil for this guide.
Accurate Tool Placement and Engagement
Locate your oil filter. It’s usually a cylindrical canister, sometimes painted white, blue, or black. For vehicles with cartridge-style filters, you’ll be looking for the plastic or metal housing cap that needs to be unscrewed. Gently slide your oil filter removal tool 15 flute over the end of the filter or filter housing cap. Ensure it seats fully and snugly. You should feel it “click” or firmly engage with all 15 flutes. Wiggle it slightly to confirm it’s properly seated and not just resting on the edges. A proper fit is key to preventing slippage and damage.
Once the tool is in place, attach your 3/8-inch (or 1/2-inch) drive ratchet. If the filter is in a difficult-to-reach spot, use an extension bar between the ratchet and the filter tool. This provides better leverage and keeps your hands away from potential hazards.
The Gentle Art of Loosening the Filter
With the tool securely in place and your ratchet attached, it’s time to loosen the filter. Remember the age-old mechanic’s adage: “lefty loosey, righty tighty.” Turn the ratchet counter-clockwise to loosen the filter. The initial break-free turn might require a bit of force, especially if the filter is old or overtightened. Apply steady, increasing pressure rather than sudden, jerky movements. You’ll feel a distinct “break” as the filter seal gives way.
Once it’s broken free, the filter should loosen easily by hand. You may only need to turn it a quarter or half turn with the ratchet and tool before you can unscrew it manually. This prevents dropping the tool and makes for a cleaner removal. Have your drain pan ready underneath, as oil will inevitably drip out as the filter is unscrewed.
Post-Removal: Cleaning and Preparation
After you’ve completely unscrewed the old filter, let it drain into your pan for a few minutes. Carefully remove it and dispose of it properly according to local regulations. Wipe down the oil filter mounting surface on the engine block with a clean rag. Inspect the surface for any old gasket material or debris that might prevent a good seal with the new filter. It should be perfectly clean.
Before installing the new filter, take a small amount of new engine oil and apply a thin film to the rubber O-ring gasket of the new filter. This lubricates the gasket, allowing it to seal properly without tearing and making future removal easier. Screw the new filter on by hand until the gasket makes contact with the engine block. Then, tighten it an additional 3/4 to one full turn by hand. Do NOT overtighten. Some filter manufacturers specify torque settings; if so, you can use your oil filter removal tool 15 flute with a torque wrench for precise tightening, but hand-tightening is often sufficient and recommended for most filters.
Common Mistakes to Avoid and Troubleshooting for Stubborn Filters
Even with the right tool, common pitfalls can turn an oil change into a hassle. Knowing what to avoid and how to troubleshoot can save you a lot of grief.
Avoiding Misapplication and Incorrect Sizing
The most common mistake is using a tool that’s not quite the right size or type. While a 15-flute tool is excellent for its specific applications, trying to force it onto a filter with 14 or 16 flutes, or a different diameter, will only lead to frustration and potential damage. Always double-check your filter’s specifications. Don’t guess. If you find your oil filter removal tool 15 flute slipping, stop immediately and verify your filter type. A slipping tool indicates either the wrong size or improper engagement, and continuing will only round off the filter, making it even harder to remove.
Another common mistake is applying excessive force with a universal tool when a dedicated 15-flute cap wrench is needed. This often results in a crushed filter or a damaged filter housing, which are much bigger problems than a stubborn filter. Patience and the correct tool are your best allies.
Strategies for Stubborn or Overtightened Filters
Sometimes, despite having the perfect oil filter removal tool 15 flute, a filter can be incredibly stubborn. This usually happens if it was overtightened during the last installation or if it has been on for an extended period, allowing corrosion to set in. Here are a few strategies:
- Use a Longer Breaker Bar or Extension: More leverage often solves the problem. A longer handle on your ratchet or adding a longer extension can provide the extra torque needed.
- Impact Wrench (with caution): For extremely stuck filters, a low-setting impact wrench can sometimes deliver a quick burst of torque that breaks the seal without damaging the filter. However, this should be a last resort and used with extreme care, especially on plastic housings. Too much impact can crack the housing or strip the threads.
- Tapping (Gently): Sometimes a few gentle taps with a rubber mallet on the side of the filter (not the end where the tool attaches) can help break the seal. Do this sparingly and gently.
- Penetrating Oil: If the filter is accessible and safe to apply, a little penetrating oil around the base where it meets the engine block might help loosen things up. Let it sit for a few minutes before trying again.
When to Seek Professional Help or Alternative Methods
If your filter is completely rounded off, crushed, or simply won’t budge after trying these methods, it might be time for alternative, more destructive approaches. This often involves piercing the filter with a screwdriver and leveraging it off, or using a heavy-duty strap wrench on the body of the filter. However, these methods carry a higher risk of injury and mess, and should only be attempted if you are confident and prepared for potential complications.
If you’re uncomfortable, or if the filter housing (especially if plastic) shows signs of damage, it’s always wise to take your vehicle to a professional mechanic. They have specialized tools and experience to deal with the toughest situations without causing further damage to your engine components. Prevention is always better than cure, which is why having the right oil filter removal tool 15 flute from the start is so important.
Maintaining Your Tool and Investing in Quality
Your oil filter removal tool 15 flute is an investment in stress-free maintenance. Like any good tool, it deserves a little care to ensure it performs optimally for years to come.
Simple Care for Long Tool Life
After each use, especially if it gets covered in oil, wipe your 15-flute tool clean with a rag. If it’s particularly greasy, a bit of degreaser can help. Make sure it’s dry before storing it to prevent rust, especially if it’s a steel version. Store it in your toolbox where it’s protected from excessive moisture and impact. Inspect it periodically for any signs of wear, cracks, or deformation, although a quality tool should hold up exceptionally well.
The Long-Term Value of a Quality 15-Flute Tool
While you might be tempted by a cheaper, generic tool, a high-quality oil filter removal tool 15 flute will outlast and outperform its cheaper counterparts. A well-made tool from stamped steel or cast aluminum, with precise manufacturing tolerances, will maintain its shape and grip, preventing damage to both the filter and itself. The slightly higher initial cost is easily offset by the peace of mind, saved time, and avoided damage over years of oil changes. It’s a small but mighty piece of equipment that truly earns its place in your garage.
Conclusion
Changing your own oil is one of the most rewarding and cost-effective maintenance tasks a car owner can undertake. While it can sometimes present challenges, particularly with a stubborn oil filter, the right equipment makes all the difference. The oil filter removal tool 15 flute is an excellent example of a specialized tool that simplifies a specific job, turning potential frustration into effortless efficiency.
By understanding its purpose, selecting a high-quality tool, and using it correctly, you can ensure your oil changes are always smooth, clean, and free from damage. It’s a small investment that yields big returns in terms of convenience, confidence, and the longevity of your vehicle. So, grab your 15-flute wrench, get under that car, and enjoy the satisfaction of a job well done!
Frequently Asked Questions
What vehicles commonly require an oil filter removal tool 15 flute?
The 15-flute oil filter tool is predominantly used for many Toyota and Lexus vehicles, including popular models like the Camry, Corolla, RAV4, and Highlander, as well as their Lexus counterparts. Some Honda and Mazda models also use filters with this specific flute count.
Is it possible to damage my oil filter or engine with the wrong removal tool?
Yes, absolutely. Using an ill-fitting or universal tool can easily round off the filter’s flutes, crush the filter casing, or even crack plastic oil filter housings. This can make removal much harder and lead to costly repairs.
What materials are 15-flute oil filter tools usually made from?
These tools are typically manufactured from either stamped steel or cast aluminum. Both materials offer good durability, but high-quality versions of each will have precise machining or casting for a perfect, snug fit and long-lasting performance.
How do I ensure a secure fit when using the 15-flute tool?
Gently slide the tool onto the filter cap until it’s fully seated and engages all 15 flutes. You should feel a firm connection with no significant wobble. If it feels loose, double-check that you have the correct size and number of flutes for your filter.
Can I use the oil filter removal tool 15 flute to tighten a new filter?
While you can use it to tighten, it’s generally recommended to hand-tighten new oil filters until snug, then an additional 3/4 to one full turn, as specified by the manufacturer. If a torque specification is provided, you can use the 15-flute tool with a torque wrench for precise tightening.
What are the advantages of a cap-style 15-flute wrench over a strap or claw wrench?
A cap-style 15-flute wrench offers a precise, non-slip grip that distributes force evenly, minimizing damage. It’s also more effective in tight engine spaces where strap or claw wrenches might not fit or achieve proper leverage, making the job much cleaner and safer.

Sagor Jahan is the founder and author of Automopromo.com, dedicated to delivering insightful tips, reviews, and updates in the automotive and promotional industry. With a passion for innovation and clear guidance, Sagor helps readers make informed decisions and stay ahead in the ever-evolving automotive world.

