
Learning how to use an oil filter wrench is a crucial skill for any DIY car enthusiast. This comprehensive guide breaks down the process into easy-to-follow steps, ensuring you can confidently remove and install your vehicle’s oil filter. You’ll discover different wrench types, essential safety precautions, and practical tips to make your next oil change a breeze, saving you time and money.
To use an oil filter wrench, fit it securely around the oil filter. Turn it counterclockwise to loosen the filter. Once loose, remove it by hand. Wipe the mounting surface clean before installing the new filter. Ensure the wrench grips firmly to avoid slipping.
Key Takeaways
- Choose the Right Tool: Selecting the correct type of oil filter wrench (cap, strap, claw, band) is essential for effective and damage-free removal.
- Safety Above All Else: Always prioritize safety by using jack stands, wearing protective gear, and working with a cooled-down engine.
- Preparation Prevents Problems: Gather all necessary tools and supplies before starting the oil change to ensure a smooth process.
- Counter-Clockwise for Loosening: Remember to turn the oil filter wrench counter-clockwise to loosen and remove the old oil filter.
- Hand-Tighten New Filters: New oil filters should only be tightened by hand according to manufacturer specifications, never with an oil filter wrench, to prevent overtightening and damage.
- Clean Up and Dispose Responsibly: Be prepared for oil spills and ensure proper disposal of old oil and the used filter.
Quick Answers to Common Questions
Stuck Filter?
If your oil filter is stubbornly stuck, try applying some penetrating oil to its base and let it sit for a few minutes. If a cap-style wrench isn’t working, switch to a claw or band-style oil filter wrench for better grip and leverage.
Which Wrench Type is Best?
The “best” oil filter wrench depends on your specific filter and access. Cap-style wrenches offer a precise fit and prevent crushing, making them ideal when they fit perfectly. For versatility or hard-to-reach filters, strap or claw-style wrenches are excellent universal options.
How Tight Should a New Filter Be?
New oil filters should *only* be tightened by hand. Once the gasket contacts the engine block, turn it an additional 3/4 to 1 full turn. Never use an oil filter wrench to install a new filter, as this can lead to overtightening, damage, and leaks.
Can I Change My Oil Filter Without Draining All the Oil?
While some people try, it’s generally not recommended. A significant amount of old, dirty oil will still be in the filter, and opening the filter without draining the pan first will result in a much larger mess and doesn’t allow for a complete refresh of your engine’s oil system.
Safety First!
Always wear safety glasses and gloves when changing your oil filter. Ensure your vehicle is securely supported by jack stands (never just a jack) and the engine is cool enough to touch to prevent burns from hot oil.
Master How To Use An Oil Filter Wrench Easy Steps
Changing your vehicle’s oil filter is a fundamental part of routine maintenance, crucial for keeping your engine running smoothly and extending its lifespan. While it might seem daunting at first, learning how to use an oil filter wrench correctly makes this task straightforward and empowering. This comprehensive guide will walk you through everything you need to know, from understanding different types of oil filter wrenches to the step-by-step process of safely removing your old filter and installing a new one. By the end, you’ll feel confident tackling your next oil change with your trusty oil filter wrench.
Why Learn to Use an Oil Filter Wrench?
Regular oil changes, including replacing the oil filter, are non-negotiable for engine health. The oil filter traps contaminants, dirt, and debris that accumulate in your engine oil, preventing them from recirculating and causing wear. Over time, filters become clogged and less effective. Learning to use an oil filter wrench allows you to perform this vital maintenance yourself, saving money on labor costs, giving you control over the quality of parts used, and providing a deep sense of accomplishment.
Understanding Different Types of Oil Filter Wrenches
Before you can effectively use an oil filter wrench, it’s helpful to know the various types available. Each design has its strengths and is better suited for certain situations or filter types.
Cap-Style Oil Filter Wrench
This is arguably the most common and often the best type of oil filter wrench. It looks like a large socket that fits precisely over the end of the oil filter, gripping the flutes or facets. Cap-style wrenches are designed for specific filter sizes, so you’ll need one that matches your vehicle’s filter diameter and number of flutes. They provide excellent grip and minimize the risk of crushing the filter.
Strap-Style Oil Filter Wrench
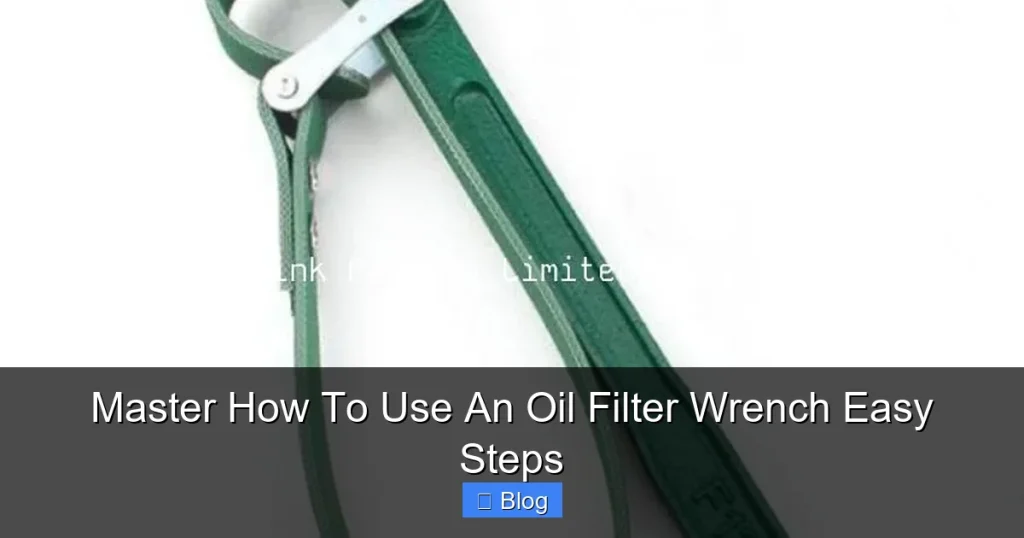
A strap-style oil filter wrench uses a durable fabric or rubber strap that wraps around the filter’s body. A handle or lever then tightens the strap, providing a strong grip. These are highly versatile as they can accommodate a wide range of filter sizes, making them a good “universal” option if you work on different vehicles. However, they can sometimes slip if the filter is very tight or greasy.
Band-Style Oil Filter Wrench
Similar in principle to the strap wrench, the band-style oil filter wrench uses a metal band instead of a fabric strap. The band often has a hinged mechanism or a screw adjustment to tighten it around the filter. Like strap wrenches, they are versatile for different sizes but can sometimes crush softer filters if overtightened during removal.
Claw-Style (3-Jaw) Oil Filter Wrench
The claw-style oil filter wrench features three metal “claws” that grip the filter. As you apply torque with a ratchet, the claws tighten their grip around the filter, making it an excellent choice for stubborn or hard-to-reach filters. They are self-tightening and fit various sizes, offering strong leverage.
Pliers-Style Oil Filter Wrench
These large pliers have curved jaws designed to grip the oil filter’s body. They offer significant leverage and can be effective for filters that are difficult to reach or are stuck. However, a downside is that they can sometimes deform or puncture the filter if not used carefully, especially if the filter material is thin.
Safety First: Essential Precautions
Working on your car always requires a focus on safety. Using an oil filter wrench is no exception.
- Eye Protection: Always wear safety glasses or goggles to protect your eyes from oil splashes or debris.
- Gloves: Protect your hands from hot oil, cuts, and chemicals with work gloves.
- Cool Engine: Ensure your engine has cooled down for at least 30 minutes. Hot oil can cause severe burns.
- Secure Vehicle: If you need to lift your vehicle, use a hydraulic jack and always secure it with jack stands on a flat, stable surface. Never work under a vehicle supported only by a jack. Engage the parking brake and consider using wheel chocks.
- Ventilation: Work in a well-ventilated area, especially if the engine is still slightly warm and emitting fumes.
Gather Your Tools and Supplies
Having everything you need within reach will make the process much smoother.
- New Oil Filter: Ensure it’s the correct one for your vehicle’s make, model, and year.
- New Engine Oil: The correct type and quantity specified in your owner’s manual.
- Oil Filter Wrench: The appropriate type and size for your filter.
- Drain Pan: Large enough to hold all the old oil.
- Socket Wrench and Socket: To remove the oil drain plug.
- Torque Wrench (Optional but Recommended): For tightening the drain plug to specification.
- Funnel: For adding new oil without spills.
- Rags or Paper Towels: Plenty of them for cleaning up spills.
- Cardboard or Plastic Sheeting: To protect your driveway from oil drips.
- Jack and Jack Stands (if needed): For lifting the vehicle safely.
- Wheel Chocks (if needed): For added vehicle stability.
Preparation: Getting Your Vehicle Ready
Warm Up the Engine (Slightly)
It’s best to change the oil when the engine is slightly warm, not hot. This helps the oil flow more easily, carrying contaminants with it. Run the engine for about 5-10 minutes, then turn it off and let it sit for another 15-30 minutes to cool down and allow oil to drain back into the pan.
Position Your Vehicle
Park your car on a level, stable surface. If your vehicle has low ground clearance, you might need to lift it. If using ramps, drive onto them carefully. If using a jack, lift the vehicle from its specified jack points and immediately place jack stands under the appropriate support points. Ensure the vehicle is stable before proceeding.
Locating the Oil Filter
The oil filter is typically a cylindrical canister, often located on the side, front, or bottom of the engine. Sometimes it’s easily visible, other times it might be tucked away or even enclosed in a housing. Consult your vehicle’s owner’s manual if you have trouble finding it.
Choosing the Right Oil Filter Wrench for the Job
Once you’ve located the filter, assess its position and how much room you have to work. This will help you select the best oil filter wrench. For instance, a cap-style wrench is great if you have direct access to the filter’s end. A strap or claw wrench might be better for tighter spaces or if the filter is particularly stubborn.
Step-by-Step: Removing the Old Oil Filter
Draining the Old Engine Oil (Briefly)
Before touching the oil filter, you need to drain the old engine oil. Place your drain pan directly under the oil pan’s drain plug. Use your socket wrench to loosen and remove the drain plug. Allow all the oil to drain completely, which can take 10-20 minutes. Once drained, reinstall the drain plug, tightening it to the manufacturer’s specified torque using a torque wrench if you have one. Don’t overtighten it.
Positioning Your Oil Filter Wrench
Now, shift your drain pan directly under the oil filter. There will likely be some residual oil in the filter that will drip out.
- For Cap-Style Wrench: Slide the cap wrench directly onto the end of the oil filter, ensuring it engages firmly with the flutes. Attach your ratchet or breaker bar to the square drive on the end of the cap wrench.
- For Strap or Band-Style Wrench: Wrap the strap or band around the body of the oil filter. Tighten the strap or band so it grips the filter securely but doesn’t crush it. Position the handle or square drive so you have good leverage.
- For Claw-Style Wrench: Place the claw wrench over the end or body of the filter. Attach your ratchet, and as you turn, the claws will automatically tighten their grip.
Applying Controlled Force to Loosen
With your oil filter wrench firmly in place, it’s time to loosen the filter. Remember: lefty loosey, righty tighty. You will need to turn the wrench counter-clockwise to loosen the filter.
Apply steady, firm pressure. Old oil filters can be very tight due to heat cycles and gasket compression. If it’s exceptionally stubborn, you might hear a “pop” or “crack” as the seal breaks, which is normal. Avoid sudden, jerky movements, as this can cause the wrench to slip or damage the filter.
Loosening and Allowing Drainage
Once the initial seal breaks and the filter starts to turn, loosen it by hand. You’ll feel it spin more easily. As you unscrew it, oil will begin to drip out. Allow this oil to drain into your pan. Continue to unscrew the filter slowly, keeping it over the drain pan to catch all the drips.
Fully Removing the Filter
Carefully unscrew the oil filter completely. It will be full of old oil, so try to keep it upright as you remove it to minimize spills. Once removed, immediately place the old filter in your drain pan or a designated container to prevent further drips. Use rags to wipe up any oil that spilled around the filter mounting area on the engine block.
Preparing the New Oil Filter
Before installing the new filter, take a small amount of your fresh engine oil and lubricate the rubber gasket (O-ring) on the new filter. This simple step is crucial as it helps create a good seal, prevents the gasket from sticking, and makes future removal easier.
Installing the New Oil Filter
Hand-Tightening the New Filter
This is a critical step where many DIYers make mistakes. The new oil filter should never be tightened with an oil filter wrench.
Carefully screw the new filter onto the engine block by hand. Make sure it threads on smoothly; if you feel resistance or it seems to be cross-threading, stop immediately, back it off, and try again. Once the gasket makes contact with the engine block, turn the filter by hand for an additional 3/4 to 1 full turn (check your filter’s packaging or owner’s manual for specific instructions). This ensures a snug fit without overtightening.
Overtightening can crush the gasket, causing leaks, or deform the filter, making it extremely difficult to remove next time. Your hand provides enough torque.
Post-Installation Checks
Once the new filter is in place and the drain plug is tightened, you can refill your engine with the new oil.
- Add New Oil: Use a funnel to pour the correct amount and type of new engine oil into the oil filler cap.
- Check for Leaks: After adding the oil, wait a few minutes, then start the engine and let it run for a minute or two. Turn it off and carefully check under the car for any leaks around the oil filter or drain plug. If you see leaks, turn the engine off, and if it’s the filter, gently hand-tighten it a little more. If it’s the drain plug, check its tightness.
- Check Oil Level: Let the car sit for a few minutes, then check the oil level with the dipstick. Add more oil if needed.
Troubleshooting Common Oil Filter Wrench Issues
Even with the right oil filter wrench, you might encounter a few hiccups. Here’s how to address them:
Stuck Filter
If the filter is extremely tight, try different types of oil filter wrenches. A claw-style or band-style might offer better grip and leverage. Sometimes, a shot of penetrating oil around the filter’s base can help. If all else fails and you’re comfortable, a last-resort option for a very stubborn filter is to carefully (and slowly!) drive a screwdriver through the filter body for leverage – but be extremely cautious not to damage anything else on the engine. This is messy and should only be done if you’re replacing the filter immediately.
Wrench Slipping
Ensure the oil filter wrench is clean and dry. If it’s a cap-style, double-check that it’s the correct size and fully engaged. For strap or band wrenches, make sure the strap/band is as tight as possible around the filter. Cleaning the filter’s surface can also improve grip.
Damaged or Crushed Filter
If your oil filter wrench is crushing the filter without loosening it, you might be using too much force, or the wrench isn’t fitting correctly. Switch to a cap-style wrench if possible, as they are less prone to crushing. If the filter is already crushed, it will be harder to remove, and you may need to try a different gripping point or tool.
Excessive Oil Spillage
Always have plenty of rags on hand and ensure your drain pan is directly underneath the filter. Tilting the old filter as you remove it can minimize spills. A larger or wider drain pan can also help.
Practical Tips for Success
- Always Double-Check: Before installation, compare your new filter to the old one to ensure they are identical.
- Keep it Clean: A clean work area is a safe work area. Wipe up oil spills immediately.
- Don’t Rush: Take your time with each step. Rushing can lead to mistakes or injuries.
- Dispose Responsibly: Most auto parts stores and recycling centers accept used motor oil and old oil filters for proper disposal. Never pour used oil down drains or throw it in the trash.
- Consider a Universal Wrench: If you work on various vehicles, a high-quality strap or claw oil filter wrench can be a versatile addition to your toolbox.
- Read Your Manual: Your vehicle’s owner’s manual is your best friend for specific torque specs, oil types, and filter locations.
Conclusion
Mastering how to use an oil filter wrench is an invaluable skill for any car owner. It empowers you to perform essential maintenance, save money, and gain a deeper understanding of your vehicle. By following these easy steps, prioritizing safety, and choosing the right tools, you’ll be confidently changing your oil filter like a seasoned pro in no time. Happy wrenching!

Sagor Jahan is the founder and author of Automopromo.com, dedicated to delivering insightful tips, reviews, and updates in the automotive and promotional industry. With a passion for innovation and clear guidance, Sagor helps readers make informed decisions and stay ahead in the ever-evolving automotive world.

